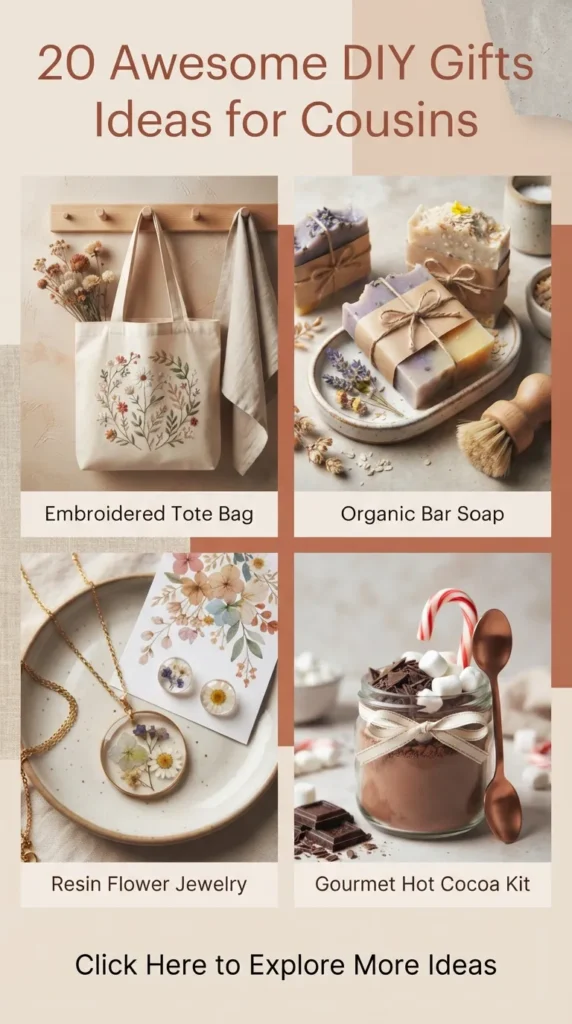
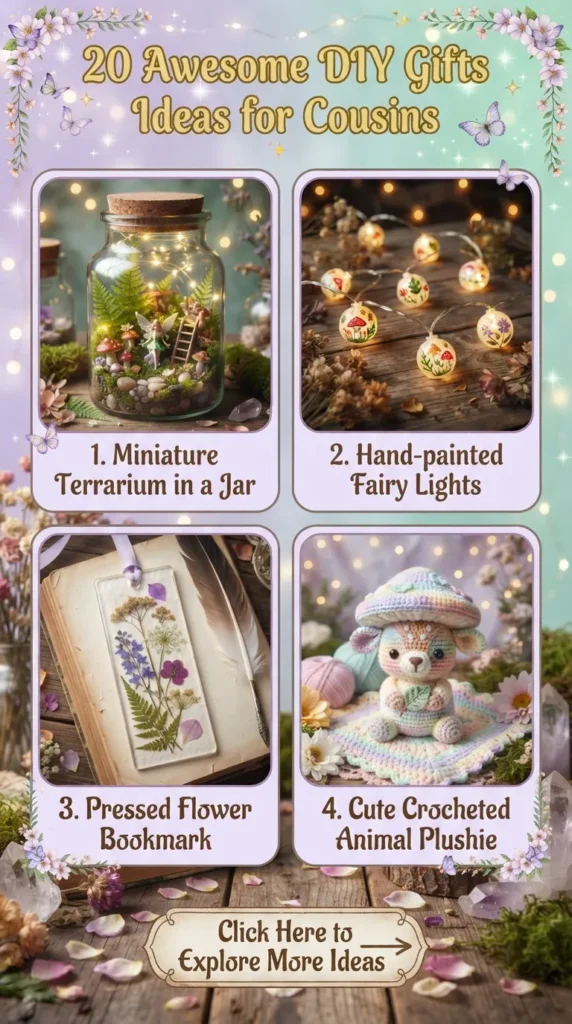
Finding the perfect gift for a cousin can be a wonderfully unique challenge. Cousins occupy a special space in our lives—they are often our very first friends, our partner-in-crime at family gatherings, and lifelong confidants who understand our family dynamics like no one else can. Whether you are celebrating a milestone birthday, a holiday exchange, or simply want to send a surprise package across the miles, a handmade gift carries warmth and intentionality that no store-bought item can emulate.
Crafting a DIY gift allows you to tailor every single detail to your cousin’s personality, favorite aesthetics, and shared childhood memories. Below is an ultimate guide to 20 incredible, Pinterest-inspired DIY gift ideas for cousins. Each idea includes the story behind the gift, what supplies you need, step-by-step instructions, creative variations, and crucial pitfalls to avoid while making them.


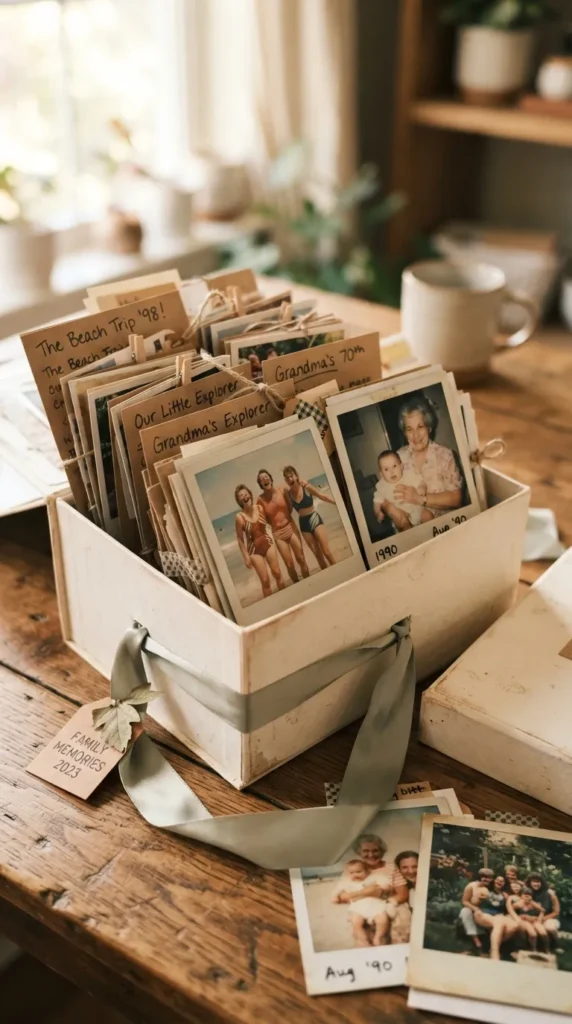
1. The Nostalgic Memory Lane Scrapbook Box
What This Idea Means
This concept takes the traditional photo album and upgrades it into a dynamic, interactive keepsake box. Instead of flipping through flat pages, your cousin unboxes a layered explosion of photo flip-books, hidden pull-out tabs, and handwritten notes referencing your favorite shared family moments.
What You Need
- Sturdy cardboard or wooden memory box
- High-quality printed photographs
- Heavyweight cardstock (various colors)
- Double-sided tape or scrapbooking adhesive
- Fine-tip metallic gel pens
- Decorative ribbons, stamps, and stickers
How to Make It
- Prepare the Base: Measure the interior dimensions of your box to determine how large your photo fold-outs can be.
- Create Accordion Flaps: Cut long strips of cardstock and fold them into equal sections to create accordion-style photo holders.
- Attach Photos & Captions: Glue your photos on each fold, leaving space underneath for brief handwritten memories, inside jokes, or dates.
- Build Interactive Elements: Add small envelopes inside the box containing concert tickets, mini letters, or tiny trinkets from past family vacations.
- Final Assembly: Secure the bottom fold of each accordion strip to the inside floor of the box using heavy-duty double-sided tape, then decorate the top exterior lid with a custom painted title.
Tips and Variations
- Digital Hybrid: Include a printed QR code inside the box that links to a shared Spotify playlist of songs you both listened to growing up.
- Theme-Based: Focus entirely on a specific era, such as “Summer Vacations at Grandma’s House” or “The 90s Cousin Crew.”
Things to Avoid
Avoid using liquid craft glue on thin photo paper, as it will cause the photos to warp and bubble over time. Stick to archival double-sided photo tape. Also, do not overcrowd the interior; leave enough space so the box closes naturally without crushing the paper mechanics inside.
2. Hand-Poured Custom Scented Soy Candles
What This Idea Means
Candle-making is an art that directly engages the senses. By blending specific fragrance oils, you can create a personalized aroma profile that matches your cousin’s favorite cozy vibe—whether that is fresh morning rain, warm vanilla coffee, or cedarwood bonfire.
What You Need
- 100% Soy wax flakes
- Cotton or wooden candle wicks with metal sustainers
- High-quality candle fragrance oils
- Glass jars, ceramic mugs, or vintage thrifted tea cups
- Heat-resistant pitcher and double boiler setup
- Wick centering tools or wooden clothespins
How to Make It
- Prep the Vessel: Wash and completely dry your glass jar. Secure the metal base of the wick to the bottom center using a wick sticker or a dab of hot glue.
- Melt the Wax: Heat soy wax flakes in a double boiler until it reaches approximately 185°F (85°C).
- Scent Integration: Remove the wax from heat, let it cool slightly to around 175°F (79°C), then stir in your chosen fragrance oils slowly for two full minutes.
- Pouring: Carefully pour the melted wax into your jar, leaving half an inch at the top. Secure the wick upright using a clothespin laid across the rim.
- Curing: Allow the candle to cool slowly at room temperature for 24 to 48 hours, then trim the wick to a quarter-inch before wrapping.
Tips and Variations
- Crystals & Dried Botanicals: Gently add dried lavender buds or small tumbled quartz crystals onto the surface wax right when it starts to skin over.
- Custom Labels: Print a personalized label with a funny name like “Cousin’s Stress Relief Blend” or “Smells Like Family Drama.”
Things to Avoid
Avoid adding fragrance oil while the wax is boiling hot, as the heat will flash off the delicate aromatic compounds and leave your candle with very little scent throw. Never cool candles in the refrigerator, as rapid temperature changes cause shrinkage, cracks, and sinkholes around the wick.
3. Embroidered Aesthetic Canvas Tote Bag
What This Idea Means
A reusable tote bag is a daily essential, but turning it into a custom embroidered piece elevates it from mundane to meaningful. Stitches of minimalist linework, floral motifs, or a small embroidered phrase create an eco-friendly accessory your cousin will carry everywhere.
What You Need
- Plain cotton canvas tote bag
- Embroidery hoop (6 to 8 inches)
- Embroidery floss (various colors)
- Hand-sewing embroidery needles
- Water-soluble fabric marker
- Pair of small sharp scissors
How to Make It
- Design Transfer: Sketch your minimalist design or quote onto the canvas tote using a water-soluble marker.
- Set the Hoop: Unscrew the embroidery hoop, place the fabric tautly between the rings, and tighten the screw so the canvas feels like a drum skin.
- Stitch the Outline: Use a classic backstitch or stem stitch for lines, and satin stitch to fill in solid shapes like leaves or flower petals.
- Secure Knots: Fasten off your threads neatly on the inside of the tote bag with double knots to prevent unraveling during daily use.
- Clean Up: Mist the finished embroidery with water to erase any visible guide marks from the fabric marker, then let it air dry.
Tips and Variations
- Initial & Birth Flower: Stitch your cousin’s initial intertwined with their birth month flower for an elegant, personalized look.
- Pop Culture Motif: Embroider a simple silhouette icon from a TV show or film you both love to binge-watch together.
Things to Avoid
Avoid pulling your thread too tightly while stitching, as canvas fabric can pucker and distort the shape of your design. Do not skip securing the hoop properly; loose fabric leads to uneven stitch lengths and crooked lines.
4. Personalized Chunky Knit Blanket
What This Idea Means
Nothing communicates warmth quite like a chunky hand-knit blanket. Using the hand-knitting technique (no needles required), you can weave super chenille or jumbo wool yarn into a plush, ultra-cozy throw blanket perfect for movie nights.
What You Need
- 6 to 8 skeins of Jumbo Chenille Yarn (Size 7 or higher)
- Flat working surface (large table or clean floor space)
- Scissors
- Needle and thread (matching yarn color for finishing ends)
How to Make It
- Cast On: Pull out a long tail of yarn and form a series of equal-sized loops (about 2 inches tall) on your flat surface to set the width of the blanket.
- First Row: Working from right to left, pull the working yarn up through each loop to create a new row of identical loops.
- Building Rows: Continue weaving back and forth, pulling working yarn loops through existing loops while keeping your loop size uniform throughout.
- Cast Off: Once you reach your desired length, overlap two loops and pull the main yarn through both, moving across the edge to lock the stitches.
- Tuck Ends: Weave any excess yarn tails back into the thick body of the blanket and stitch them down securely with matching thread.
Tips and Variations
- Two-Tone Color Block: Switch yarn colors halfway through to give the blanket a modern, mid-century color-blocked visual style.
- Travel Size: Scale down the dimensions slightly to create a lap blanket or an aesthetic sofa throw.
Things to Avoid
Avoid making your loops drastically different sizes as you move along rows, as this makes the blanket look lopsided and creates loose, floppy edges. Do not use delicate, scratchy wool yarn; stick to washable jumbo chenille yarn so your cousin can easily care for it.
5. Hand-Painted Terracotta Planter with Live Succulent
What This Idea Means
A hand-painted terracotta pot paired with a low-maintenance plant offers a bright, living piece of home decor. Decorating the pot with abstract shapes, arch patterns, or playful quotes gives it a fresh, Pinterest-inspired look.
What You Need
- Plain terracotta pot with drainage dish
- Acrylic craft paints (boho/terracotta/pastel color palette)
- Foam and fine-detail paintbrushes
- Matte or satin acrylic clear sealer spray
- Potting soil mix designed for succulents
- Healthy live succulent or small indoor plant
How to Make It
- Surface Prep: Wipe down the terracotta pot with a damp cloth to remove residual dust and let it dry completely.
- Base Coat: Apply two thin coats of background acrylic paint, allowing adequate drying time between applications.
- Add Artistic Patterns: Paint geometric arches, terrazzo spots, or minimalist botanical stems around the circumference of the pot.
- Seal the Surface: Spray two coats of acrylic sealant over the exterior and inner upper rim to shield your artwork from water damage.
- Planting: Once cured, fill the base with well-draining soil, nestle the succulent roots gently, and water lightly.
Tips and Variations
- Punny Quotes: Paint a cute phrase on the rim like “Growing Strong Since [Birth Year]” or “You Succulent Cousin.”
- Marble Effect: Dip the pot into a bucket of water layered with floating marble enamel paint for a swirl pattern.
Things to Avoid
Avoid painting the raw interior bottom of the pot, as soil moisture needs to breathe through the clay or escape the drain hole naturally. Do not skip the waterproofing clear coat, as unsealed acrylic paint will peel when wet.



6. Cozy Gourmet Hot Cocoa & Cookie Gift Basket
What This Idea Means
This food-centric DIY gift curates an indulgent winter evening experience inside a basket. By layering homemade cocoa mix into glass jars and bundling handmade cookies, you provide a delicious treat that feels high-end and comforting.
What You Need
- Woven storage basket or wooden crate
- Glass Mason jars with airtight lids
- Dutch-process cocoa powder, powdered sugar, and milk powder
- Mini marshmallows and gourmet chocolate chips
- Cellophane treat bags and baker’s twine
- Freshly baked cookies or brownie bites
- Custom handwritten recipe cards
How to Make It
- Layer Cocoa Mix: Fill a Mason jar in distinct layers with cocoa powder, powdered sugar, mini chocolate chips, and top with marshmallows.
- Package Baked Goods: Wrap your homemade cookies tightly in food-safe cellophane bags tied off with baker’s twine.
- Assemble Basket: Fill the bottom of your basket with shredded kraft paper or a folded linen tea towel for elevation.
- Arrange Items: Position the cocoa jar, cookie bundles, and a pair of cute ceramic mugs neatly within the basket.
- Add Instructions: Attach a gift tag detailing preparation steps (e.g., “Mix 3 tablespoons with warm milk”).
Tips and Variations
- Spiced Mocha Upgrade: Add espresso powder, cinnamon, and a pinch of cayenne to the mix for a Mexican Hot Chocolate variation.
- Adult Twist: Include a tiny mini-bottle of Irish cream or peppermint liqueur inside the basket.
Things to Avoid
Avoid packing warm, freshly baked cookies directly into sealed plastic bags, as trapped condensation makes them soggy. Always let baked items cool completely to room temperature before packaging.
7. Artisanal Cold-Process Spa Soap Bars
What This Idea Means
Creating handmade, cold-process or melt-and-pour spa soap bars turns simple bathing into a luxurious retreat. Infusing bars with natural clays, essential oils, and exfoliating oats yields a thoughtful, skin-loving present.
What You Need
- Melt-and-pour goat’s milk or shea butter soap base
- Silicone soap molds (rectangular or floral shapes)
- Essential oils (lavender, eucalyptus, or sweet orange)
- Natural colorants (French pink clay, spirulina powder)
- Dried botanicals (calendula petals, oats)
- Rubbing alcohol in a spray bottle
How to Make It
- Melt Base: Cube the soap base and heat it in short 30-second bursts in a microwave until fully liquid.
- Incorporate Additives: Stir in a few drops of essential oil and natural color clays gently to avoid creating air bubbles.
- Layer Botanicals: Sprinkle rolled oats or dried flowers into the bottom of your silicone mold cavities.
- Pour Soap: Carefully pour the liquid soap into the molds over the botanicals.
- Remove Bubbles & Set: Lightly spritz the top surface with rubbing alcohol to dissipate surface bubbles immediately, then let cool for 3 hours before unmolding.
Tips and Variations
- Exfoliating Loofah: Place a sliced slice of natural dried loofah inside the mold cavity before pouring the soap.
- Layered Sunrise: Pour two different colored layers, letting the first layer set partially before adding the second.
Things to Avoid
Avoid adding fresh leaves or un-dried flowers to your soap, as fresh vegetation rots and turns brown over time. Stick strictly to fully dehydrated botanicals.
8. Customized Resin & Pressed Flower Bookmarks
What This Idea Means
If your cousin is an avid reader, a crystal-clear resin bookmark encapsulating real pressed flowers, gold foil flakes, and a tassel is a stunning accessory that turns reading into an aesthetic ritual.
What You Need
- Silicone bookmark molds
- Clear 2-part epoxy resin (or UV resin)
- Dried pressed flowers and leaves
- Imitation gold or silver leaf flakes
- Mixing cups, wooden stir sticks, and tweezers
- Pre-made silky tassel cords
How to Make It
- Mix Resin: Carefully measure and mix equal parts resin and hardener according to package instructions, stirring slowly for 3 minutes.
- Pour Base Layer: Pour a thin, level layer of clear resin into the bottom of the bookmark mold.
- Arrange Flowers: Use tweezers to gently submerge pressed flowers and gold leaf flakes face-down into the resin layer.
- Top Coat: Pour a second thin layer of resin to encapsulate the botanicals completely without overflowing the mold edges.
- Cure & Finish: Let the resin cure undisturbed for 24 hours. Pop out the hardened bookmark and loop a silky tassel through the top hole.
Tips and Variations
- Monogram Inclusion: Embed a transparent printed film with your cousin’s name or initial directly inside the resin layers.
- Galaxy Aesthetic: Tint the resin with dark blue mica powder and fine glitter instead of flowers for a cosmic look.
Things to Avoid
Avoid stirring resin aggressively, as this introduces hundreds of tiny micro-bubbles that obscure your flowers. Use a lighter or heat gun passed quickly over the surface to pop any rising bubbles before curing.
9. Handwritten Recipe Book of Shared Family Meals
What This Idea Means
Food holds family history together. Creating a hand-bound or binder-style recipe book packed with traditional family recipes—from Grandma’s famous holiday pie to secret summer marinade recipes—preserves culinary heritage for your cousin.
What You Need
- Blank hardcover journal or photo album with sleeves
- Recipe cards or heavyweight cardstock
- Archival archival ink pens
- Vintage family photos of food gatherings
- Page markers, tabs, and corner stickers
How to Make It
- Gather Recipes: Reach out to aunts, uncles, and grandparents to compile classic, authentic family recipes.
- Transcribe Neatly: Handwrite or neatly print each recipe on individual cardstock sheets, keeping layout formats consistent.
- Categorize Sections: Organize the book logically (e.g., Appetizers, Sunday Dinners, Desserts, Holiday Specials).
- Add Personal History: Beside each recipe, write a short paragraph explaining who created the dish and at which family events it was served.
- Illustrate: Insert old photos of family cooking or paste in original scraps of vintage recipe notes for nostalgic flair.
Tips and Variations
- Digital Preservation: Scan original handwritten notes from deceased relatives and print them onto textured linen paper to keep their actual handwriting preserved.
- Laminated Pages: Place cards inside clear plastic sleeves to protect pages from kitchen splatters during cooking.
Things to Avoid
Avoid writing with non-impervious ballpoint pens that smudge easily when touched by damp fingers in the kitchen. Use waterproof, fade-proof archival pens instead.
10. Hand-Beaded Friendship Bracelet & Ring Set
What This Idea Means
A refined adult modern take on classic childhood friendship bracelets. Using glass seed beads, freshwater pearls, and gemstone chips, you can weave elegant, stackable jewelry pieces that honor your cousin bond.
What You Need
- Glass seed beads (Size 11/0 or 8/0)
- Natural freshwater pearls or semi-precious stone chips
- Clear elastic jewelry cord (0.5mm – 0.7mm) or beaded wire
- Jewelry glue (such as E6000 or Hypo Cement)
- Small sharp bead scissors and bead mat
How to Make It
- Sizing: Measure your cousin’s wrist or finger circumference using a soft measuring tape.
- Design Layout: Lay out your pattern on a felt bead mat so your beads don’t roll away while designing.
- Stringing: Thread your elastic cord with alternating seed beads, gold accents, and center freshwater pearls.
- Securing Knots: Tie a strong surgeon’s knot (looping twice) tightly at the end of the elastic strand.
- Glue & Trim: Dab a tiny drop of jeweler’s glue directly on the knot, let it dry completely, then slide an adjacent bead over it to hide the knot before trimming ends.
Tips and Variations
- Morse Code Beads: Spell out a secret word, inside joke, or “Cousins” using two colors of seed beads representing dots and dashes.
- Matching Set: Create a matching set so both you and your cousin wear identical stacked bracelets.
Things to Avoid
Avoid using cheap household tape or weak glue to knot elastic cord; unreinforced knots will untie over time under friction. Never stretch elastic tightly while stringing, or the finished bracelet will warp.


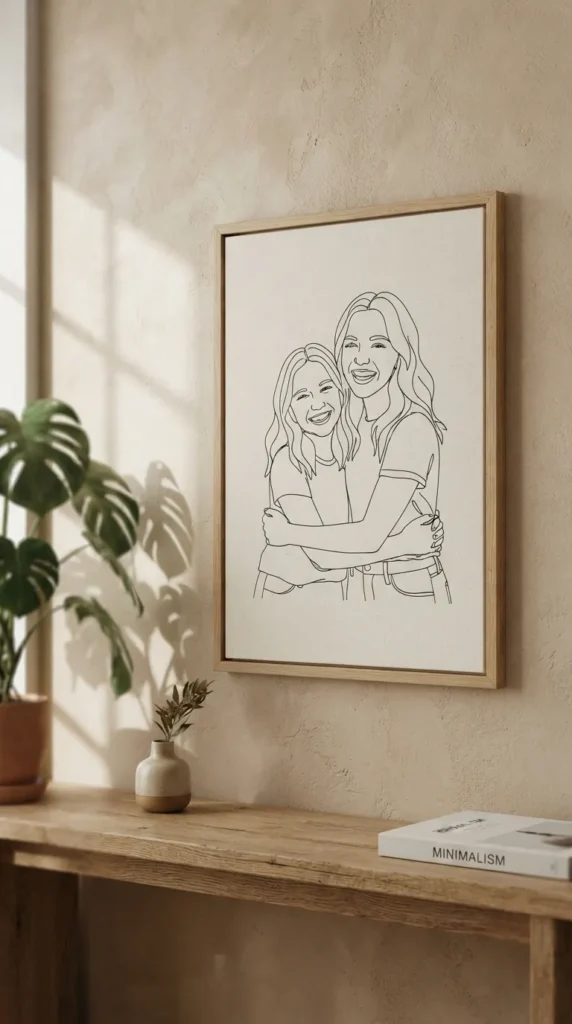
11. Minimalist Line-Art Custom Framed Canvas
What This Idea Means
Turn a favorite photograph of you and your cousin into sleek, modern line art. You don’t need to be an expert illustrator; tracing key outlines digitally or manually produces a minimalist piece suitable for modern home interiors.
What You Need
- Digital tablet/laptop or tracing paper
- Stretched canvas or heavy watercolor paper
- Black fine-liner pens or acrylic paint pens
- Wooden picture frame with mat board
- Printed base reference photo
How to Make It
- Trace Outlines: Trace the main contours, facial profiles, and clothing lines of your reference photo using tracing paper or a digital drawing app.
- Transfer Art: Transfer the clean outline onto your stretched canvas or heavy paper using graphite transfer paper.
- Ink the Canvas: Carefully ink over the transfer lines using smooth, steady strokes with a black acrylic paint pen.
- Detailing: Keep facial features minimal—focusing on hair movement, glasses frames, or iconic clothing details.
- Framing: Allow ink to dry, wipe off residual graphite marks, and mount the artwork inside a wooden mat frame.
Tips and Variations
- Pop of Color: Paint simple watercolor or acrylic color blocks (like abstract terracotta arch shapes) behind the black line art.
- Monochrome Style: Use metallic gold ink line art on a deep matte black canvas for a dramatic, chic contrast.
Things to Avoid
Avoid cluttering the canvas with overly detailed shading or realistic eye details; minimalist line art relies on clean, open negative space to look modern.
12. Personalized Leather (or Faux-Leather) Keychain
What This Idea Means
A practical gift that adds elegance to daily life. Crafting a custom leather key fob stamped with your cousin’s initials or significant geographic coordinates offers a durable, high-end gift.
What You Need
- Vegetable-tan leather strips (or thick faux leather)
- Metal leather stamp set (alphabet/numbers) and wooden mallet
- Brass or silver key rings and brass rivets
- Leather hole punch tool
- Leather edge slicker and burnishing gum
How to Make It
- Cut Strips: Cut leather into 0.75-inch wide by 6-inch long strips with rounded ends.
- Dampen Surface: Lightly sponge the top surface of vegetable-tan leather with clean water to soften fibers for stamping.
- Stamp Letters: Align your metal stamps vertically and hit firmly with a mallet to imprint initials or meaningful numbers.
- Punch Hole & Hardware: Fold the leather strip around your metal key ring and punch a clean hole through both layers.
- Rivet Assembly: Insert a brass rivet through the holes and set it securely in place using a setting tool and mallet.
Tips and Variations
- Coordinate Stamp: Stamp the GPS coordinates of your shared grandparents’ house or favorite childhood spot.
- Dyed Finishes: Apply rich antique brown or olive green leather stain prior to burnishing the edges.
Things to Avoid
Avoid hitting leather stamps with a metal hammer, as this damages the stamping tools. Use a wooden mallet or rawhide mallet instead. Don’t stamp on wet, dripping leather; let the water absorb until the leather returns to its natural tone.
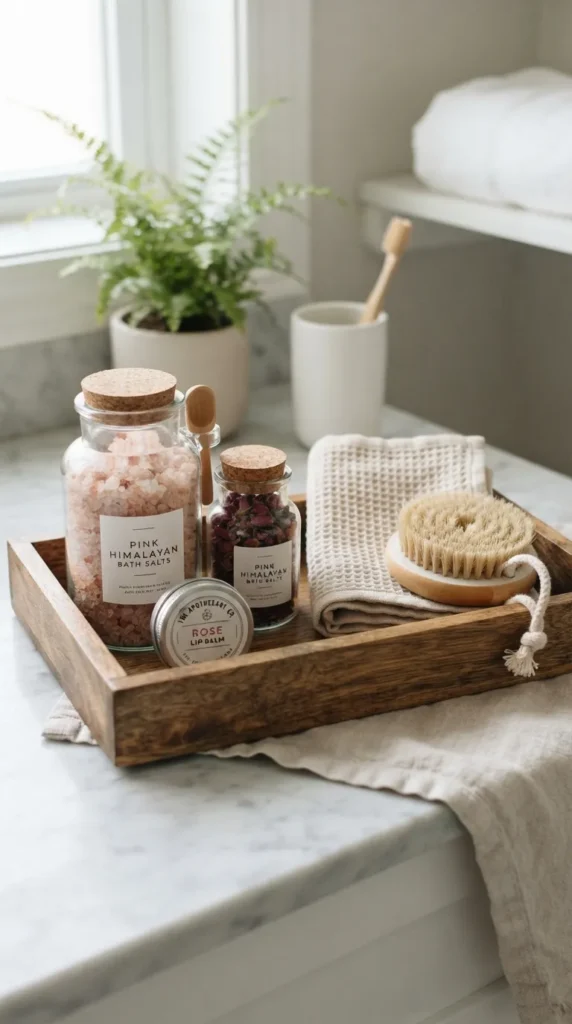
13. DIY Cozy Spa Day Relaxation Box
What This Idea Means
Self-care gifts are always welcome. Assemble a curated relaxation kit containing handmade bath salts, a plush clay face mask bowl, and organic lip balms packaged together inside a spa-themed container.
What You Need
- Epsom salts, Himalayan pink salt, and baking soda
- Pure essential oils (eucalyptus and peppermint)
- Small glass cork jars
- Organic beeswax pellets, coconut oil, and shea butter
- Lip balm tubes or mini tins
- Wooden salt scoops and bamboo bath sponges
How to Make It
- Mix Bath Salts: Combine 2 cups Epsom salt, 1 cup pink salt, and 15 drops of essential oils in a bowl, stirring thoroughly before funneling into glass cork jars.
- Melt Lip Balm: Melt equal parts beeswax, coconut oil, and shea butter in a glass bowl over hot water. Pour carefully into lip balm tins and let solidify.
- Label Items: Affix aesthetic waterproof labels to every jar with usage directions (e.g., “Soak & Unwind Bath Salts”).
- Arrange Kit: Lay out a folded linen washcloth in a wooden tray, placing bath salts, lip balm, and facial tools neatly on top.
Tips and Variations
- Shower Steamers Alternative: If your cousin doesn’t have a bathtub, convert the salt mix into fizzy shower steamers using citric acid.
- Matching Headband: Include a fluffy spa headband or silk scrunchie in the bundle.
Things to Avoid
Avoid using synthetic fragrance oils for bath salts, as sensitive skin can react negatively. Stick to pure, skin-safe essential oils diluted properly in bath-grade salts.
14. Hand-Decorated Ceramic Coffee Mugs
What This Idea Means
If your cousin depends on morning coffee or tea, a custom hand-painted ceramic mug makes their routine personal. Using oil-based enamel markers, you can design dishwasher-durable mugs with witty quotes or custom art.
What You Need
- Plain white glossy ceramic mugs (ensure they are oven-safe)
- Oil-based paint pens (like Sharpie Oil-Based)
- Rubbing alcohol and cotton pads
- Household baking oven
How to Make It
- Clean Surface: Scrub the mug’s exterior with rubbing alcohol to remove grease and fingerprint oils that prevent paint adhesion.
- Draw Artwork: Use oil-based paint pens to paint patterns, quotes, or illustrations on the mug exterior.
- Correct Errors: If you make a mistake, wipe it clean immediately using a cotton swab dipped in rubbing alcohol.
- Cure/Bake: Place the painted mug in a cold oven. Set the oven to 350°F (175°C) and bake for 30 minutes once heated.
- Cool Down: Turn off the oven and let the mug cool down inside the oven completely before removing it to set the paint permanently.
Tips and Variations
- Inside Joke Quote: Write a funny quote on the inner rim or bottom of the mug that becomes visible only when they finish drinking.
- Speckled Paint Look: Flick black paint from a toothbrushed bristles over a pastel mug surface for an trendy earthenware finish.
Things to Avoid
Avoid using standard water-based permanent markers; water-based ink washes away off glazed ceramic instantly. Never put a cold mug into a preheated hot oven, as thermal shock will crack the ceramic.
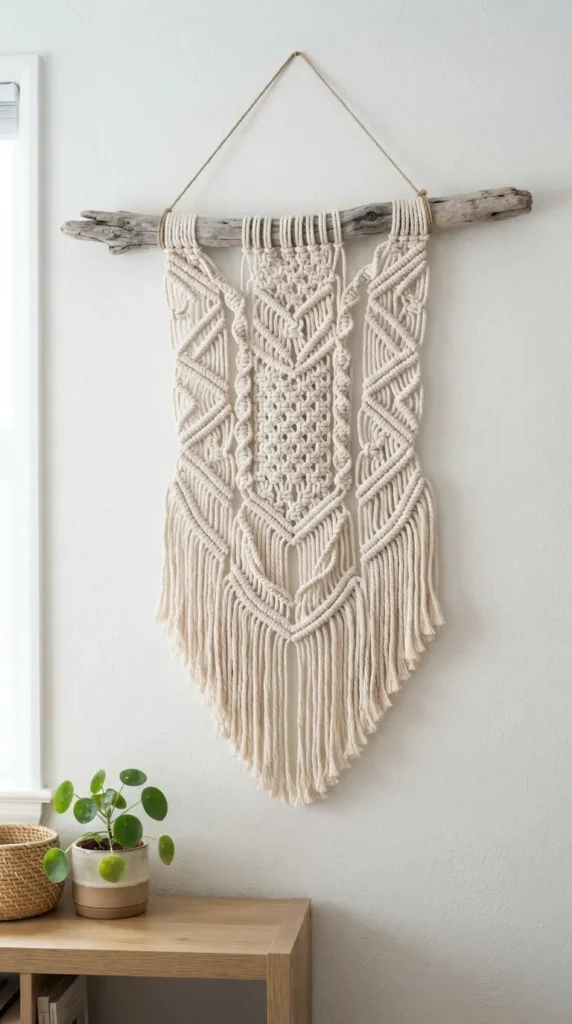
15. Hand-Woven Macramé Wall Hanging
What This Idea Means
Bring texture and boho warmth to your cousin’s bedroom or home office with a handmade macramé wall hanging. Using basic knotting techniques like square knots and lark’s head knots, you can create intricate textile art.
What You Need
- 3mm or 4mm twisted cotton macramé cord
- Smooth wooden dowel rod or natural driftwood branch
- Measuring tape and sharp fabric scissors
- Masking tape (to stop cord fraying while weaving)
How to Make It
- Mount Cords: Cut 10 to 12 strands of cord equal in length (usually 8-10 feet each). Attach them to your wooden dowel using Lark’s Head Knots.
- Knot Middle Rows: Work across the strands making alternating Square Knots to form a geometric “V” mesh pattern down the center.
- Create Diagonals: Use Diagonal Double Half Hitch Knots to create clean border lines outlining your knot cluster.
- Fringe Trimming: Comb out the remaining bottom cord tails with a fine-tooth comb and cut a crisp, angled lower fringe edge.
- Hanging Cord: Tie a short piece of twine securely to both ends of the wooden dowel to create a sturdy hanging loop.
Tips and Variations
- Dip-Dye Fringe: Dip the lower fringe of the finished piece into fabric dye for an ombre color transition.
- Wooden Beads: String polished natural wooden beads onto center cords while knotting for extra design texture.
Things to Avoid
Avoid using slippery synthetic nylon rope, as knots will slip and untie easily. Use 100% natural twisted cotton cords. Do not cut your initial cord strands too short; macramé knotting consumes significantly more length than expected.


16. Fabric Scraps & Dried Floral Wreath
What This Idea Means
A seasonal or year-round decorative door wreath constructed from torn fabric ribbons, preserved eucalyptus, and dried flowers. This project recycles leftover textiles into a stylish home decor statement.
What You Need
- Wire wreath frame or natural rattan grapevine wreath
- Strips of scrap fabric (linen, cotton, or lace in cohesive colors)
- Bundles of dried flowers (statice, baby’s breath, bunny tails)
- Floral wire and hot glue gun
- Satin hanging ribbon
How to Make It
- Prep Fabric: Rip fabric into long, half-inch wide strips for textured, raw frayed edges.
- Wrap or Tie Base: Tie fabric strips securely around the wire frame using simple double knots, packing them tightly together.
- Arrange Botanicals: Group small sprigs of dried flowers into mini bouquets and wrap their stems with green floral wire.
- Attach Dried Elements: Tuck and glue floral stems securely amongst the fabric ties using a hot glue gun.
- Hanger: Loop a long satin ribbon through the top frame to hang the finished wreath on a door or wall.
Things to Avoid
Avoid placing delicate dried flower wreaths outdoors in areas directly exposed to rain or heavy sunlight, as rain ruins dried petals and UV rays fade fabric colors quickly.
17. Custom Illustrated Desk Calendar
What This Idea Means
A year-long gift that keeps giving every month. Designing a custom 12-month mini desk calendar complete with family birthdays, seasonal artwork, and motivational quotes tailored specifically to your cousin’s year ahead.
What You Need
- Heavyweight cardstock (5×7 inch pre-cut cards)
- Mini wooden easel desk holder or binder ring
- Stamps, watercolors, or printed digital graphic art
- Fine-tip black pens and gold foil stickers
How to Make It
- Layout Dates: Print or hand-draw monthly calendar grids for all 12 months onto individual cardstock sheets.
- Mark Family Events: Pre-fill key dates on the grid like family birthdays, cousin anniversaries, and annual holiday traditions.
- Illustrate Tops: Decorate the upper half of each card with seasonal art (e.g., pumpkins for October, floral stems for April).
- Bundle Set: Stack the cards chronologically and place them neatly onto a mini wooden easel stand for display.
Tips and Variations
- Photo Calendar: Feature a nostalgic family photograph from years past corresponding to that specific month’s season.
- Mini Clip Board: Present the cards on a mini brass clipboard rather than a wooden easel for an industrial aesthetic.
Things to Avoid
Avoid using ultra-thin printer paper, which curls up over time when resting on a desk stand. Stick to sturdy 100lb cardstock paper.
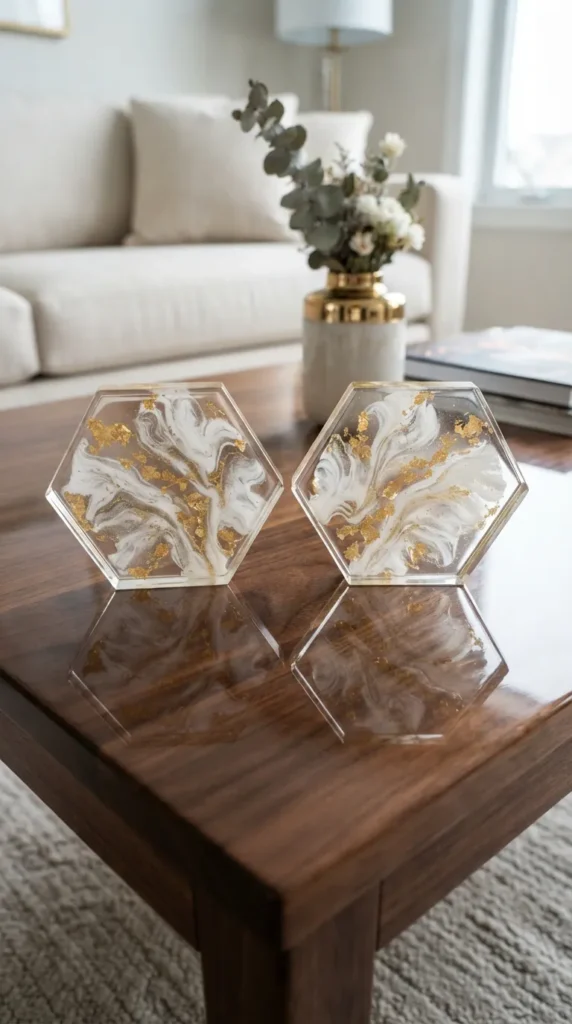
18. Hand-Poured Resin Coasters with Gold Leaf
What This Idea Means
Protect coffee tables in style with clear, geometric resin coasters embedded with metallic leaf accents or dried botanical petals. They look like expensive boutique glass tiles but are lightweight and durable.
What You Need
- Silicone coaster molds (hexagonal, round, or agate-style)
- Clear 2-part epoxy resin system
- Metallic foil flakes (gold, rose gold, or copper)
- Alcohol inks (for marble tinting)
- Cork backing pads
How to Make It
- Mix Resin Base: Stir 2-part epoxy resin thoroughly according to instructions for 3 full minutes.
- Add Gold Flakes: Tear tiny bits of gold leaf and scatter them across the bottom of the silicone molds using tweezers.
- Pour Resin: Slowly pour resin into each mold cavity to fill it to the brim.
- Swirl Inks: Drop two drops of alcohol ink into the wet resin and swirl lightly with a toothpick to create fluid marble waves.
- Cure & Back: Let cure for 24-48 hours. Peel molds off and attach self-adhesive cork circles to the undersides to shield furniture surfaces.
Tips and Variations
- Agate Edge: Paint the outer rims of the cured coasters with metallic gold enamel paint to resemble cut natural geodes.
- Coffee Bean Inlay: Embed real roasted coffee beans inside clear resin for a kitchen-themed coaster set.
Things to Avoid
Avoid un-molding coasters prematurely while they are still rubbery or soft, as fingerprints will permanently dent the shiny surface finish.
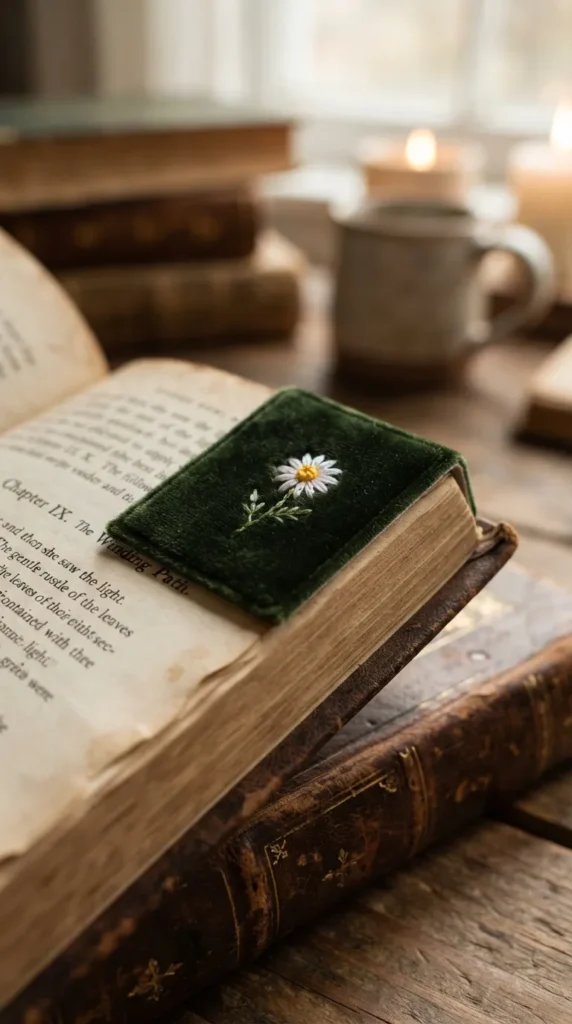
19. DIY Embroidered Corner Bookmark
What This Idea Means
Unlike traditional flat bookmarks, a corner bookmark slips snugly over the top corner of the book page you are reading. Hand-stitching small floral initials onto felt or linen corners creates a charming accessory.
What You Need
- Thick felt or linen fabric scraps
- Embroidery thread and needle
- Sturdy cardstock insert triangles
- Scissors and fabric glue
How to Make It
- Cut Triangles: Cut two right-angle triangles out of felt measuring 3×3 inches on the short sides.
- Embroider Design: Stitch your initial, small daisies, or vines onto the front triangle layer using colored thread.
- Reinforce: Place a piece of thin cardstock triangle inside between the felt layers to add structural firmness.
- Stitch Edges: Sew the two upper sides of the triangle together using a blanket stitch, leaving the diagonal bottom hypotenuse open.
- Finish: Trim loose threads cleanly and test slip it over a book page corner.
Tips and Variations
- Velvet Accents: Use soft velvet fabric scraps instead of felt for a luxurious, dark-academia literary look.
- Glow Thread: Incorporate subtle glow-in-the-dark embroidery thread so they can spot their book mark while night reading.
Things to Avoid
Avoid sewing closed the bottom diagonal edge of the triangle, otherwise the bookmark loses its pouch function and cannot slide onto the page corner.
20. Customized Spotify Code Keychain or Plaque
What This Idea Means
Music connects people across time and distance. By converting a song that symbolizes your cousin relationship (like a childhood car trip anthem) into a scannable acrylic Spotify soundwave code plate, you gift an interactive audio memory.
What You Need
- Clear acrylic blank glass sheet or keychain blank
- Vinyl cut sticker OR paint pens
- High-res printout of the Spotify scannable soundwave code
- Keyring loop or acrylic display stand
How to Make It
- Generate Code: Locate your chosen song on Spotify, click “Share,” and download the official Spotify scannable code image.
- Transfer Art: Trace or stick the precision cut vinyl code onto your clear acrylic surface carefully.
- Add Cover Artwork: Trace or paste the album art image alongside the song title and artist text above the code block.
- Test Scanning: Open the Spotify app on your mobile phone camera and scan the code on your acrylic plate to ensure it instantly plays the song.
- Pack & Frame: Install the keychain ring hardware or set the acrylic glass inside a mini illuminated wooden base stand.
Tips and Variations
- Voice Note Option: Create a custom QR code that links directly to a personal audio voice note recorded by you instead of a song.
- Mini Keychain Format: Scale the design down to a tiny 2-inch acrylic rectangle to hang directly off their car key ring or backpack.
Things to Avoid
Avoid scratching or distorting the line thickness of the scannable code bars. If the lines are smudged, blurry, or misaligned, the Spotify camera scanner will fail to recognize and play the track.