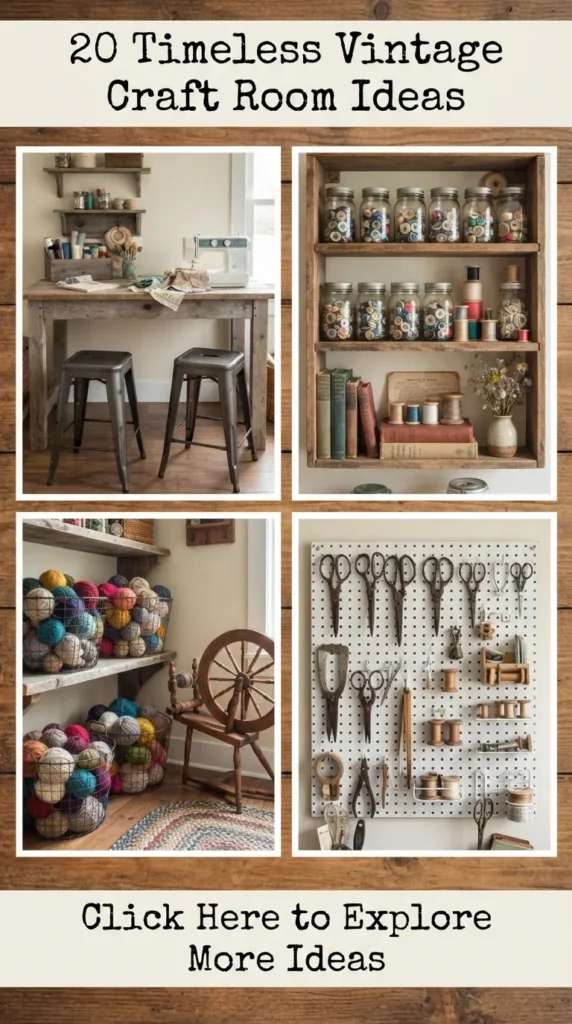
There is an unmistakable magic in stepping into a craft room infused with vintage charm. Unlike ultra-modern, sterile studio spaces, a vintage-inspired creative sanctuary feels lived-in, storied, and warm. It breathes soul back into the making process. Incorporating antique textures, repurposed heirlooms, warm wooden finishes, and nostalgic storage solutions allows you to build an environment that inspires craftsmanship while honoring the artistry of the past.
Whether you occupy an expansive dedicated workshop or a cozy sunlit corner, these 20 vintage craft room ideas will help you curate a space that is as functionally brilliant as it is aesthetically timeless.



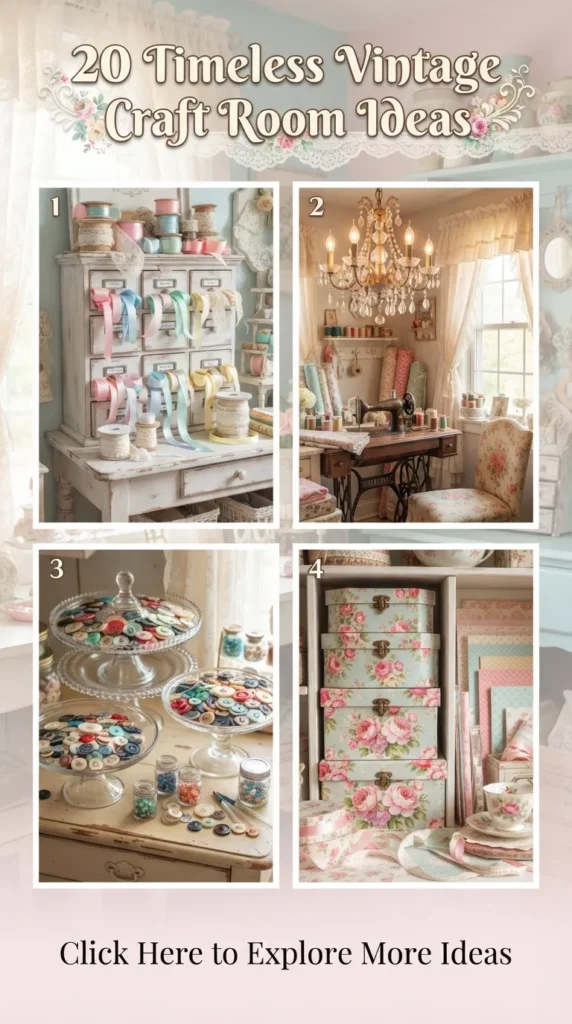
1. Antique Haberdashery Ribbon Cabinet
The Heritage Spool Display
This concept centers around using authentic or replica multi-drawer wooden cabinets—originally found in 19th-century drapery shops—to store, display, and organize ribbons, trims, lace, and threads. The goal is to elevate functional supplies into decorative room accents.
How to Build It
Acquire a vintage wooden apothecary chest, desktop file drawers, or a slender multi-tier wooden rack. Drill small entry holes across drawer fronts if you wish to pull ribbon tails through directly, or simply remove top dividers to lay wooden thread spools and silk ribbons side by side in color-coordinated order. Sand the exterior lightly and coat with dark walnut wax to highlight the aged wood grain.
Tips and Essential Materials
- Materials Needed: Vintage shallow multi-drawer chest, brass label pulls, wooden spools, clear beeswax paste, sandpaper.
- Pro Tip: Replace plastic spools with traditional solid wooden bobbins to maintain an authentic antique look.
Pitfalls to Avoid
Avoid exposing delicate silk, antique lace, or vintage cotton ribbons to direct daylight, which permanently fades pigments over time. Never store ribbon rolls loosely without securing the ends with soft brass pins, as tangled spools will quickly ruin the organized aesthetic.
2. Upcycled Wooden Card Catalog Storage
Nostalgic Apothecary Organization
An iconic library card catalog or mid-century apothecary chest serves as the ultimate multi-compartment storage system for small crafting components, hardware, stamps, buttons, and beads.
How to Build It
Source a solid wood card catalog unit or a modular apothecary drawer set. Deep-clean the wood using oil soap to remove decades of dust while retaining its natural patina. Insert custom cardstock dividers inside each drawer to categorize your supplies. Attach vintage brass label holders onto each drawer front, using hand-lettered or calligraphic index cards to identify what’s inside.
Tips and Essential Materials
- Materials Needed: Card catalog or apothecary unit, brass cardholder hardware, calligraphic cardstock, wood soap, custom velvet or felt drawer liners.
- Pro Tip: Line the interior of each drawer with self-adhesive felt or velvet to protect delicate findings and quiet the sound of metal components sliding around.
Pitfalls to Avoid
Do not overload fragile, unreinforced drawer bottoms with heavy cast-iron or stone supplies. Avoid painting over original solid hardwood in bright acrylic colors, as stripping down true vintage wood finishes drastically reduces their character and value.
3. French Country Ironstone Button Jars
Ethereal Glass & Ceramic Displays
Inspired by classic French provincial kitchens and haberdasheries, this idea uses mismatched clear glass apothecary jars, ironstone crocks, and cut-crystal containers filled with buttons categorized by color, shell, or mother-of-pearl compositions.
How to Build It
Collect vintage Mason jars, milk glass vessels, and clear glass candy jars from local flea markets. Group jars on open wooden shelving in clusters of three or five. Sort your button inventory into broad color palettes (cream, pearl, aged brass, pastel, jewel tones) and fill each jar to the brim.
Tips and Essential Materials
- Materials Needed: Assorted vintage glass jars, ironstone vessels, sorted buttons, jute twine, hand-stamped paper tags.
- Pro Tip: Mix clear jars with opaque white ironstone pieces to create visual contrast on your display shelves.
Pitfalls to Avoid
Avoid stashing plastic modern buttons alongside genuine vintage mother-of-pearl or glass buttons, as it ruins the timeless aesthetic. Keep glass jars off unstable or narrow ledge shelves where vibrations could lead to accidental shattering.
4. Reclaimed Farmhouse Table Centerpiece
The Distressed Workhorse Island
A long, sturdy reclaimed oak or pine dining table serves as a spacious craft island, providing 360-degree walking room and ample surface space for pattern cutting, scrapbooking, or painting.
How to Build It
Find an old farmhouse dining table with turned legs or a substantial trestle base. Sand the tabletop down to smooth out splinters while preserving knots and character marks. Seal the surface with a durable, non-yellowing matte polyurethane or hemp oil seal to withstand glue drips, ink, and water spills.
Tips and Essential Materials
- Materials Needed: Solid wood farmhouse table, matte polyurethane sealant, medium/fine sandpaper, wood conditioner.
- Pro Tip: Keep table legs unpainted or distressed with milk paint to complement the rustic top.
Pitfalls to Avoid
Never use high-gloss, slick clear coats on your primary work surface, as they create harsh glare under workspace lighting. Do not cut materials directly on the wood without a protective self-healing mat.
5. Victorian Wall-Mounted Plate Rack Supply Station
Vertical Wooden Shelf Displays
Adapting classic Victorian plate racks or wooden spoon racks into vertical storage units allows you to store paper pads, craft books, cutting boards, and ruler grids in plain sight without taking up desk space.
How to Build It
Mount a solid pine or oak wall rack securely into wall studs. Use the plate slots to hold large paper pads, watercolor blocks, and cutting mats vertically. Hang small brass hooks along the bottom rail to suspend scissors, measuring tapes, and hole punches.
Tips and Essential Materials
- Materials Needed: Vintage plate rack or spoon display, brass S-hooks, heavy-duty wall anchors, measuring tape, level.
- Pro Tip: Paint the rack in soft heritage paint tones like sage green, duck-egg blue, or warm cream.
Pitfalls to Avoid
Avoid overloading slatted wooden racks with excessively heavy items that could warp the wooden dowels. Don’t mount the rack too high on the wall; keep it within comfortable reach of your primary workstation.



6. Industrial Vintage Metal Rolling Carts
Mobile Crafting Efficiency
Repurposing 1950s medical carts, dental trays, or industrial factory utility trolleys creates a mobile station for paints, brushes, inks, and tools that moves wherever you work.
How to Build It
Clean a multi-tier metal utility cart, scrubbing off rust with wire wool. Either preserve the weathered patina with a coat of clear satin metal lacquer or spray paint it in a soft vintage pastel shade. Organize the trays using small wire baskets, wooden boxes, and stoneware cups to hold tools securely while rolling.
Tips and Essential Materials
- Materials Needed: Vintage metal cart, wire steel wool, rust-inhibiting clear coat or paint, enamel organization cups.
- Pro Tip: Replace old, seized rubber castors with heavy-duty vintage-style brass or cast-iron wheels.
Pitfalls to Avoid
Avoid leaving raw, untreated rust on metal carts, as rust flakes can ruin fabrics, papers, and paints. Don’t overload top trays with top-heavy liquid bottles that could tip over while rolling.
7. Repurposed Wooden Ladder Drying Rack
Suspended Overhead Fabric Holder
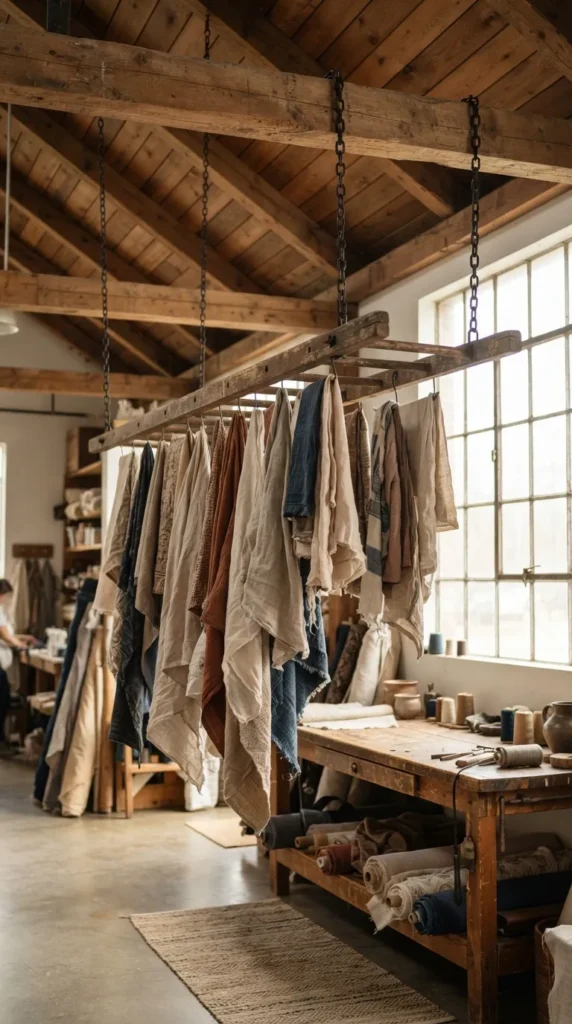
Hanging a wooden orchard ladder horizontally from the ceiling or mounting it against a wall provides an ideal rack for drying dyed fabrics, hanging lace trims, or displaying quilts.
How to Build It
Locate a weathered wooden step or extension ladder. Sand down rough edges to ensure delicate textiles won’t snag. Secure heavy-duty eye hooks into ceiling joists and suspend the ladder horizontally using vintage-style iron chains and S-hooks. Slide fabric lengths, dried flowers, or skeins of yarn over the rungs.
Tips and Essential Materials
- Materials Needed: Antique wooden ladder, heavy-duty ceiling eye bolts, iron chain links, S-hooks, fine sandpaper.
- Pro Tip: Double-check ceiling joists with a stud finder to ensure the overhead fixture is completely secure.
Pitfalls to Avoid
Never mount ceiling hooks into plain drywall without joist support; the weight of the ladder and supplies will pull it down. Avoid hanging damp dyed fabrics directly on untreated raw wood, as wood tannins can stain light fabrics.
8. Antique Dresser turned Fabric Storage Armoire
Concealed Textile Haven
A vintage bedroom dresser or wardrobe with deep drawers keeps delicate textiles, yarn skeins, and large paper sheets protected from dust, light, and pests while adding furniture elegance.
How to Build It
Restore an old wooden dresser or linen armoire. Remove any stale odors by wiping interiors with a vinegar solution and lining drawers with cedar veneer sheets or lavender sachets. Fold fabrics uniformly around cardboard bolts and line them up vertically in deep drawers for easy browsing.
Tips and Essential Materials
- Materials Needed: Vintage dresser, cedar drawer liners, scented shelf liners, cardboard fabric bolts, wood cleaner.
- Pro Tip: Label drawer exteriors using removable ceramic knobs with brass labels.
Pitfalls to Avoid
Avoid storing delicate vintage textiles in damp, unconditioned dressers where mildew can form. Never cram fabrics in so tightly that air cannot circulate.
9. Rustic Brass & Cast-Iron Tool Wall
Hanging Hardware Aesthetic
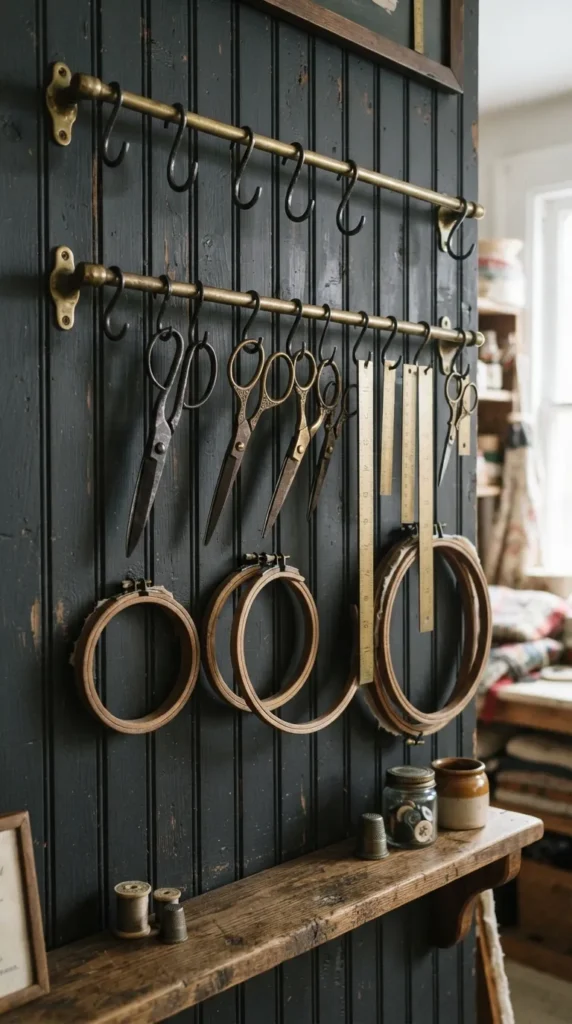
Replacing modern plastic pegboards with dark wooden wall paneling, iron coat hooks, and antique brass rails provides an elevated display for scissors, rulers, and hand tools.
How to Build It
Install dark stained beadboard or reclaimed wood planks onto your focal wall. Secure vintage-style brass towel bars, iron coat hooks, and cup hooks in grid formations across the wall. Hang your collection of metal scissors, rotary cutters, brass rulers, and wooden embroidery hoops directly onto the hooks.
Tips and Essential Materials
- Materials Needed: Wood wall paneling, antique brass hanging rails, forged iron hooks, wall mounting screws, spirit level.
- Pro Tip: Group tools by material—such as all-brass or all-forged steel—for a cohesive visual look.
Pitfalls to Avoid
Avoid using cheap, bright chrome plastic hooks that clash with the vintage tone. Don’t leave heavy iron tools on flimsy single nails without proper wall anchors.
10. Vintage Thread Cone & Yarn Spindle Display
Fiber Art Architectural Accents
Using old wooden shoe lasts, textile mill bobbins, and wooden thread cones as functional desk organizers brings historic textile art history straight onto your work surfaces.
How to Build It
Source authentic industrial wooden thread bobbins or shoe lasts from antique dealers. Mount them onto a reclaimed wooden base board or stand them vertically in shallow crates. Slide yarn skeins, thread spools, and baker’s twine cones directly onto the wooden spindles.
Tips and Essential Materials
- Materials Needed: Antique mill bobbins, wooden shoe lasts, reclaimed timber base, wood glue, brass screws.
- Pro Tip: Mix threads of varying textures—like jute, raw silk, and spun wool—to enrich the visual appeal.
Pitfalls to Avoid
Avoid placing vintage wooden spindles near open flames or high-heat appliances. Don’t force thick yarn spools onto oversized spindles, which can split aged wood.



11. Shabby Chic Wire Egg Baskets for Yarn
Airy Fiber Storage
Vintage wire egg baskets, metal milk crates, and French wire fruit bowls provide breathable, open-air storage for colorful yarn, wool roving, and fabric scraps.
How to Build It
Collect vintage metal wire baskets with collapsible handles or woven wire patterns. Clean off dust with a wire brush and spray with a matte clear coat to prevent metal transfer. Group baskets on open wooden shelves or stack them diagonally to create a honeycomb display filled with yarn.
Tips and Essential Materials
- Materials Needed: Antique wire egg baskets, metal sealant spray, soft dusting cloth, wire brush.
- Pro Tip: Put darker yarn colors in bottom baskets and lighter pastels on upper shelves to balance visual weight.
Pitfalls to Avoid
Avoid using wire baskets with sharp, rusted wire ends that could snag delicate wool or silk yarns. Do not store delicate fibers near damp external walls.
12. Milk Glass & Transferware Storage Cups
Delicate Tabletop Holders
Repurposing vintage porcelain teacups, transferware mugs, and milk glass tumblers as desktop organizers turns daily supplies like pens, paintbrushes, and crochet hooks into charming decor.
How to Build It
Gather mismatched Victorian transferware teacups, vintage enamel mugs, and white milk glass cups. Arrange them across a wooden desktop tray or elevated shelf riser. Fill each cup with specific items—one for watercolor brushes, one for bone folders, and another for graphite pencils.
Tips and Essential Materials
- Materials Needed: Mismatched vintage teacups, transferware mugs, milk glass vessels, wooden desk tray.
- Pro Tip: Add small river pebbles inside light teacups to weigh down the base and prevent tipping from tall brushes.
Pitfalls to Avoid
Avoid using cracked or hairline-fractured porcelain that could shatter under the weight of metal tools. Keep valuable, pristine antique teacups out of harm’s way if using sharp tools like craft knives.
13. Antique Printers’ Type Tray Ribbon & Stamp Gallery
Miniature Compartment Magic
A wooden printer’s shadow box (type drawer), once used to hold metal and wood typesetting letters, creates a ready-made grid wall frame for displaying small trinkets, rubber stamps, miniature bottles, and thread bobbins.
How to Build It
Clean an original printer’s drawer with a soft brush and wood conditioner. Screw two heavy-duty picture hangers onto the solid back board. Mount the tray securely onto the wall. Place tiny treasures, decorative stamps, rolled paper scraps, and vintage ink bottles into individual compartments.
Tips and Essential Materials
- Materials Needed: Wooden printer’s type drawer, heavy d-ring hangers, wood conditioner, soft dusting brush.
- Pro Tip: Leave some compartments intentionally empty to prevent the display from looking cluttered.
Pitfalls to Avoid
Avoid hanging heavy printer trays with adhesive strips or weak nails; these drawers require secure wall studs. Don’t wedge oversized items into compartments, which can crack fragile wooden dividers.
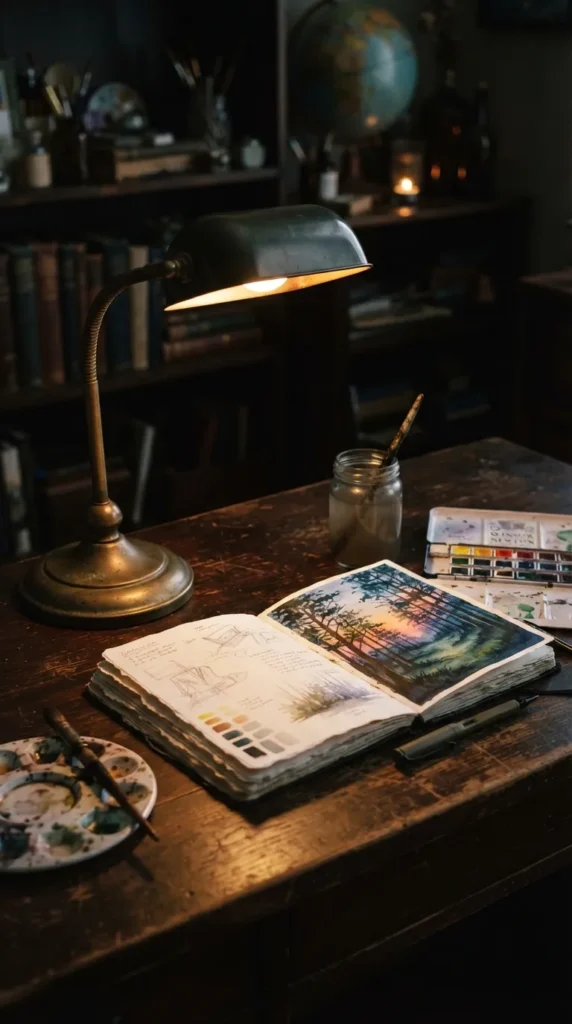
14. Mid-Century Brass Desk Lamp Workspace Lighting
Nostalgic Task Illumination
A classic vintage banker’s lamp, adjustable brass gooseneck lamp, or green glass shade fixture delivers warm, focused task lighting for intricate handwork while lending an authentic mid-century atmosphere.
How to Build It
Find an original brass desk lamp at an antique shop. Ensure the wiring is restored or re-wired to modern safety standards. Position the lamp at the corner of your main cutting or writing table to cast warm, directional light right over your hands.
Tips and Essential Materials
- Materials Needed: Vintage brass desk lamp, warm-toned LED filament bulb, metal polish cloth, electrical rewiring kit.
- Pro Tip: Use warm LED filament bulbs (around 2700K) that mimic original incandescent warmth without generating heat that could dry out paper and glues.
Pitfalls to Avoid
Never use old lamps with frayed, exposed, or brittle original cloth wiring without rewiring them first, as they pose real electrical fire hazards. Avoid cool blue lightbulbs that ruin the warm vintage ambience.
15. Distressed Galvanized Bucket Supply Wall
Industrial Rustic Utility
Galvanized metal buckets, olive buckets, and zinc tubs mounted on raw wood backboards bring a cozy rustic feel while providing spacious storage for larger rolls, wrapping paper, and long tools.
How to Build It
Mount a thick reclaimed barnwood plank to your wall studs. Attach galvanized metal pails onto the plank using heavy-duty iron hose clamps or direct screws through the bucket interiors. Angles the buckets slightly outward for easy access to tall items like roll paper, long rulers, and dowels.
Tips and Essential Materials
- Materials Needed: Galvanized metal buckets, reclaimed barnwood plank, pipe clamps, heavy-duty screws, power drill.
- Pro Tip: Stencil vintage typography or numbers on the bucket fronts using dark oil paint.
Pitfalls to Avoid
Avoid installing bucket openings directly flat against the wall, which makes grabbing tall tools frustratingly difficult. Don’t mount heavy bucket arrangements on unreinforced drywall.


16. Vintage Suitcase Stacking Craft Kits
Portable Nostalgic Storage
Stacking vintage leather, tweed, or canvas suitcases creates a charming storage tower for seasonal supplies, specialty paper collections, or lesser-used craft tools.
How to Build It
Clean vintage suitcases using leather cleaner or fabric shampoo. Line the interiors with decorative vintage wallpaper or cotton fabric. Organize supplies inside each suitcase based on theme (e.g., leatherwork, embroidery, watercolors). Stack three to four suitcases by size beside your work desk.
Tips and Essential Materials
- Materials Needed: Vintage hard-shell suitcases, leather conditioner, decorative lining paper, craft glue, luggage tags.
- Pro Tip: Attach vintage luggage tags onto each handle, writing the suitcase contents on the card for quick identification.
Pitfalls to Avoid
Avoid using damp, musty suitcases without thoroughly cleaning and drying them first, as moisture will damage papers and fabrics inside. Avoid stacking suitcases too high where they could tip over.
17. Botanical Print Gallery Wall & Framed Lace
Natural Historic Wall Decor
Framing antique botanical lithographs, vintage sewing patterns, and hand-stitched lace specimens turns historical paper craft into an inspiring gallery wall backdrop for your creative space.
How to Build It
Collect real pages from damaged 19th-century botanical books, vintage fashion pattern envelopes, or heirloom lace samples. Mount them inside distressed wooden or gilded frames with acid-free mats. Hang them in an asymmetric gallery wall layout above your desk or sewing machine.
Tips and Essential Materials
- Materials Needed: Vintage botanical prints, distressed wood frames, acid-free mats, picture hanging wire, wall anchors.
- Pro Tip: Use non-glare museum glass in frames to reduce reflections from your task lamps.
Pitfalls to Avoid
Never glue original vintage prints directly to backing boards without acid-free linen tape, as permanent glues ruin historic artifacts. Avoid placing unframed lace in high-dust areas.
18. Antique Enamelware Pitcher Water Stations
Rustic Watercolor Companion
Vintage white and blue enamelware pitchers, basin bowls, and measuring cups bring a charming cottage aesthetic to your workspace, functioning as water vessels for brush cleaning and paint mixing.
How to Build It
Source authentic enamelware water pitchers and basins. Keep a dedicated pitcher on your painting desk filled with clean water for rinsing watercolor and acrylic brushes. Pair it with a matching enamelware tray to hold damp rag towels and mixing palettes.
Tips and Essential Materials
- Materials Needed: Vintage enamelware pitcher, enamel basin tray, cotton wiping rags, natural sea sponges.
- Pro Tip: Look for chipped enamel edges—they add authentic vintage character without affecting functional use.
Pitfalls to Avoid
Avoid using enamelware with deep interior rust holes that leak water onto wooden tables. Do not leave dirty acrylic paint water sitting in vintage enamel for days, as acrylic paint can bind to damaged enamel coatings.
19. Vintage Mason Jar Wall Rack with Hose Clamps
Floating Glass Storage
Securing classic blue or clear glass Mason jars to wall boards using stainless steel hose clamps builds a striking, space-saving floating wall display for small tools, buttons, ribbons, and markers.
How to Build It
Stain a solid pine board in a rich dark walnut tone and mount it horizontally to the wall. Mark equal spaces along the board. Fasten metal hose clamps to the board using wood screws through drilled pilot holes. Slip vintage Mason jars into the clamps and tighten with a screwdriver until secure.
Tips and Essential Materials
- Materials Needed: Glass Mason jars, pine board, metal hose clamps, wood screws, wood stain, screwdriver.
- Pro Tip: Use genuine vintage light-blue zinc-lid Mason jars to maximize visual appeal.
Pitfalls to Avoid
Do not overtighten metal clamps around glass jar necks, which can crack the glass under tension. Avoid placing heavy hardware in jars that aren’t securely anchored into studs.
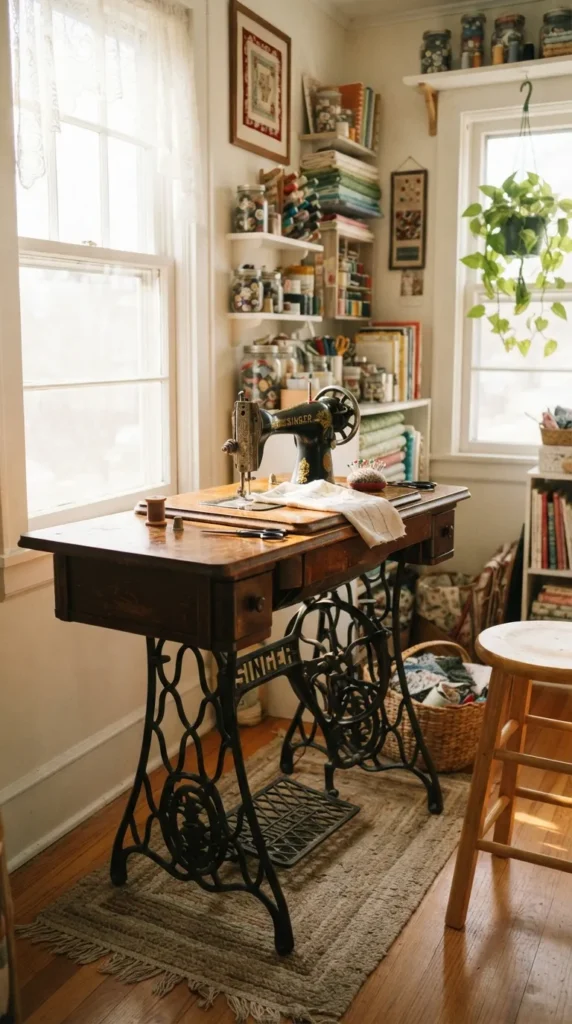
20. Antique Sewing Machine Desk Conversion
Dedicated Craft Station
Converting a vintage treadle sewing machine cabinet into a functional writing, journaling, or hand-stitching desk honors historic craftsmanship while giving your room an eye-catching focal point.
How to Build It
Obtain a 19th or early 20th-century iron treadle sewing machine cabinet. Retain the original cast-iron treadle base and wooden cabinet. Either restore the original flip-out machine top or replace a damaged top with a smooth slab of reclaimed hardwood, keeping the cast-iron pedal base intact beneath for a cozy footrest.
Tips and Essential Materials
- Materials Needed: Treadle sewing machine cabinet, wood varnish, metal polish, clear protective lacquer, wood glue.
- Pro Tip: Keep the original cast-iron foot pedal functional—it serves as a fun, kinetic footrest while sitting at your desk!
Pitfalls to Avoid
Avoid removing the original cast-iron base components unless irreparably broken, as original ironwork holds immense historic and visual charm. Never apply harsh chemical solvents to original gold leaf decals on vintage sewing wood.
More Ideas to Come in Future Addition…