Bring old-world warmth, nostalgia, and classic aesthetic flair into modern spaces with these handcrafted vintage projects. Whether you are aiming for shabby chic, cozy rustic, or Victorian romanticism, these projects combine accessible materials with traditional techniques.
Crafting Overview at a Glance
| Metric | Project Standard |
| Difficulty Level | Easy to Intermediate |
| Average Time Needed | 30 Minutes to 3 Hours per project |
| Estimated Cost | $5 – $25 per project |
| Essential Toolkit | Scissors, Mod Podge/Craft Glue, Chalk Paint, Distressing Sponge, Fine Sandpaper |


Idea 1: Tea-Stained Antique Lace Bookmarks
Introduction
A delicate nod to Victorian reading nooks, tea-stained lace bookmarks combine aged textile textures with functional elegance.
What This Idea Means
This project involves artificially aging leftover crochet or bobbin lace using natural tea baths to mimic centuries-old fabric heirlooms.
Supplies Needed
- White or off-white cotton lace trim
- Loose black tea leaves or standard tea bags
- Scissors
- Mod Podge (for stiffening)
- Ribbon or brass book charm
How to Make It
- Brew a strong pot of black tea and allow it to cool slightly.
- Submerge cut lace strips into the bath for 15 to 40 minutes depending on desired darkness.
- Rinse under cool water, pat dry with towels, and lay flat on wax paper.
- Paint a thin layer of Mod Podge over the dry lace to give it structural stiffness.
- Thread a thin antique ribbon or brass ring through the top loop.
Tips and Variations
Add dried lavender buds near the ribbon top for a subtle fragrance, or mix a drop of coffee into the tea bath for deep warm undertones.
Things to Avoid
Avoid using synthetic polyester lace as it resists natural tannins. Do not wring out delicate lace tightly while wet, as this warps the delicate weave patterns permanently.
Idea 2: Distressed Apothecary Jams & Jars
Introduction
Transform leftover kitchen glassware into rustic 19th-century apothecary containers perfect for storage or displays.
What This Idea Means
This technique uses matte chalk paints and distressing methods on clear glass to replicate antique painted potion bottles.
Supplies Needed
- Clean glass jars
- Matte chalk paint (sage, ivory, or slate)
- Sandpaper (medium grid)
- Vintage-style printed paper labels
- Wax sealant
How to Make It
- Wipe glass surfaces thoroughly with rubbing alcohol.
- Apply two thin coats of chalk paint, letting each layer dry fully.
- Lightly sand raised edges, rim lips, and bottom curves to reveal the glass underneath.
- Adhere antiqued paper labels using craft adhesive.
- Seal the painted surface with clear or dark furniture wax.
Tips and Variations
Use dark amber wax over white paint to create authentic grunge grime in the crevice details.
Things to Avoid
Avoid washing the finished jars in a dishwasher or soaking them in water. Never apply paint to the inner surfaces if you intend to store edible items.
Idea 3: Pressed Botanical Herbarium Frames
Introduction
Herbarium art captures the quiet beauty of dried flora, mounted elegantly between glass panels.
What This Idea Means
Drying and mounting garden leaves, fern fronds, or delicate blooms within double-glass floating frames.
Supplies Needed
- Double-glass floating frames
- Pressed foliage or flowers
- Fine tweezers
- Clear drying craft glue
- Linen backing paper (optional)
How to Make It
- Flatten flowers between heavy book pages for at least two weeks.
- Clean double-glass panes until clear of lint.
- Arrange dried stems thoughtfully on the base glass layer using tweezers.
- Apply minuscule dots of clear glue to secure heavy stems.
- Close the frame glass tightly to hold specimens under pressure.
Tips and Variations
Pair green fern leaves with aged calligraphic handwritten paper clippings underneath for an authentic Victorian scientist aesthetic.
Things to Avoid
Avoid placing fresh or damp flowers directly into frames; moisture creates mold over time. Keep finished pieces out of direct bright sunlight to prevent color fading.
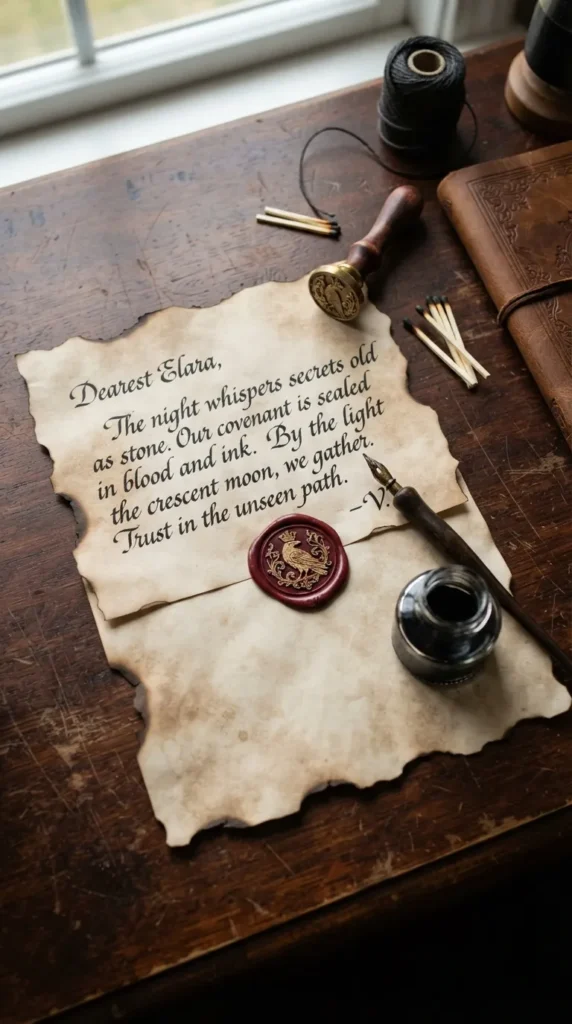
Idea 4: Wax-Sealed Vintage Envelopes & Letters
Introduction
Revive classic correspondence traditions by hand-aging stationery complete with historic sealing wax stamps.
What This Idea Means
Creating custom letter packages using tea-dyeing techniques, fountain pen calligraphy, and classic flexible seal waxes.
Supplies Needed
- Heavy cotton paper or envelope blanks
- Sealing wax sticks & brass stamp melt burner
- Instant coffee powder
- Calligraphy pen and waterproof ink
How to Make It
- Brush a light coffee-water wash across fresh paper pages and envelopes; let dry.
- Gently singe extreme outer edges with a lighter for an aged edge (optional).
- Draft your letter using classic ink pen styles.
- Fold paper, melt sealing wax directly over the seam center, and press down firmly with your brass emblem stamp for 10 seconds.
Tips and Variations
Mix tiny flecks of metallic gold leaf directly into melted crimson wax right before stamping down for an ornate finish.
Things to Avoid
Do not move or lift the brass stamp while the wax remains hot; wait until it cools completely to ensure crisp, clean impressions.
Idea 5: Decoupage Wooden Keepsake Box
Introduction
Turn plain pine craft boxes into heirloom treasure chests featuring classic floral or classical art prints.
What This Idea Means
Layering delicate decorative paper prints onto wooden surfaces using specialized gluing and sealing techniques.
Supplies Needed
- Raw wooden box
- Decoupage medium (matte finish)
- Vintage patterned paper or paper napkins
- Sponge brush
- Acrylic background paint
How to Make It
- Sand wooden surfaces smooth and apply a base coat of light acrylic paint.
- Cut or tear vintage paper patterns to match panel dimensions.
- Coat the wooden panel with a thin layer of decoupage glue.
- Smooth paper downward from the center outward to clear air pockets.
- Topcoat with 2–3 layers of decoupage sealant once dry.
Tips and Variations
Tear paper edges rather than cutting with scissors to achieve seamless, blended transitions between layered designs.
Things to Avoid
Avoid applying decoupage glue too heavily, as overly saturated thin paper can tear easily or bubble beyond repair.


Idea 6: Crackle-Finish Picture Frames
Introduction
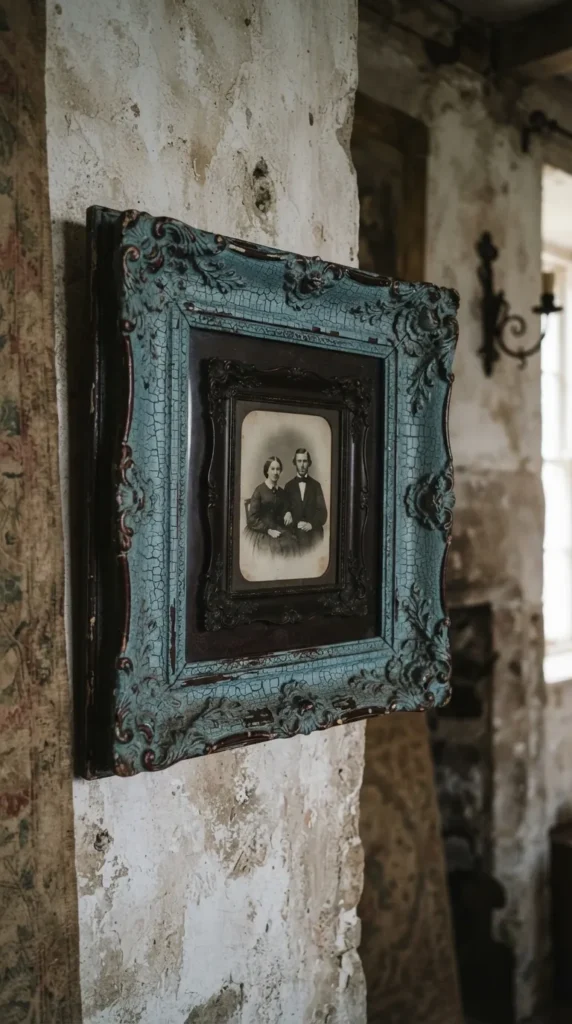
Achieve the look of multi-layered aging paint on simple wooden photo frames.
What This Idea Means
Using specialized crackle medium between two contrasting paint shades to simulate decades of paint weathering.
Supplies Needed
- Wooden picture frame
- Dark base coat paint (brown/dark red)
- Light top coat paint (cream/duck egg blue)
- Commercial crackle medium
- Flat paintbrushes
How to Make It
- Paint frame fully with dark base coat; dry thoroughly.
- Apply an even coat of crackle medium in long single strokes; let become tacky.
- Gently sweep light top coat paint over the crackle layer without re-brushing areas.
- Watch cracks open as top layer dries.
- Finish with clear protective lacquer.
Tips and Variations
Brush topcoat perpendicularly to the crackle layer application for dramatic, square check crack patterns.
Things to Avoid
Never over-brush the top layer of paint; repeating strokes on active crackle medium ruins the cracking effect entirely.
Idea 7: Tarnished Faux-Silver Mirrors
Introduction
Recreate the dreamy, mysterious oxidized edges of antique mercury glass mirrors.
What This Idea Means
Treating plain mirror surfaces with spray paint and vinegar mixtures to simulate silver degradation.
Supplies Needed
- Simple framed glass mirror
- Looking Glass spray paint
- Spray bottle with 50/50 vinegar and water
- Black spray paint
- Paper towels
How to Make It
- Remove glass from frame and clean thoroughly.
- Mist outer back borders lightly with the vinegar mixture.
- Immediately spray thin coat of silver reflective paint over wet droplets.
- Blot gently with paper towel to lift wet vinegar spots.
- Seal back with solid matte black spray paint coat.
Tips and Variations
Concentrate vinegar droplets near outer edges where historical mirrors naturally degrade first.
Things to Avoid
Avoid oversaturating the mirror surface with vinegar spray; tiny mist droplets create authentic aging while pools of liquid erase paint completely.
Idea 8: Hand-Embroidered Flour Sack Towels
Introduction
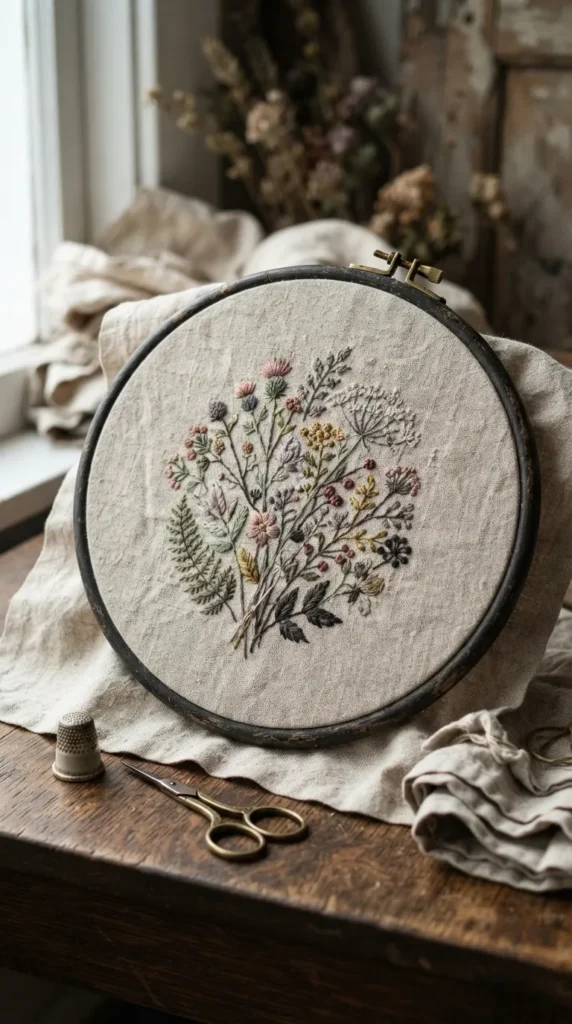
Bring vintage cottage charm to your kitchen with simple hand-stitched botanical accents.
What This Idea Means
Working classic embroidery stitches onto soft woven cotton kitchen towels using retro floral patterns.
Supplies Needed
- Unbleached flour sack towels
- Embroidery hoop & needles
- DMC embroidery floss
- Transfer pen or carbon paper
How to Make It
- Trace vintage floral motif onto corner of towel using water-soluble transfer pen.
- Secure fabric drum-tight inside embroidery hoop.
- Work design using French knots, satin stitch, and stem stitch methods.
- Wash finished piece under cold water to dissolve transfer lines.
- Press flat with warm steam iron.
Tips and Variations
Use muted vintage thread shades like sage, dusty rose, mustard, and faded denim rather than bright neon colors.
Things to Avoid
Do not pull embroidery threads excessively tight while stitching, which causes lightweight kitchen towel fabric to pucker up unappealingly.
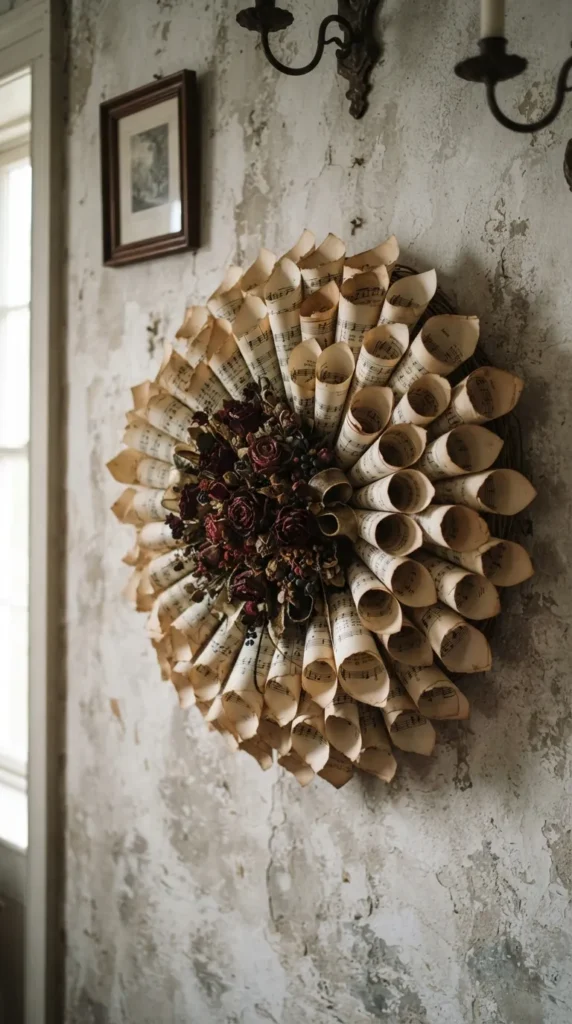
Idea 9: Aged Sheet Music Wreath
Introduction
Transform yellowed classical music sheets into a dramatic, sculptural wall medallion.
What This Idea Means
Rolling vintage sheet music into uniform paper cones and assembling them onto a structural core base.
Supplies Needed
- Antique sheet music (or printed aged sheets)
- Wreath cardboard base or metal ring
- Hot glue gun & glue sticks
- Antiquing ink pad
How to Make It
- Cut music paper into uniform 4×4 inch squares.
- Roll each square into a tight cone shape, securing outer seam with hot glue.
- Lightly rub edges of cones across brown ink pads for depth.
- Glue paper cones radially around outer circumference of base ring.
- Work inward layer-by-layer until center is fully covered.
Tips and Variations
Add a central cluster of dried roses or a brass vintage brooch right in the wreath’s center point.
Things to Avoid
Avoid using real historic sheet music of high value; scan and print reproductions onto matte paper to preserve original antiques.
Idea 10: Antiqued Cloche Display Bases
Introduction
Display tiny collectibles inside warm, Victorian-style glass cloche domes resting on distressed wooden bases.
What This Idea Means
Staining and aging raw turned-wood pedestals to house decorative glass cover domes.
Supplies Needed
- Glass cloche with raw wood base
- Dark walnut wood stain
- Steel wool (0000 fine)
- Rags and sealant finish
How to Make It
- Sand raw wood base along grain lines until smooth.
- Apply dark walnut stain using soft cotton rag; let sit 5 minutes before wiping excess.
- Once dry, buff lightly with fine steel wool to wear away stain along raised edges.
- Wipe clean and apply clear matte polyurethane finish.
- Assemble with decorative items under clear glass.
Tips and Variations
Pair inside objects with tiny warm LED copper fairy lights tucked beneath display items for ambient glow.
Things to Avoid
Avoid applying thick varnish coats that fill up natural wood grain textures completely, hiding rustic surface characteristics.


Idea 11: Faux Enamelware Metal Pitcher
Introduction
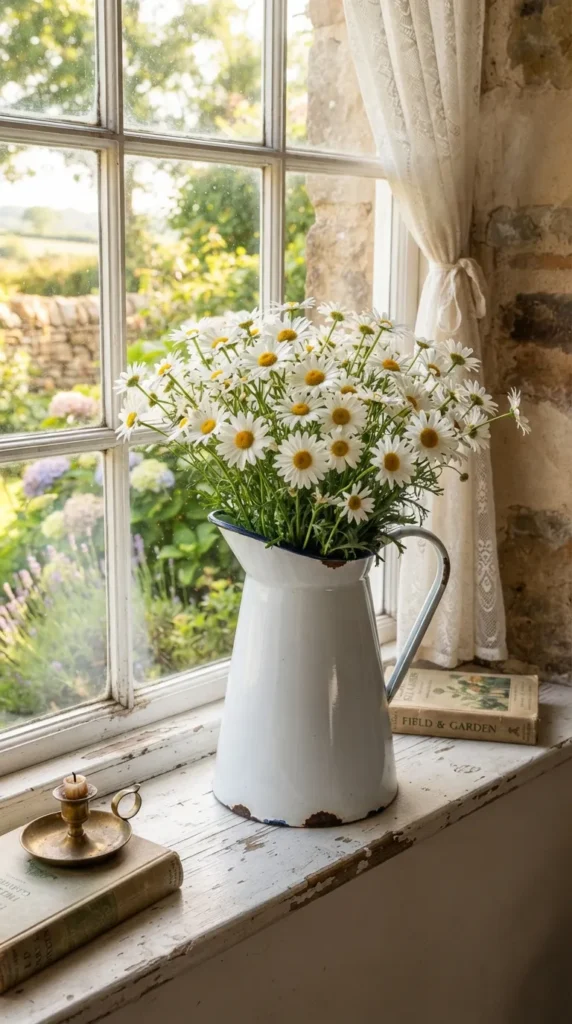
Capture French country kitchen charm by transforming modern galvanized jugs into crisp vintage enamelware styles.
What This Idea Means
Using gloss white paint paired with dark blue accents to emulate vintage baked enamel metal containers.
Supplies Needed
- Metal pitcher or metal vase
- Gloss white spray paint
- Deep navy blue acrylic paint
- Fine detail paintbrush
- Sandpaper
How to Make It
- Prime metal surface and spray with two solid layers of gloss white paint.
- Once dry, dip fine detail brush into deep navy blue paint.
- Paint dark blue trim rings around outer upper lip rims and handle joint points.
- Use sandpaper on tiny select edge spots to simulate authentic chipped metal spots underneath.
Tips and Variations
Add small black painted distress marks where handles meet body structures to copy genuine vintage wear patterns.
Things to Avoid
Do not leave fresh acrylic paint lines unblended; keep rim lines crisp and clean for authentic enamelware look.
Idea 12: Brass Pin-Cushion Teacup
Introduction
Turn delicate vintage teacups into whimsical, functional sewing room displays.
What This Idea Means
Fitting fabric stuffing cushions tightly into delicate china teacups decorated with lace and pins.
Supplies Needed
- Vintage floral porcelain teacup
- Fabric scrap (velvet or linen)
- Polyfill stuffing or fiberfill
- Strong hot glue
- Vintage pearl pins
How to Make It
- Gather a circle of fabric around polyfill ball; tie base shut tightly with string.
- Test fit fabric dome into teacup so it sits snugly above rim line.
- Apply thick ring of hot glue along inner rim of china cup.
- Press stuffed fabric cushion down securely; hold 30 seconds to set glue.
- Accent top with decorative brass and pearl sewing pins.
Tips and Variations
Add a spoonful of crushed dried lavender inside polyfill ball to scent workspace while working on projects.
Things to Avoid
Avoid using overly thin cotton fabrics that let inner polyfill show through or tear when pins are inserted.
Idea 13: Vintage Silhouette Wall Art
Introduction
Revive classic 18th-century profile portraiture using simple modern cutting techniques.
What This Idea Means
Tracing side profile profile outlines onto matte black paper mounted against cream-tinted backgrounds.
Supplies Needed
- Side profile photo printout
- Matte black cardstock
- Cream/off-white textured background paper
- Fine detail precision craft knife
- Frame
How to Make It
- Take crisp profile photo of subject against plain light wall; print out scaled correctly.
- Layer photo print directly over matte black cardstock piece.
- Cut along profile boundary lines using sharp precision knife blade.
- Glue black cutout profile centered onto textured cream paper.
- Mount completed artwork inside dark oval picture frame.
Tips and Variations
Add tiny detail cuts around eyelash points or hair strands to make silhouette profiles feel lively and authentic.
Things to Avoid
Avoid using dull craft blades that tear delicate paper edges during detail cutting around facial features.
Idea 14: Distressed Wooden Bread Board
Introduction
Craft rustic decorative wooden cutting boards that look straight out of a historic bakery kitchen.
What This Idea Means
Shaping, distressing, and conditioning raw hardwood boards to recreate antique charcuterie presentation pieces.
Supplies Needed
- Pine or hardwood plank
- Jigsaw/hand saw
- Wood rasp and heavy sandpaper
- Dark coffee bean stain or food-safe mineral oil
- Leather hanging strip
How to Make It
- Sketch classic breadboard silhouette handle design onto wooden plank.
- Cut shape out using jigsaw; drill hole near top of handle for strap.
- Scrape edges using wood rasp tools to round hard corners down.
- Sand surfaces until smooth yet subtly uneven under hands.
- Treat wood surface liberally with dark food-safe mineral oil or wood stain.
Tips and Variations
Stamp small numbers or initials near base of handle using metal letter punches for custom branding look.
Things to Avoid
Do not use non-food-safe wood stains if planning to serve food directly on board surfaces.
Idea 15: Vintage Book Page Candle Holders
Introduction
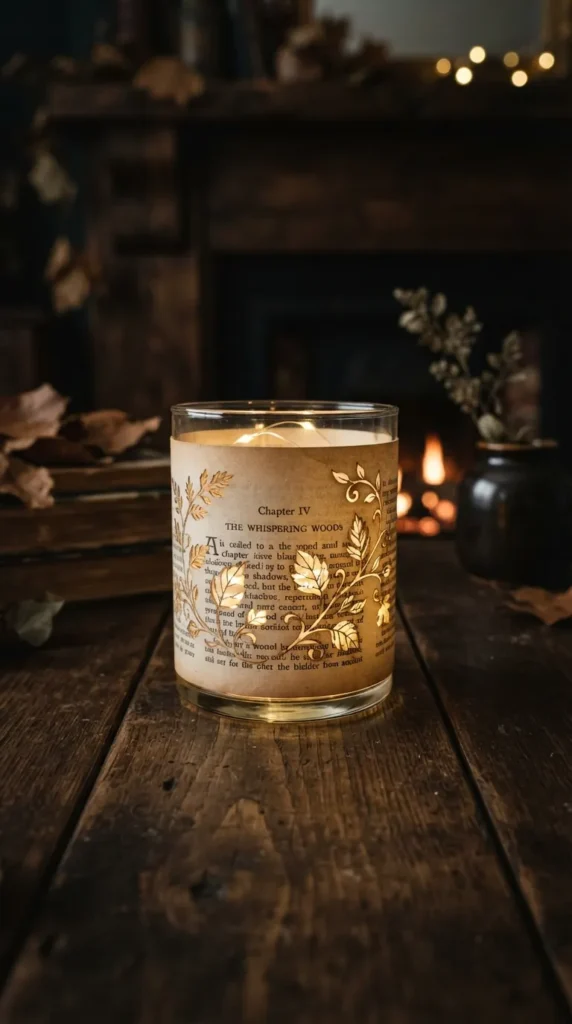
Cast soft warm ambient light through vintage calligraphic text wrapped around simple glass hurricane jars.
What This Idea Means
Adhering aged book pages onto clear glass votives using translucent decoupage layers.
Supplies Needed
- Glass hurricane cylinders or glass jars
- Discarded vintage book pages
- Decoupage finish
- Heart/leaf punch tools (optional)
- LED tea lights
How to Make It
- Measure paper strips to fit around cylinder body heights.
- Punch out small shapes or leaf silhouettes along central paper band for light passthrough.
- Apply decoupage glue coat directly to exterior glass.
- Wrap paper strip around cylinder, smoothing out air bubbles carefully.
- Seal exterior with matte topcoat layer.
Tips and Variations
Use real candlelight only if glass height extends high above paper top; otherwise use safe flickering LED tea lights inside.
Things to Avoid
Avoid putting paper linings on inner surfaces of candle jars where open flame creates fire hazards.


Idea 16: Pearl-Accented Antique Drawer Knobs
Introduction
Elevate basic furniture hardware into detailed focal accents using vintage pearl and bronze jewelry elements.
What This Idea Means
Adhering flatback pearl beads and oxidized metal stampings onto standard wooden or metal drawer pulls.
Supplies Needed
- Plain wooden or metal knobs
- Flatback faux pearls (various sizes)
- Jewelry glue (E6000)
- Metallic bronze paste paint
How to Make It
- Coat plain hardware knobs with dark bronze metallic paste paint.
- Plan symmetric pearl arrangement pattern over knob face.
- Apply tiny dots of strong jewelry adhesive to backings.
- Position pearls precisely using tweezers; press firmly to seat.
- Allow adhesive to cure fully for 24 hours before installing.
Tips and Variations
Mix tiny antique crystal rhinestones into pearl arrangements for added subtle Victorian shine.
Things to Avoid
Avoid installing fresh hardware onto drawers before adhesive cures completely, or pearls may shift during handling.
Idea 17: Antiqued Galvanized Buckets
Introduction
Tone down harsh shiny new zinc finishes on galvanized metal buckets to match aged vintage farmhouse decor.
What This Idea Means
Applying vinegar acid washes and dark oil-based antiquing paints to age modern metal surfaces fast.
Supplies Needed
- Shiny galvanized metal bucket
- Toilet bowl cleaner or vinegar acid
- Scuffing scouring pad
- Black and burnt umber oil paints
- Soft rags
How to Make It
- Rub metal surfaces down with acid cleaner using scuffing pad to strip shiny factory sealers.
- Wash clean with plain water and dry thoroughly.
- Dab tiny bits of brown and black oil paint onto rag surfaces.
- Smudge paint into metal seams, rim lines, and handle joints.
- Wipe excess away, leaving dark shadows along corner crevices.
Tips and Variations
Leave buckets outdoors in elements for two days post acid treatment to accelerate real surface rust spots naturally.
Things to Avoid
Always work in well-ventilated areas when using acidic chemical solutions or oil paints.
Idea 18: Shabby Chic Linen Lavender Sachets
Introduction
Keep wardrobes smelling fresh using old-world linen pouches filled with fragrant lavender flowers.
What This Idea Means
Sewing simple small linen pouches detailed with vintage lace trimmings and lavender flower buds inside.
Supplies Needed
- Off-white linen fabric scraps
- Dried lavender buds
- Vintage cotton lace trims
- Sewing machine or needle and thread
- Pinkers pinking shears
How to Make It
- Cut linen into 4×6 inch rectangle pairs using pinking shears.
- Stitch decorative lace strips across front side face of one panel piece.
- Pin panels together right-sides inward; sew 3 sides closed leaving top rim open.
- Turn pouch right-side out; fill generously with dried lavender buds.
- Tie open top tightly shut with torn linen ribbon strip.
Tips and Variations
Stamp tiny vintage botanical branch images onto linen front faces before assembly using brown fabric ink pads.
Things to Avoid
Avoid overfilling sachets tightly; loose filling lets lavender release fragrance better when squeezed.
Idea 19: Aged Brass Key Wall Display
Introduction
Transform loose vintage key collections into intriguing shadowbox art arrangements.
What This Idea Means
Arranging assorted antique skeleton keys against fabric backgrounds inside deep shadowbox frames.
Supplies Needed
- Assorted skeleton keys (real or replica brass)
- Deep shadowbox frame
- Velvet or burlap backing sheet
- Fine brass wire
- Needle-nose pliers
How to Make It
- Cut backing fabric sheet to match inner shadowbox dimensions cleanly.
- Arrange keys in balanced symmetric grids across fabric surface.
- Pierce tiny holes through backing on sides of key stems.
- Thread thin brass wire up from back, over key stem, and back out down to secure.
- Twist wires tight on back side; mount backboard into shadowbox frame.
Tips and Variations
Attach tiny hand-written vintage paper tags to key tops detailing fictional room numbers or historical dates.
Things to Avoid
Do not rely solely on hot glue to mount heavy metal keys; wire securing keeps heavier pieces held safe over time.
Idea 20: Rustic Twine Candle Wraps
Introduction
Add textured warmth to simple white pillar candles using natural jutewrap techniques.
What This Idea Means
Wrapping natural jute twine around candle bases finished with vintage button details.
Supplies Needed
- Plain unscented pillar candles
- Natural jute twine
- Antique brass buttons or mother-of-pearl buttons
- Dual-temp craft glue gun
How to Make It
- Apply small dot of glue near bottom base of pillar candle.
- Secure twine end and begin wrapping tightly upward around candle body.
- Keep wraps tight for 2–3 inches of vertical height coverage.
- Secure end strand with hidden dot of glue on back side.
- Glue vintage button accent prominently on center front face of twine band.
Tips and Variations
Tuck a tiny stem of dried baby’s breath or lavender behind twine wrap next to button anchor point.
Things to Avoid
Never place twine or decorative elements near top wick area where melting candle wax or flames burn down.
More Ideas to Come in Future Additions!
Stay tuned for upcoming updates to this collection! Future expansions will cover projects like Chalk-Painted Mason Jar Chandeliers, Victorian Ribbon Rosettes, Distressed Canvas Wall Hangings, and Vintage Transfer Wooden Trays.