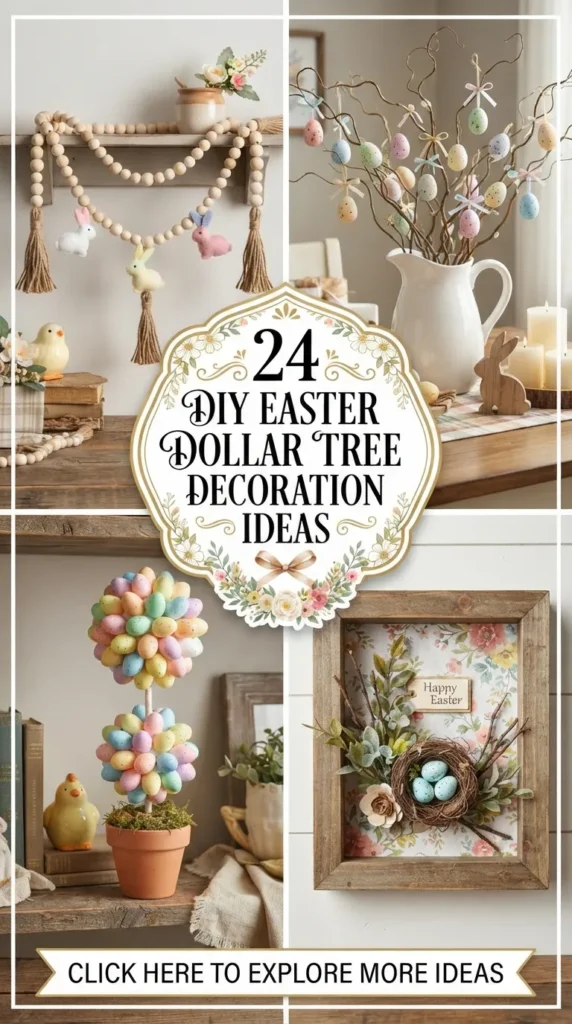
Transforming your home for spring shouldn’t require breaking the bank. High-end home decor boutiques often charge exorbitant prices for seasonal items, but with a quick trip to your local Dollar Tree and a splash of creativity, you can craft high-end, farmhouse-inspired, and modern pastel Easter decorations that look like they came straight out of a luxury catalog.
Below is the ultimate step-by-step guide to 20 unique, budget-friendly DIY Easter Dollar Tree decoration ideas. Each craft includes a complete rundown of supplies, detailed tutorials, expert styling advice, and design variations to make your home shine this spring season.



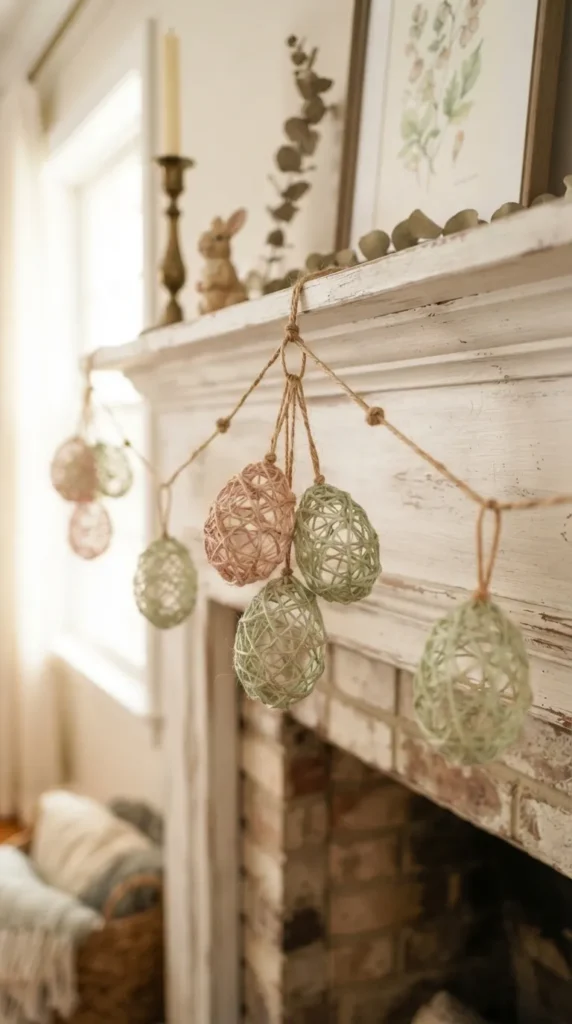
1. Rustic Dollar Tree Twine & Balloon Easter Egg Garland
What This Idea Means
This craft transforms basic craft twine and party balloons into stunning, textured, open-weave 3D string eggs. Strung along a mantle, staircase, or window frame, this rustic garland brings organic warmth, delicate charm, and subtle spring color into any room.
Supplies Needed
- 1 pack of small water balloons or standard 5-inch balloons (Dollar Tree)
- 2–3 spools of Dollar Tree natural jute twine or pastel cotton baker’s twine
- 1 bottle of Elmer’s liquid PVA glue or mod podge
- 1 bottle of pastel acrylic paint (soft green, powder blue, blush pink, lavender)
- Water and a shallow mixing bowl
- Cornstarch (1–2 tablespoons, optional for extra stiffness)
- Scissors, paintbrushes, and wax paper
- Length of thick jute rope or floral vine for hanging
How to Make It
- Prep the Base: Inflate 8 to 12 balloons to roughly the size of a large chicken egg or goose egg. Tie them securely.
- Mix the Stiffening Solution: In a shallow bowl, mix 1 cup of PVA glue, 1/2 cup of warm water, and 2 tablespoons of cornstarch until smooth.
- Soak and Wrap: Cut lengths of twine (about 4–5 feet long). Submerge the twine into the glue mixture, squeezing off excess glue between your fingers. Begin wrapping the twine tightly around an inflated balloon in random crisscross directions until an airy egg pattern forms. Leave small openings so light can pass through.
- Dry Completely: Rest the wrapped balloons on a sheet of wax paper or hang them from a drying rack using clothespins for 24 hours until the twine is completely hard and dry to the touch.
- Pop and Remove: Gently push the balloon away from the hardened twine using the blunt end of a pencil, then pop the balloon with a pin. Pull the deflated rubber out through one of the twine openings.
- Add Color & Assemble: Lightly dry-brush pastel acrylic paint over the twine eggs to give them a soft wash of color. Once dry, thread your main jute rope or floral vine through the top openings of each twine egg, securing them with small knots so they don’t slide.
Styling Tips & Creative Variations
- Fairylight Integration: Thread a string of battery-operated LED fairy lights through the twine eggs along the garland to create an enchanting ambient glow during spring evenings.
- Neutral Farmhouse Style: Leave the twine completely unpainted and accent the space between eggs with dried eucalyptus sprigs or burlap bows.
2. Speckled Dollar Tree Foam Egg Wreath
What This Idea Means
Using Dollar Tree’s foam Easter egg packs, this project creates a full, boutique-quality wreath. By repainting bright plastic or foam eggs with soft, matte chalk paint and adding realistic speckles, you elevate basic craft items into a high-end European countryside centerpiece.
Supplies Needed
- 1 wire or foam wreath ring (Dollar Tree)
- 4–5 packages of Dollar Tree decorative foam or plastic Easter eggs
- Off-white, soft sage, cream, and dusty blue chalk paint
- Dark brown or black acrylic paint for speckling
- An old toothbrush or stiff bristle paintbrush
- Hot glue gun and plenty of glue sticks
- Artificial moss or Spanish moss (Dollar Tree)
- 2-inch wide burlap or linen ribbon
How to Make It
- Base Paint the Eggs: Remove any artificial plastic sheen by painting all the foam eggs with two coats of matte chalk paint. Mix your colors so you have a realistic assortment of robin’s egg blue, cream, sage, and pale beige.
- Add Realistic Speckles: Dilute a small amount of dark brown acrylic paint with water. Dip an old toothbrush into the paint, point it at the painted eggs, and pull your thumb back over the bristles to flick tiny brown specks all over the eggs. Let them dry completely.
- Prep the Wreath Base: Hot glue clumps of Spanish moss or green forest moss around your wreath form to completely conceal the underlying wire or foam.
- Attach the Eggs: Beginning on the inner ring, hot glue the speckled eggs closely together in alternating angles and colors. Work your way outward to the middle and outer edges until the entire wreath looks full and plush.
- Add Finishing Details: Tuck small sprigs of faux greenery or tiny faux feathers into any remaining gaps between the eggs.
- Hanger: Loop a long length of burlap or linen ribbon around the top of the wreath and tie a loose bow to hang it from your front door or above a mantle.
Styling Tips & Creative Variations
- Monochrome Elegance: Paint all eggs in shades of off-white and warm taupe, paired with preserved boxwood sprigs for a minimalist Scandinavian aesthetic.
- Mini Door Frame Wreaths: Make smaller 6-inch versions using embroidery hoops to hang on the backs of your dining room chairs.
3. Faux Carrot Rope Door Wreath
What This Idea Means
A whimsical twist on traditional round wreaths, this carrot-shaped door hanger uses Dollar Tree foam cones or cardboard forms wrapped in bright orange nautical rope or twine, topped with vibrant faux greenery.
Supplies Needed
- Dollar Tree floral foam cones or sturdy thick cardboard cut into a large carrot triangle shape
- 3–4 packs of Dollar Tree orange nylon rope, orange jute twine, or thick yarn
- 1–2 bunches of artificial carrot top greenery, faux fern fronds, or faux asparagus fern
- Hot glue gun and glue sticks
- Gingham or buffalo check ribbon (black and white or orange and white)
- Scissors
How to Make It
- Form the Base: If using cardboard, cut a triangular carrot shape roughly 18 inches long, slightly widening near the top and tapering to a sharp point at the bottom.
- Wrap the Rope: Starting at the bottom point of the carrot shape, apply a dab of hot glue and secure the end of your orange rope. Begin wrapping the rope tightly around the form, gluing every few rows to secure it tightly.
- Cover completely: Continue wrapping around and around until you reach the wide top edge of the carrot. Trim the excess rope and glue the end neatly behind the form.
- Prepare the Greens: Take your artificial greenery bunches and trim the stems down to about 4 inches. Group them together to mimic fresh, leafy carrot tops.
- Secure the Tops: Apply a generous amount of hot glue to the back top edge of the carrot form. Press the stems of the greenery firmly into the glue, securing them between the form and a backing piece of cardboard.
- Accent Bow: Tie a bow using black-and-white buffalo check ribbon and hot glue it directly over the base of the leafy green top to conceal the stems.
Styling Tips & Creative Variations
- Raffia Top: Replace plastic ferns with natural raffia tied with twine for a softer, rustic aesthetic.
- Trio Trio Display: Make three smaller carrots in varying lengths (12 inches, 10 inches, and 8 inches) and group them together on a wooden plaque as a wall display.
4. Dollar Tree Glass Candleholder Bunny Cloche
What This Idea Means
Glass cloches add instant elegance to home displays, but they can be expensive. This project pairs Dollar Tree glass terrarium globes or clear glass vases upside down over stemless candleholders to create a stunning glass cloche encasing a delicate Easter vignette.
Supplies Needed
- 1 Dollar Tree glass hurricane vase or rounded glass bowl
- 1 Dollar Tree pillar candleholder or small ceramic coaster
- 1 small faux bunny figurine (ceramic, resin, or flocking)
- Mini faux eggs and green moss
- Hot glue or E6000 industrial adhesive
- Small wooden knob or cabinet pull (Dollar Tree or scrap wood)
- Spray paint (white, gold, or matte black)
How to Make It
- Prepare the Top Knob: Spray paint a small wooden knob with matte white or brushed metallic gold paint. Once dry, use E6000 or hot glue to attach the flat base of the knob to the center top of your inverted glass vase (the flat bottom of the glass).
- Assemble the Pedestal Base: Flip your glass candleholder upside down to serve as a pedestal, or use a flat wooden/ceramic coaster as your base.
- Build the Vignette: Glue a bed of soft green moss on top of the base. Arrange your small bunny figurine in the center and nestle 2–3 mini speckled eggs into the moss surrounding the bunny.
- Place the Cloche: Carefully lower the inverted glass globe over the base and vignette, letting it rest flush against the bottom edge. Secure with a tiny dot of clear glue if desired, or leave unattached for easy seasonal updating.
Styling Tips & Creative Variations
- Vintage Book Page Accent: Cut a circular piece of old book paper or sheet music to glue under the moss for a subtle vintage layer.
- LED Fairy Dust: Tuck a micro-strand of warm fairy lights inside the glass dome around the bunny for an illuminated centerpiece.
5. Moss-Covered Bunny Silhouette Sign
What This Idea Means
Combining rich green natural textures with clean silhouette design, this project uses Dollar Tree wooden craft plaques and faux moss sheets to create a tactile piece of botanical wall art that looks like an expensive boutique find.
Supplies Needed
- 1 Dollar Tree wood plaque or stretched canvas (approx. 8×10 or 10×12 inches)
- 1 sheet of Dollar Tree adhesive moss sheet or loose preserved green moss
- White or light pastel acrylic paint or stain
- Bunny silhouette template (printed from the internet)
- Hot glue gun
- Burlap string or small faux flower buds
- Scissors
How to Make It
- Prepare the Plaque: Paint or stain your wooden plaque using light cream, white chalk paint, or a light wood wash. Allow it to dry thoroughly.
- Trace the Silhouette: Print out a simple bunny silhouette template that fits within your wooden plaque. Cut out the silhouette.
- Cut the Moss: Trace the silhouette onto the backing of your moss sheet (or on a piece of light cardstock if using loose moss). Carefully cut out the shape with sharp scissors.
- Attach to the Sign: Peel the backing from the moss sheet (or apply hot glue across the back of the cardstock) and center the moss bunny silhouette on your painted wood plaque. Press down firmly.
- Add the Pom-Pom Tail: Glue a tiny piece of white faux fur, a mini white yarn pom-pom, or a small white faux flower right on the tail area of the bunny silhouette for a cute 3D touch.
- Border & Detail: Frame the edge of the wood plaque with thin jute rope glued along the perimeter to cleanly finish the edges.
Styling Tips & Creative Variations
- Negative Space Version: Cover the entire board with moss, and cut the bunny shape out of a white piece of wood or cardstock overlaid on top so the green moss shows through the cutout.
- Spring Wreath Accent: Attach this completed sign directly to the center of a grapevine wreath for a complete front door arrangement.


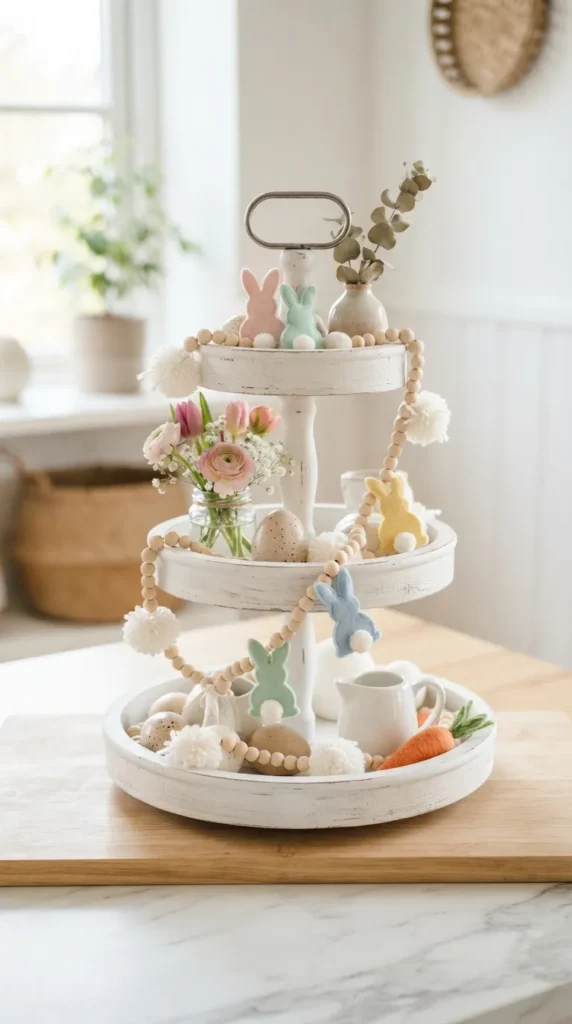
6. Dollar Tree Wooden Bead & Felt Bunny Garland
What This Idea Means
Scandinvian-inspired wooden bead garlands bring texture and modern warmth to spring decor. This project integrates raw wooden craft beads with soft pastel felt bunny cutouts to make a versatile garland perfect for mantle, tray, or shelf styling.
Supplies Needed
- 1 pack of natural wooden craft beads (16mm to 20mm sizes) from Dollar Tree
- 2–3 sheets of pastel craft felt (blush pink, sky blue, butter yellow, cream)
- Natural jute twine or cotton baker’s twine
- Tapestry needle with a large eye
- White yarn pom-poms or small felt balls
- Scissors and bunny stencil
How to Make It
- Cut the Bunnies: Using a simple bunny stencil, trace and cut 6–8 bunny shapes from your sheets of pastel felt.
- Add Tails: Hot glue a tiny white yarn pom-pom onto the lower back of each felt bunny to form a 3D tail.
- Prep the String: Cut a 5-foot length of jute twine. Tie a small loop at one end for easy hanging.
- Thread Beads and Bunnies: Thread your tapestry needle with the twine. String 8 to 10 natural wooden beads onto the twine, followed by a felt bunny (poking the needle through the top tips of the bunny ears), then another 8 to 10 beads.
- Repeat Pattern: Continue this alternating pattern—beads, felt bunny, beads—until you reach your desired length.
- Finish Ends: Tie off the remaining end of the garland with a matching loop or make a tassel out of jute twine to anchor each end.
Styling Tips & Creative Variations
- Dip-Dyed Beads: Dip every third bead into pastel acrylic paint before stringing for an added pop of modern color.
- Tiered Tray Accent: Drape a shorter 2-foot version of this garland across a two-tiered farmhouse display tray along with mini egg cups and candles.
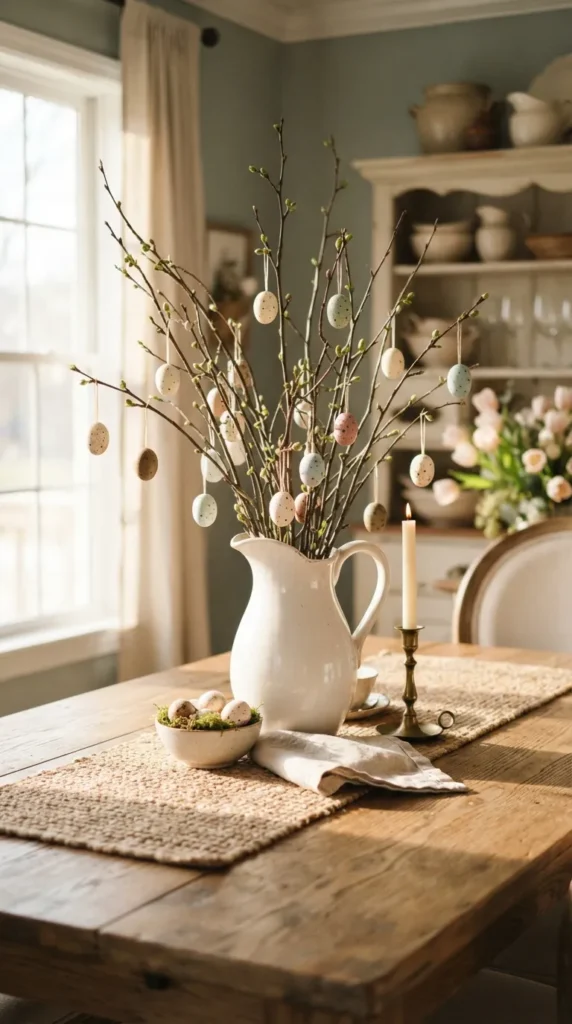
7. Burlap & Ribbon Easter Tree Centerpiece
What This Idea Means
In European spring traditions, twig trees hung with egg ornaments are a sign of new life. This budget-friendly DIY captures that classic charm using real branches from your yard, Dollar Tree vase fillers, and custom burlap ribbon accents.
Supplies Needed
- 1 glass pitcher or sturdy vase (Dollar Tree)
- 4–5 tall dried branches or faux blossom stems from your yard or store
- 2 packs of mini lightweight foam Easter eggs with hanging loops
- 1 spool of 1.5-inch burlap ribbon or pastel satin ribbon
- White river rocks, glass marbles, or floral foam (to anchor stems)
- Matte acrylic spray paint (optional, for painting branches white or metallic gold)
How to Make It
- Prepare the Base: Place floral foam or weigh down the bottom of your Dollar Tree vase with white river stones or glass marbles.
- Prep the Branches: Collect clean, sturdy branches with plenty of offshoots. If desired, spray paint the branches matte white, light gray, or soft metallic gold for a uniform look.
- Arrange Stems: Insert the main stems of your branches securely into the base material inside the vase, arranging them outward to form a balanced tree canopy.
- Wrap the Vase: Wrap your burlap ribbon around the waist of the glass vase and tie a relaxed tail bow.
- Hang the Eggs: Space out the mini foam eggs and hang them from the small side twigs of your tree using their pre-attached ribbon loops or short lengths of jute twine.
- Base Concealment: Cover the top exposed rocks inside the vase with fresh green moss or shred paper.
Styling Tips & Creative Variations
- Lace & Crystal Upgrades: Add strips of delicate white lace ribbon loops between the hanging eggs for an elegant vintage aesthetic.
- Egg Shell Candle Base: Surround the base of the pitcher on your table with real hollowed eggshells filled with tiny tealight candles.
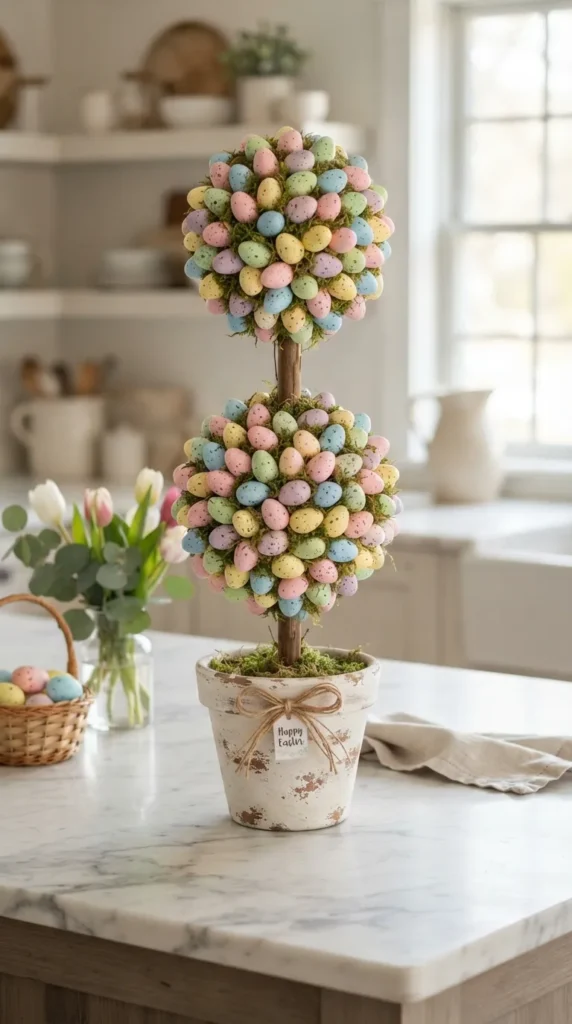
8. Dollar Tree Floral Foam & Egg Topiary
What This Idea Means
Symmetrical, sculpted topiaries provide structure, height, and visual interest to entry hall tables or mantelpieces. This project uses stacked Dollar Tree foam balls, pastel eggs, and moss to construct an elegant double-sphere topiary in a terra cotta base.
Supplies Needed
- 2 smooth foam spheres (1 medium, 1 slightly smaller) from Dollar Tree
- 1 small terra cotta pot or decorative planter
- 1 wooden dowel rod (1/2 inch thick, roughly 12 inches long)
- 3–4 packs of mini foam speckled eggs
- Green sheet moss or floral moss
- Hot glue gun and glue sticks
- Spray paint or acrylic paint for the pot
How to Make It
- Prepare the Base Pot: Paint your terra cotta pot in white chalk paint, distressing the edges lightly with sandpaper for a shabby-chic finish.
- Anchor the Dowel: Fill the pot with floral foam, cut to fit snugly. Push the bottom end of your wooden dowel straight into the center of the foam, securing it with hot glue.
- Form the Topiary Structure: Push the medium foam sphere halfway down the dowel, then press the smaller foam sphere onto the top end of the dowel. Secure both with generous dabs of hot glue.
- Cover with Moss Base: Glue small patches of green sheet moss over both foam spheres so no white foam shows through.
- Attach Eggs: Hot glue mini speckled eggs densely across the surface of both moss-covered spheres, mixing colors evenly.
- Finish the Base: Fill the top opening of the terra cotta pot around the dowel with additional moss and a few scattered mini eggs.
Styling Tips & Creative Variations
- Boxwood Topiary: Replace the foam eggs on the top sphere with faux boxwood leaves, leaving just the bottom sphere adorned with mini eggs.
- Ribbon Wrap: Wrap a thin pastel pink or blue satin ribbon spiral up the wooden dowel stem before assembling.
9. Framed Dollar Tree Bunny Nest Art
What This Idea Means
Turn an inexpensive Dollar Tree picture frame into 3D gallery-style wall art by removing the front glass and building a textured nest with a mini egg display on a burlap background.
Supplies Needed
- 1 Dollar Tree wooden picture frame (5×7 or 8×10 inches)
- 1 piece of burlap fabric or scrap linen cut to frame size
- Shredded kraft paper, excelsior wood shred, or twig nest materials
- 3 small speckled foam eggs
- Hot glue gun
- White acrylic paint for distressing the frame
- Small sprig of faux lavender or baby’s breath
How to Make It
- Refinish the Frame: Disassemble the frame and remove the glass (you won’t need it for this 3D craft). Paint the wooden frame with white paint and wipe away excess while wet to give it a distressed, white-washed look.
- Backing Preparation: Wrap the original frame cardboard backing sheet tightly with your piece of burlap or linen fabric, securing it on the back with hot glue.
- Construct the Nest: Form a small circle of shredded excelsior, twig fibers, or brown kraft paper. Shape it into a realistic mini bird/bunny nest shape and glue it securely to the lower center of the burlap backing.
- Nest Details: Glue 3 small speckled eggs inside the center of the nest. Tuck a small sprig of faux lavender or baby’s breath along the side of the nest.
- Reassemble: Pop the burlap-covered backing board back into the frame and lock the tabs down.
Styling Tips & Creative Variations
- Printed Script Layer: Glue a page of old sheet music onto the backing behind the nest for a romantic vintage touch.
- Shadow Box Style: Use a deeper shadowbox frame and add a tiny wooden bunny silhouette sitting beside the nest.
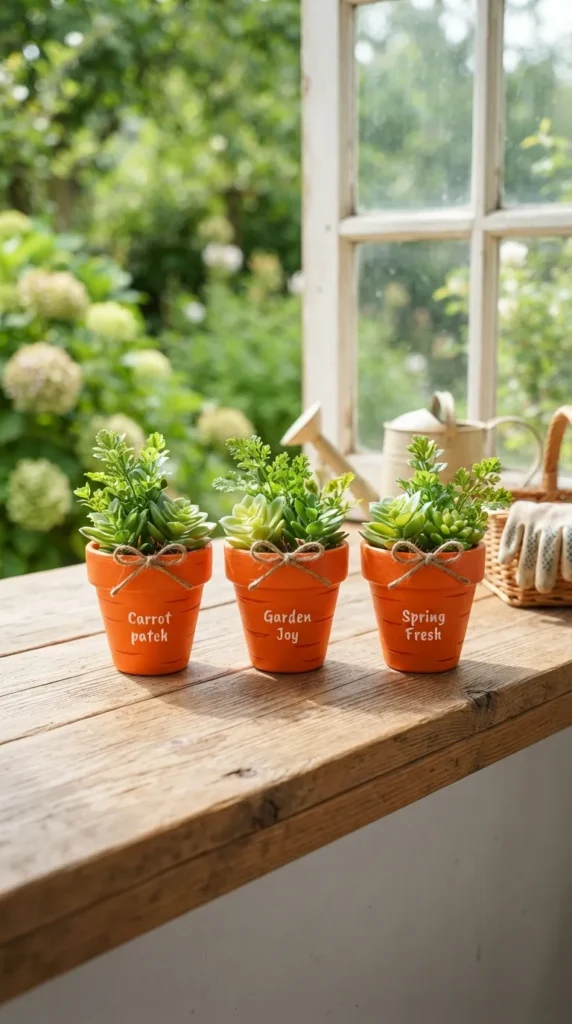
10. Terra Cotta Pot Carrot Planters
What This Idea Means
This project turns small, inexpensive clay or plastic pots into playful carrot-themed containers. Perfect for holding spring treats, real succulents, or faux greenery, these brighten up any windowsill or dining table setting.
Supplies Needed
- 3–4 mini terra cotta pots (Dollar Tree, usually sold in 3-packs)
- Bright orange acrylic paint or orange chalk paint
- White acrylic paint and dark orange paint for shading
- Faux grass, faux ferns, or real spring succulents
- Jute twine
- Foam paintbrushes and fine detail brushes
How to Make It
- Base Color: Clean and dry the clay pots. Apply 2 coats of bright orange paint across the outside and inside upper rim of each pot. Let dry.
- Add Texture Lines: Using a fine detail brush and dark orange/brown paint, brush small horizontal curved line strokes across the sides of the pots to mimic the natural ridges found on real carrots.
- Dry-Brush Highlights: Dip a dry brush lightly into white paint, brush off most of the paint on a paper towel, and flick light vertical strokes over the pots for depth.
- Rim Accent: Wrap jute twine around the top lip of each terra cotta pot 3–4 times and tie off with a simple knot.
- Fill and Plant: Fill the interior of the pots with faux grass, faux fern stems, or plant real spring succulents directly into soil.
Styling Tips & Creative Variations
- Personalized Place Settings: Paint guest names in white cursive lettering onto the side of each pot and place one on each dining plate as an Easter favor.
- Distressed Cottage Look: Lightly sand the edges of the painted pots before adding twine for a weathered, vintage garden vibe.

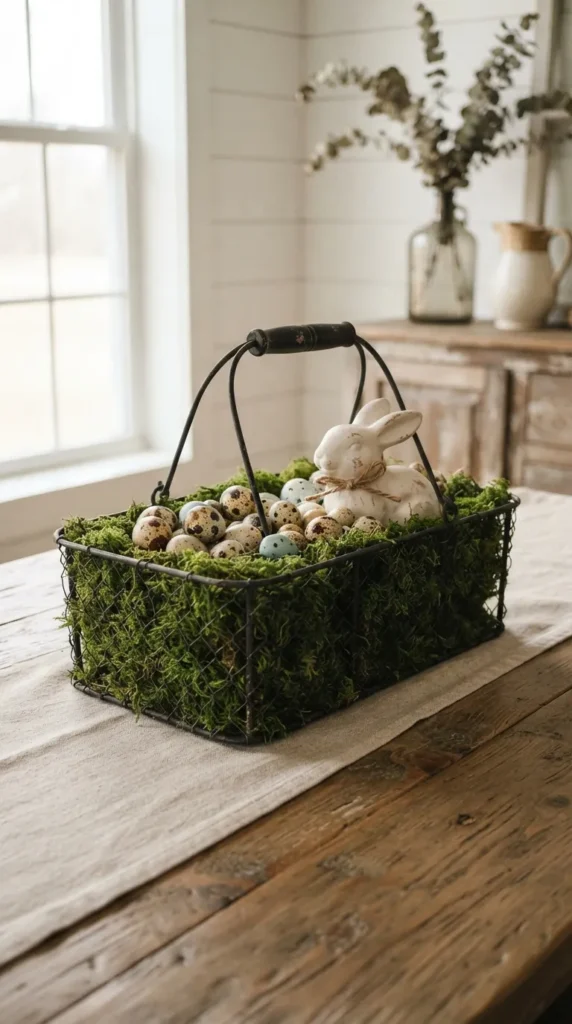
11. Farmhouse Dollar Tree Wire Basket Bunny Nest
What This Idea Means
Industrial metal wire baskets are a staple of modern farmhouse design. By filling a Dollar Tree metal wire caddy with soft moss, decorative eggs, and green foliage, you create a cozy table centerpiece that balances industrial chic with soft organic spring elements.
Supplies Needed
- 1 Dollar Tree wire basket or metal caddy
- 1 sheet of Spanish moss or green forest moss
- 6–8 medium-sized painted or speckled eggs
- Faux sprigs of eucalyptus, greenery, or spring blossoms
- 1 small resin or ceramic bunny figurine
- Strip of gingham or grain sack fabric ribbon
How to Make It
- Line the Basket: Fluff your Spanish moss or green forest moss and line the entire wire basket, allowing small tendrils of moss to peek naturally through the metal wire grids.
- Build the Nest Base: Layer additional moss or excelsior wood strands in the center to create a slightly dished nest shape.
- Set the Scene: Place your small bunny figurine slightly off-center inside the basket.
- Arrange Eggs & Foliage: Nestled the decorative eggs around the bunny. Tuck small sprigs of faux eucalyptus or floral stems around the perimeter to soften the metal lines.
- Ribbon Accent: Tie a piece of grain sack or gingham ribbon around the top handle or side loop of the wire basket.
Styling Tips & Creative Variations
- Candle Centerpiece: Nest a white pillar candle inside a glass hurricane vase in the center of the basket, building the nest and eggs around the glass.
- Wire Dyeing: Spray paint the wire basket black or antique bronze before filling to give it a darker rustic contrast against bright greens.
12. Pastel Speckled Egg Mason Jar Vases
What This Idea Means
Mason jars are the ultimate craft canvas. By painting them in ultra-matte spring pastels and adding dry-brushed distressing along with egg-speckling effects, they become charming vases for fresh spring tulips, daffodils, or faux greenery.
Supplies Needed
- 3 Dollar Tree glass mason jars or milk bottles
- Pastel chalk paints (mint green, pale pink, butter yellow)
- Dark brown acrylic paint and toothbrush for speckling
- Medium-grit sandpaper
- Jute twine
- Fresh or artificial spring flowers (tulips, daisies, baby’s breath)
How to Make It
- Paint the Jars: Apply 2–3 thin coats of pastel chalk paint to the exterior of each jar, letting them dry completely between coats.
- Distress the High Points: Once fully dry, use sandpaper to lightly rub away paint along the raised lettering, jar threads, and bottom edge of the jars to expose the glass beneath.
- Add Speckles: Dip a toothbrush into water-diluted dark brown paint and flick tiny specks over all surfaces of the jars.
- Tie Twine: Wrap jute twine around the neck of each jar 4–5 times and tie into a neat bow.
- Arrange Flowers: Fill with water and fresh spring tulips, or arrange faux greenery and floral stems inside. Group all three jars together in a row.
Styling Tips & Creative Variations
- Wooden Box Display: Place the trio of jars inside an inexpensive wooden craft crate or painted Dollar Tree tray.
- Lace Overlay: Wrap a strip of white vintage lace around the center of each jar before tying the twine bow.
13. Dollar Tree Plastic Egg Succulent Planters
What This Idea Means
Instead of throwing away oversized bright plastic Easter eggs, split them in half and repurpose them into contemporary mini succulent planters. Painted in modern stone finishes, they serve as unique favors or window sill accents.
Supplies Needed
- 1–2 packs of large or medium plastic snap-together Easter eggs (Dollar Tree)
- Textured stone spray paint or matte pastel acrylic paints
- Faux mini succulents or real miniature succulent cuttings
- Small pebbles or pea gravel
- Hot glue gun and small wooden rings/washers (for bases)
How to Make It
- Prepare Bases: Glue a small wooden ring, washer, or bottle cap to the rounded bottom of each plastic egg half using hot glue so it can stand upright without tipping over.
- Paint the Shells: Spray paint the egg halves using textured stone spray paint or apply two coats of matte chalk paint. This completely masks the cheap plastic texture.
- Fill with Drainage: Add a few small pebbles into the bottom of each egg half to act as drainage layer or weight.
- Add Succulents: If using faux succulents, insert them into a small piece of floral foam fitted inside the egg, then top with small pebbles or moss. If using real succulents, fill with potting soil and plant carefully.
Styling Tips & Creative Variations
- Egg Carton Display: Place a row of six succulent-filled egg halves into a real cardboard egg carton painted in soft off-white.
- Gold Leaf Edging: Paint the top ragged rim of each egg half with metallic gold leaf paint for an exquisite modern touch.
14. Rustic Wooden Egg Pedestal Stand
What This Idea Means
Elevating decor items on wooden risers gives a display depth and sophistication. This craft combines a Dollar Tree unfinished wooden egg cutout or wood plaque with a small candleholder base to create a raised pedestal stand for spring vignettes.
Supplies Needed
- 1 Dollar Tree egg-shaped wooden plaque
- 1 small wooden or glass candleholder/cup
- Off-white paint or wood stain
- Sandpaper
- Wood glue or E6000 industrial adhesive
- Stencil or craft stamps (optional, e.g., spring words or floral patterns)
How to Make It
- Attach the Base: Flip the egg-shaped wooden plaque face down. Center the small wooden or glass candleholder onto the underside of the plaque and bond with wood glue or E6000. Clamp or place a weight on top until dry.
- Paint or Stain: Paint the entire assembled pedestal stand with off-white chalk paint or apply a dark oak stain for a rich, warm wood tone.
- Distress: Once dry, lightly sand along the edges of the egg top and candleholder base to create an authentic antiqued look.
- Optional Stenciling: Use a stencil to add a delicate botanical branch or words like “Hop” or “Spring” in gray paint onto the top surface of the egg.
Styling Tips & Creative Variations
- Riser for Cloches: Use this pedestal as the raised platform for Idea #4 (Glass Bunny Cloche).
- Tiered Tray Feature: Place a small nest and egg right on top of this pedestal to highlight it inside a larger display.
15. Dollar Tree Pizza Pan Easter Welcome Sign
What This Idea Means
Dollar Tree metal pizza pans are a favorite among budget crafters. By painting and applying vinyl lettering or painted stencils, these round metal bases become chic, door-ready signs that rival expensive boutique wreaths.
Supplies Needed
- 1 Dollar Tree metal pizza pan
- Matte white, sage green, or black spray paint
- Printable vinyl, sticker lettering, or stencils (“Welcome Spring” or “Happy Easter”)
- Greenery sprigs (eucalyptus, boxwood, or blossoms)
- Burlap and buffalo check ribbon
- Hot glue gun and braided twine for hanging
How to Make It
- Paint the Base: Spray paint the front and back of the pizza pan with two coats of matte paint (white or soft sage work wonderfully). Let dry completely.
- Apply Lettering: Carefully align and adhere your vinyl decal or stencil text (“Welcome to Our Nest” or “Happy Easter”) onto the center of the pan. Press down firmly.
- Create the Top Floral Arrangement: Layer two small bunches of faux greenery facing outward in opposite directions at the top center of the pan. Glue the stems securely.
- Make and Attach Bow: Tie a large bow with buffalo check or burlap ribbon. Hot glue it directly over the center where the greenery stems meet.
- Add Hanger: Glue a loop of thick braided jute twine to the upper back of the pizza pan, reinforcing it with a scrap piece of cardboard glued over the twine ends.
Styling Tips & Creative Variations
- Magnetic Sign: Glue a sheet of magnetic paper to the pan before painting so you can swap out central seasonal cutout icons year-round.
- Shiplap Effect: Use a ruler and thin black permanent marker or paint pen to draw faint horizontal shiplap lines across the white painted pan before adding lettering.



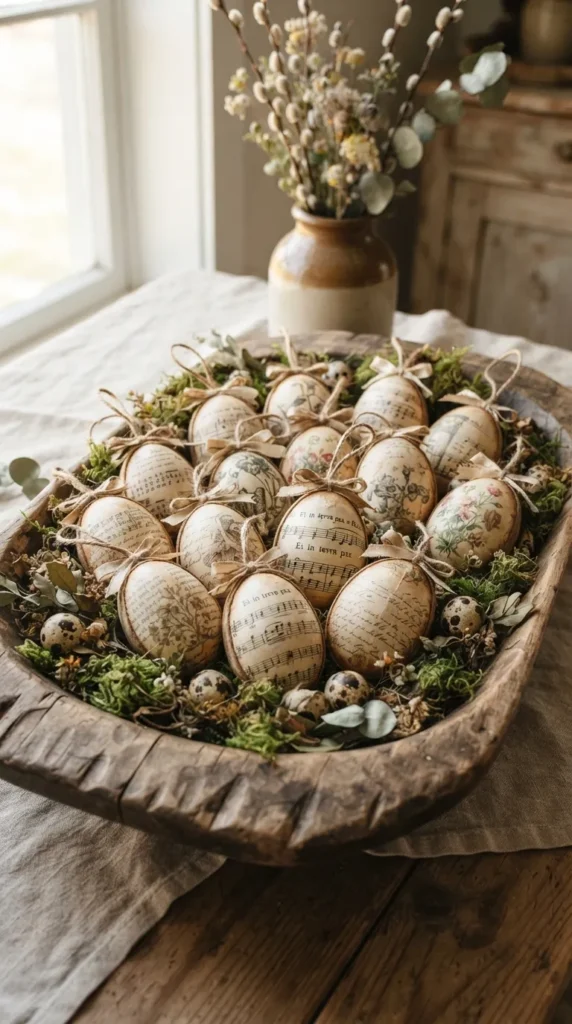
16. Vintage-Style Book Page Egg Ornaments
What This Idea Means
Recycling old book pages, music sheets, or map prints into craft projects creates instant vintage charm. Wrapping lightweight Dollar Tree foam eggs in aged paper strips provides a sophisticated, literary look to your Easter decor tree or bowl fillers.
Supplies Needed
- 1 pack of foam Easter eggs (Dollar Tree)
- Pages from an old damaged book or vintage sheet music
- Mod Podge or PVA craft glue
- Sponge brush
- Dark brown ink pad or diluted brown paint for aging
- Natural jute twine for hanging loops
How to Make It
- Prepare Paper Strips: Tear (don’t cut) old book pages into narrow strips roughly 1/2 inch wide and 3 inches long. Tearing gives soft, feathered edges that blend seamlessly when decoupaged.
- Apply Paper: Brush a layer of Mod Podge onto a foam egg. Lay a strip of book paper onto the glue, smoothing it down with your fingers. Repeat, overlapping strips until the entire egg is covered.
- Seal: Coat the entire paper-covered egg with a thin top layer of Mod Podge to seal it.
- Age the Edges: Once dry, lightly rub a brown ink pad or a dry sponge dipped in diluted brown paint along the edges and seams of the paper to add a warm, antique patina.
- Attach Hanging Loop: Glue a folded loop of thin jute twine to the top of the egg, finishing with a small knot or mini button.
Styling Tips & Creative Variations
- Botanical Print Strips: Use printed pages from discarded botanical field guides for colorful floral and leaf patterns.
- Dough Bowl Fillers: Make 10–12 of these paper eggs without hanging loops and mound them inside a rustic wooden dough bowl along with moss and dried lavender.
17. Ribbon & Twig Easter Table Runner
What This Idea Means
Instead of a standard fabric runner, construct an organic, textural table runner using natural twigs bundled together with twine and interwoven with delicate pastel ribbons, moss, and scattered eggs.
Supplies Needed
- Clean twigs and slim branches (12 to 15 inches long, gathered outdoors)
- 1 roll of thick jute twine
- Spanish moss or sheet moss
- Assorted pastel ribbons (satin, lace, or grosgrain)
- Mini foam eggs and faux spring flowers
- Hot glue gun
How to Make It
- Prepare Twigs: Collect twigs of roughly equal thickness and trim them all to approximately 12–14 inches in length.
- Weave the Base: Lay two long pieces of jute twine parallel on your work surface. Tie the first twig across both strings using simple double knots. Place the next twig beside it and knot the twine around it. Continue this ladder pattern until your runner reaches your desired length (e.g., 3 to 4 feet long).
- Soft Coverage: Tuck patches of green moss into the small gaps between twigs, securing with small dabs of hot glue.
- Interweave Ribbons: Thread lengths of pastel ribbon over and under the twigs along the edges and down the center of the runner.
- Scatter Accents: Glue mini foam eggs, small flower heads, and faux greenery randomly along the length of the twig runner.
Styling Tips & Creative Variations
- Illuminated Runner: Weave a battery-operated strand of micro fairy lights down the center of the twig structure.
- White-Washed Vibe: Dry-brush white paint across the twigs before assembly for a softer Scandinavian look.
18. Faux Wooden Slice Bunny Place Cards
What This Idea Means
Natural wood slice elements bring rustic warmth to the table. Using Dollar Tree craft wood circles, paint, and fine-line markers, you can craft adorable bunny-ear place card holders that greet your guests at Easter dinner.
Supplies Needed
- 1 pack of Dollar Tree natural wood slices (with bark perimeter)
- White and pink felt or stiff craft paper
- Black fine-tip permanent marker or paint pen
- Hot glue gun
- Mini wooden clothespins (Dollar Tree)
- Name tags (kraft paper cardstock)
How to Make It
- Prep the Base: Smooth the face of each wood slice if necessary using fine sandpaper.
- Craft Bunny Ears: Cut double ear shapes out of white felt or cardstock, gluing smaller pink felt inner ears onto each.
- Attach Ears: Hot glue the bottom base of the ears to the upper back rim of the wood slice so they extend upward above the wood circle.
- Attach Card Holder: Hot glue a mini wooden clothespin horizontally or vertically onto the upper front face of the wood slice.
- Write Names: Write your guest’s name on a small piece of kraft cardstock and clip it into the mini clothespin.
- Face Details (Optional): Draw tiny whisker dots and a small pink heart nose onto the center of the wood slice using your fine-point markers.
Styling Tips & Creative Variations
- Earthy Stamping: Stamp initials onto the wood slice using letter stamps and dark ink instead of using cardstock clips.
- Take-Home Favor: Attach a magnet to the back so guests can take their personalized place card home to use on their refrigerator.
19. Dollar Tree Floral Hoop Easter Wreath
What This Idea Means
Modern floral hoop wreaths feature asymmetrical greenery and flowers mounted on minimal wire or bamboo rings. This trendy, lightweight craft uses Dollar Tree metal rings or wooden embroidery hoops along with faux floral sprigs to create an airy, contemporary piece.
Supplies Needed
- 1 Dollar Tree metal wreath ring or wooden embroidery hoop (10–12 inch)
- 2 bunches of faux spring florals (e.g., peonies, ranunculus, or cherry blossoms)
- 1–2 sprigs of faux greenery (eucalyptus, lamb’s ear, or boxwood)
- Floral wire and wire cutters
- Hot glue gun
- Ribbon for hanging
How to Make It
- Prepare Hoop: Clean the hoop. If using a metal hoop, you can spray paint it metallic gold, white, or matte black.
- Attach Greenery Base: Curve greenery stems along the bottom-left arch of the hoop (covering roughly one-third of the total ring circumference). Bind tightly with floral wire.
- Layer Focal Flowers: Trim faux flower heads leaving a 1-inch stem. Layer them over the greenery stems, using hot glue and floral wire to secure the largest flowers near the center of the arrangement.
- Tuck Accent Details: Add smaller buds, mini eggs, or tiny filler flowers around the focal blossoms to create a balanced, tapered look.
- Leave Asymmetry: Keep the remaining two-thirds of the hoop completely bare to preserve the modern minimalist style.
- Hanger: Tie a simple linen or velvet ribbon loop at the top of the hoop for hanging.
Styling Tips & Creative Variations
- Central Hanging Figurine: Hang a lightweight wood cutout bunny in the center empty space of the hoop with thin clear monofilament string.
- Double Hoop Design: Nest a smaller 8-inch hoop inside a 12-inch hoop before wiring greenery to create geometric depth.
20. Dollar Tree Salt Dough Egg Tree Centerpiece
What This Idea Means
Salt dough crafts are a timeless DIY tradition that can be elevated to look like high-end Scandinavian ceramic ornaments. Shaped into delicate flat eggs, stamped with botanical impressions, and baked, these lightweight ornaments hang elegantly on spring branches.
Supplies Needed
- 2 cups plain flour, 1 cup table salt, 1 cup water (kitchen staples)
- Fresh herbs or faux fern/flower sprigs for stamping impressions
- Egg-shaped cookie cutter (or glass tumbler and knife)
- Straw or toothpick to make hanging holes
- White acrylic paint and clear sealer Mod Podge
- Thin jute string or velvet ribbon
How to Make It
- Mix Dough: Knead flour, salt, and water together in a bowl for 5–10 minutes until a smooth dough forms.
- Roll and Stamp: Roll the dough out on a floured surface to roughly 1/4-inch thickness. Press fresh rosemary, fern leaves, or flower blossoms firmly into the dough surface, then gently peel them off to leave detailed botanical impressions.
- Cut Egg Shapes: Cut out egg shapes around the stamped impressions using an egg-shaped cutter.
- Puncture Hole: Use the end of a drinking straw to punch a clean hole at the top of each egg for the ribbon.
- Bake: Bake on a parchment-lined baking sheet at 200°F (95°C) for 2 to 3 hours, flipping halfway through until rock hard. Let cool completely.
- Paint Accent: Dry-brush white acrylic paint across the surface, letting the paint settle into the stamped leaf grooves. Seal with a coat of matte Mod Podge. Thread ribbon through the hole.
Styling Tips & Creative Variations
- Watercolor Wash: Paint soft pastel watercolor washes inside the leaf impressions before sealing to make the botanical details pop.
- Essential Oil Diffuser: Omit the sealer and drop 2–3 drops of lavender essential oil onto the back of the porous salt dough eggs so your centerpiece subtly scents the room.