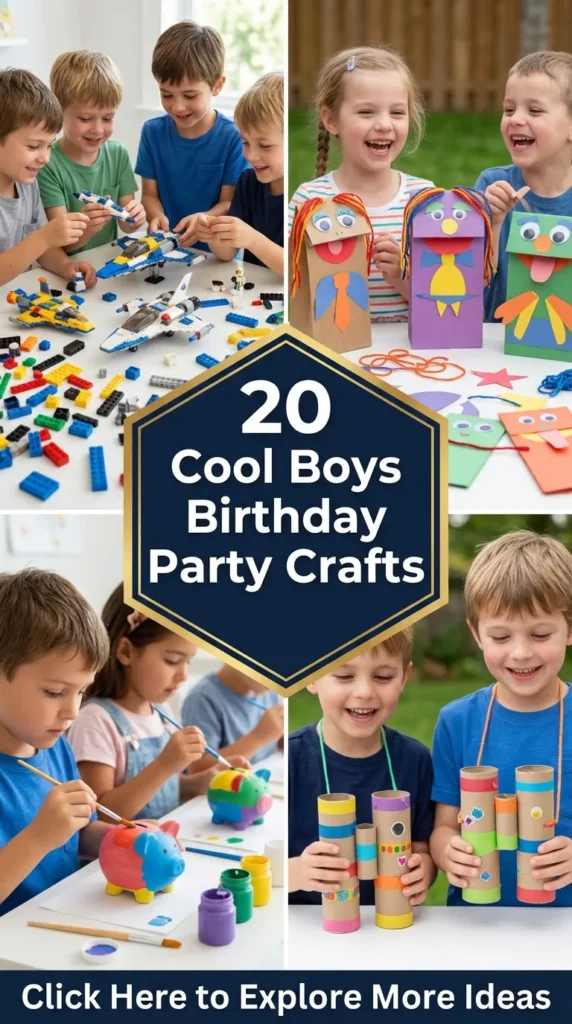
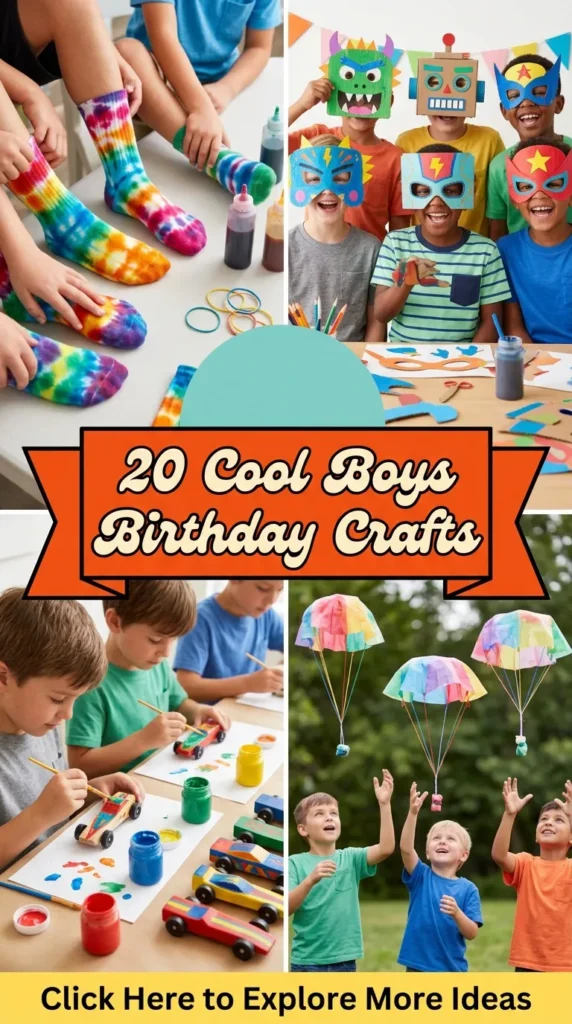
Planning a birthday party for boys requires a balance of energy, creativity, and hands-on fun. Interactive craft stations serve double duty: they keep young guests fully engaged with an immersive activity and double as unique, custom party favors that kids can proudly take home.
Below are 20 engaging, budget-friendly, and easy-to-run party craft ideas designed to suit various age groups, space setups, and party themes.




1. Custom Galaxy Slime Jars
            +-----------------------------------------------+
            |              GALAXY SLIME JARS                |
            +-----------------------------------------------+
            |  * Prep Time: 10 mins                         |
            |  * Skill Level: Easy                          |
            |  * Mess Factor: Moderate                      |
            |  * Best For: Ages 6+                          |
            +-----------------------------------------------+
What This Craft Means
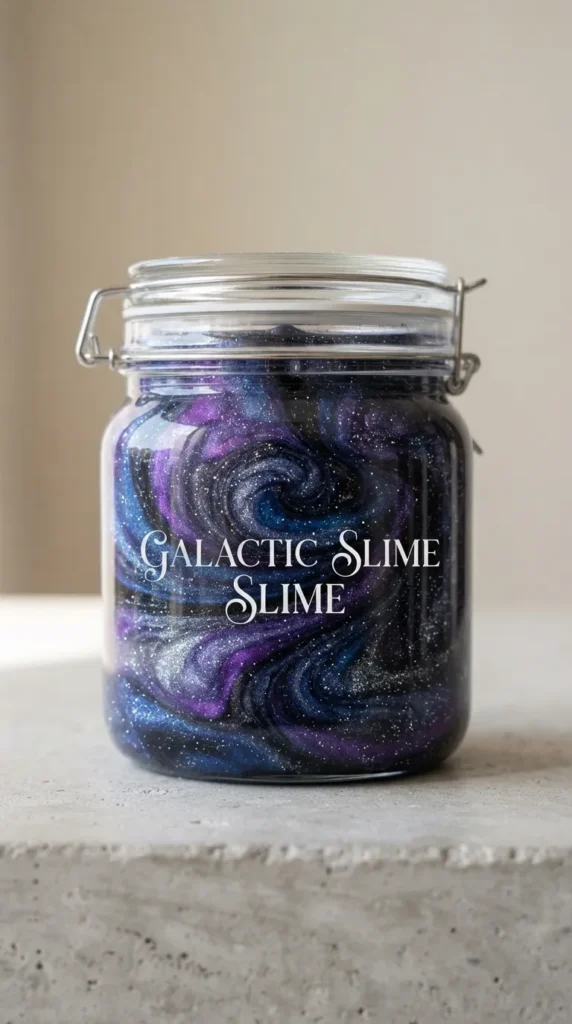
Galaxy Slime gives kids a tactile, cosmic creation experience. By blending deep shades of blue, purple, and black with metallic glitters, each child crafts a swirl of “outer space” inside a sealed glass or plastic jar.
Materials Required
- Clear PVA glue (4 oz per child)
- Warm water & liquid starch (or contact lens solution + baking soda)
- Fine glitter (silver, cosmic blue, deep purple)
- Dark liquid watercolors or food coloring (navy blue, deep purple, black)
- Airtight 8 oz plastic or glass jars with custom labels
Step-by-Step Instructions
- Mix the Base: Pour 4 oz of clear glue into a plastic bowl. Stir in 2 tablespoons of warm water to loosen the consistency.
- Color the Stars: Add 2–3 drops of navy blue or deep purple liquid watercolor. Stir until fully blended.
- Add the Starlight: Generously sprinkle silver and purple glitter into the mixture.
- Activate the Slime: Slowly add 1 tablespoon of liquid starch while stirring continuously. Once the mixture pulls away from the bowl edges, knead it by hand for 2–3 minutes until smooth and non-sticky.
- Layer and Store: Repeat the process in separate small bowls with different colors, then twist the colors together gently and transfer into the storage jar.
Pro Tips & Creative Variations
- Glow-in-the-Dark Boost: Stir 1/2 teaspoon of glowing zinc sulfide powder into the glue base before activating for night-glow slime.
- Mini Alien Figures: Drop tiny plastic alien figurines into the jars for an extra surprise element.
Mistakes to Avoid
Avoid using white school glue if you want a translucent space effect; clear PVA glue produces deep contrast for glitters. Do not add contact lens solution without baking soda, or the slime will fail to activate properly.
2. Cardboard Superhero Shield Design
What This Craft Means
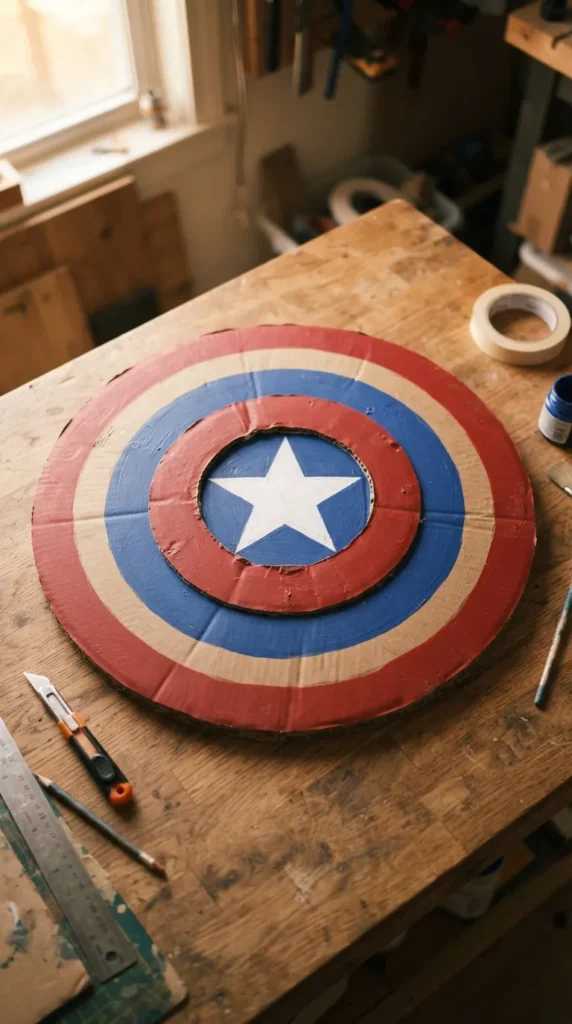
Cardboard Superhero Shields transform simple structural cardboard into durable, stylized defensive gear. Kids choose their own emblem, color scheme, and handle styles to build personal superhero personas.
       _____                      _____
     /       \                  /       \
    /   (*)   \    +======+    /   (*)   \
   |  SHIELD   |---| REAR |---|  SHIELD   |
    \  FRONT  /    | HANDLE|   \   BACK  /
     \_______/     +======+     \_______/
Materials Required
- Pre-cut 14-inch cardboard circles (double-wall corrugated preferred)
- Heavy-duty duct tape (various colors)
- Acrylic craft paint & foam brushes
- Pre-printed emblem stencils (stars, lightning bolts, shields)
- Flexible strip handles (nylon webbing or thick cardstock straps)
Step-by-Step Instructions
- Prepare the Base: Distribute pre-cut cardboard discs with edges wrapped in black duct tape for structural integrity.
- Apply Primary Coat: Paint the front face of the shield using foam brushes and quick-drying acrylic paint.
- Stencil Emblems: Once dry, lay stencils over the center and dab contrasting paint to create superhero logos.
- Attach Rear Handles: Flip the shield face-down. Secure two flexible webbing straps across the back using heavy-duty duct tape, leaving enough slack for a child’s arm to slide through comfortably.
Pro Tips & Creative Variations
- Metallic Accents: Provide silver and gold chrome paint markers to detail rim rivets and center symbols.
- 3D Center Emblems: Pre-cut foam-board shapes so kids can glue raised emblems onto their shield centers.
Mistakes to Avoid
Avoid using water-heavy watercolor paints, which warp corrugated cardboard discs. Ensure hot glue guns are handled strictly by adults if used for structural handle attachment.
3. Wooden Race Car Decorating
What This Craft Means
This craft gives kids raw pine race car blanks to paint, detail, and deck out with high-speed racing decals. It combines classic woodworking aesthetics with personalized graphic design.
Materials Required
- Unfinished pine wood toy car blanks (with pre-installed wheels)
- Acrylic paint pens (medium tip)
- Number decals & racing stripe stickers
- Sanding sponges (fine grit)
- Clear coat spray (applied by adult after drying)
Step-by-Step Instructions
- Prep the Wood: Have kids gently rub their wooden car blank with fine-grit sanding sponges to smooth any rough edges.
- Apply Base Color: Draw and fill in primary body colors using acrylic paint pens, which dry much faster than liquid paint.
- Detail the Body: Add headlights, grill lines, window outlines, and exhaust pipes using fine-tip black markers.
- Decal Application: Apply vinyl racing numbers, checkered flags, and sponsor-style stickers to the sides and hood.
Pro Tips & Creative Variations
- Ramp Testing Station: Set up a mini wooden launch ramp at the party venue so kids can race their finished creations against each other.
- Neoprene Tires: Provide tiny rubber bands to stretch over the wooden wheels for added traction during races.
Mistakes to Avoid
Avoid using wet paint brushes that oversaturate untreated pine wood, which causes color bleeding along the grain. Keep stickers off raw, dusty wood by sanding and wiping clean first.
4. Mini Dino Excavation Fossils
       +-----------------------------------+
       |    DINO FOSSIL CASTING PROCESS    |
       +-----------------------------------+
       |  1. Plaster + Sand Mixture         |
       |  2. Embed Plastic Dinosaur        |
       |  3. Set & Cure in Mold             |
       |  4. Excavate with Wooden Tools    |
       +-----------------------------------+
What This Craft Means
Mini Dino Excavation Fossils simulate real-world paleontology. Kids play the role of archaeologists as they use wooden tools to carefully dig mini plastic dinosaurs out of cured plaster blocks.
Materials Required
- Plaster of Paris
- Fine play sand
- Mini plastic dinosaur skeletons
- Silicone muffin molds
- Small wooden chisels & stiff-bristled paintbrushes
Step-by-Step Instructions
- Mix the Matrix: Combine 2 parts Plaster of Paris, 1 part play sand, and 1 part water in a bucket until smooth.
- Embed Dinosaurs: Pour the mixture halfway into silicone molds, place a mini dinosaur in each cavity, and top off with more plaster mixture.
- Set the Blocks: Allow the fossils to cure completely for 24 hours prior to the party.
- Excavate: At the party, hand out safety goggles, wooden chisels, and brushes. Guide the kids as they carefully chip away the casing to reveal their dinosaur.
Pro Tips & Creative Variations
- Hidden Gems: Add small polished river rocks or gold foil flakes inside the block alongside the dinosaur for bonus discoveries.
- Color-Coded Layers: Pour the plaster in two different color layers (using non-toxic powder pigment) to represent distinct geological strata.
Mistakes to Avoid
Avoid pouring leftover wet plaster down residential sinks, as it solidifies and clogs plumbing. Do not use metal chisels or hammers, which can break the mini plastic figures inside and create sharp edges.
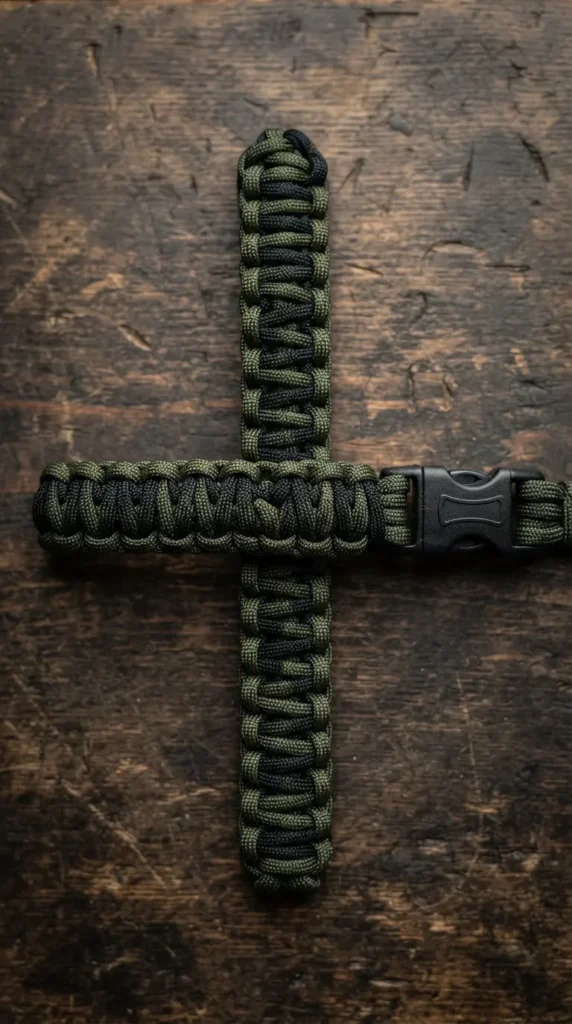
5. Paracord Survival Bracelets
What This Craft Means
Paracord survival bracelets let older kids weave military-grade parachute cord around quick-release side buckles. It teaches useful knots while making a rugged accessory.
      Buckle End A                              Buckle End B
     +------------+   /\    /\    /\    /\   +------------+
     |   [====]   |==/  \__/  \__/  \__/  \==|   [====]   |
     +------------+  \__/  \__/  \__/  \__/  +------------+
                        Cobra Stitch Weave
Materials Required
- 550 Paracord (8 feet per bracelet in various colors)
- 3/8-inch plastic side-release buckles
- Scissors
- Tape measure
- Lighter (for adult end-sealing only)
Step-by-Step Instructions
- Measure Wrist: Wrap cord around the child’s wrist and add 1 inch for comfortably loose sizing.
- Anchor Cord: Fold the 8-foot length in half, thread the loop through one side of the buckle, and draw the ends through to form a cow hitch.
- Thread Second Buckle: Slide the two loose ends through the second buckle piece to set the overall bracelet length.
- Cobra Weave: Alternate square knots over the two center core strands until reaching the opposite buckle.
- Finish Ends: Trim excess cord leaving 1/4 inch; an adult then carefully melts the raw ends using a lighter to lock the weave.
Pro Tips & Creative Variations
- Whistle Buckles: Supply side-release buckles that include built-in emergency whistles and mini compasses.
- Dual-Color Weave: Fuse two contrasting cord colors together at the center before starting to weave a two-toned band.
Mistakes to Avoid
Avoid leaving paracord ends unsealed, as the inner strands will quickly fray and unravel. Do not pull knots unevenly, which causes the bracelet to twist awkwardly.

6. Personal Magic Wand Crafting
What This Craft Means
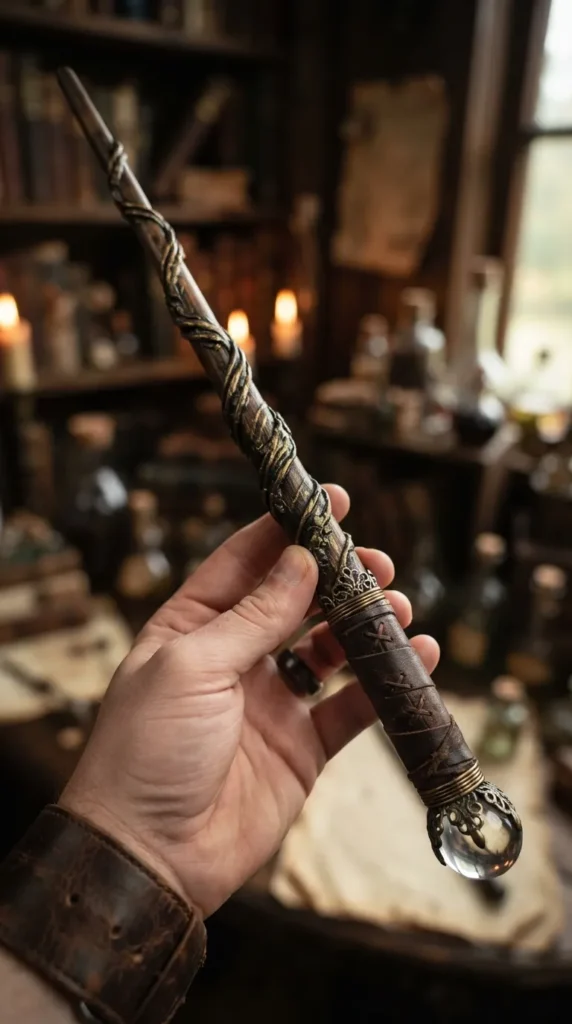
Magic Wand Crafting lets kids assemble customized wizard, fairy, or sorcerer wands using wooden dowels, hot-glue texturing, and metallic paint treatments.
Materials Required
- 12-inch, 3/8-inch diameter wooden dowels
- Low-temp glue guns & glue sticks (operated with adult assistance)
- Glass marbles or synthetic crystals for the pommel
- Metallic acrylic paints (bronze, aged gold, deep obsidian, silver)
- Sealant spray
Step-by-Step Instructions
- Mount the Crystal: Glue a glass marble or plastic crystal top onto one end of the wooden dowel using low-temp hot glue.
- Build Texture: Run spiral streams of hot glue up and down the handle area of the dowel to create a hand-carved, organic look.
- Base Paint Coat: Apply a dark base coat of acrylic paint (black or deep brown) across the entire wand body.
- Dry-Brush Details: Gently brush metallic gold, silver, or bronze paint over the raised glue ridges to highlight the 3D texture.
Pro Tips & Creative Variations
- Glow-in-the-Dark Tips: Paint the very tip of the wand with phosphorescent paint so it glows in low light.
- Leather Wraps: Provide faux-leather strip wraps for the bottom handle section for an authentic texture.
Mistakes to Avoid
Avoid using high-temperature glue guns near younger children to prevent accidental skin burns. Do not apply top coats before the base black layer has fully dried, or colors will blend into a muddy gray.
7. Hand-Painted Canvas Tote Bags
What This Craft Means
Hand-painted canvas tote bags give kids a practical, eco-friendly accessory they can design using fabric markers, stencils, and stamp kits to match their interests.
       +-----------------------+
       |  |  STRAP  | |  STRAP |
       |  +---------+ +--------+
       |   _________________   |
       |  |                 |  |
       |  |  [CUSTOM ART]   |  |
       |  |   SPACE / DINO  |  |
       |  |   HERO LOGO     |  |
       |  |_________________|  |
       +-----------------------+
Materials Required
- 100% heavy cotton canvas tote bags (blank, 10×12 inches)
- Dual-tip permanent fabric markers
- Fabric paint squeeze bottles (3D dimensional)
- Rigid cardboard inserts (cut to fit inside totes)
- Graphic stencil sets (video games, skateboards, sports motifs)
Step-by-Step Instructions
- Insert Cardboard: Slide a cardboard insert inside each blank tote bag to prevent paint from bleeding through to the back side.
- Trace Outer Outlines: Secure stencils to the front face with painter’s tape and trace shapes using fine-tip fabric markers.
- Fill Colors: Fill in design outlines using broad fabric markers or fabric paints.
- Dimensional Edging: Apply raised accents around key design edges using 3D fabric paint squeeze bottles.
- Heat Set: Allow to air-dry for 2 hours; instruct parents to heat-set with an iron at home.
Pro Tips & Creative Variations
- Foam Stamp Station: Set up pre-cut foam shapes (skateboards, lightning strikes) on acrylic blocks for quick stamping.
- Tie-Dye Bases: Pre-dye the canvas totes in light tie-dye colors before the party for extra visual interest.
Mistakes to Avoid
Avoid skipping the internal cardboard layer; fabric paint bleeds straight through thin canvas woven materials. Do not use standard washable markers, which wash out completely on the first laundry cycle.
8. DIY Mini Monster Truck Tuning
What This Craft Means
Monster Truck Tuning lets kids customize plain die-cast or plastic monster trucks using paint pens, oversized foam tires, wing spoilers, and flame decals.
Materials Required
- Blank/plain base toy monster trucks
- Oil-based paint markers (white, neon orange, bright green, cyan)
- Waterproof decal stickers (flames, skulls, racing stripes)
- Craft wire & mini plastic spoiler add-ons
- Super glue or gel craft glue (adult application)
Step-by-Step Instructions
- Surface Cleaning: Wipe down truck bodies with isopropyl alcohol wipes to remove manufacturing oils.
- Paint Custom Graphics: Use oil-based paint markers to add custom paint jobs, flame trails, or racing stripes directly onto the vehicle shell.
- Mount Custom Parts: Have an adult glue plastic spoiler modifications, mini flags, or exhaust pipes onto the rear truck bed.
- Apply Stickers: Add mini hazard logos, custom numbers, and graphic decals to the side doors and roof.
Pro Tips & Creative Variations
- Dirt Splatter Effect: Flick brown acrylic paint off a toothbrush onto the lower truck body to create realistic mud splatter.
- Tire Detailing: Provide white paint pens to fill in the raised lettering on the rubber tires for a classic racing look.
Mistakes to Avoid
Avoid water-based acrylic paints, which flake right off non-porous plastic truck shells. Do not rush sticker application before paint pen detailing has fully cured.
9. Personalized Keychain Bead Crafts
       KEYCHAIN ANCHOR
       ( RING / CLIP )
             ||
       [=== BEAD 1 ===]  <- Alphabetic / Name
       [=== BEAD 2 ===]  <- Pattern Accent
       [=== BEAD 3 ===]  <- Pattern Accent
             ||
       (( TIE-OFF KNOT ))
What This Craft Means
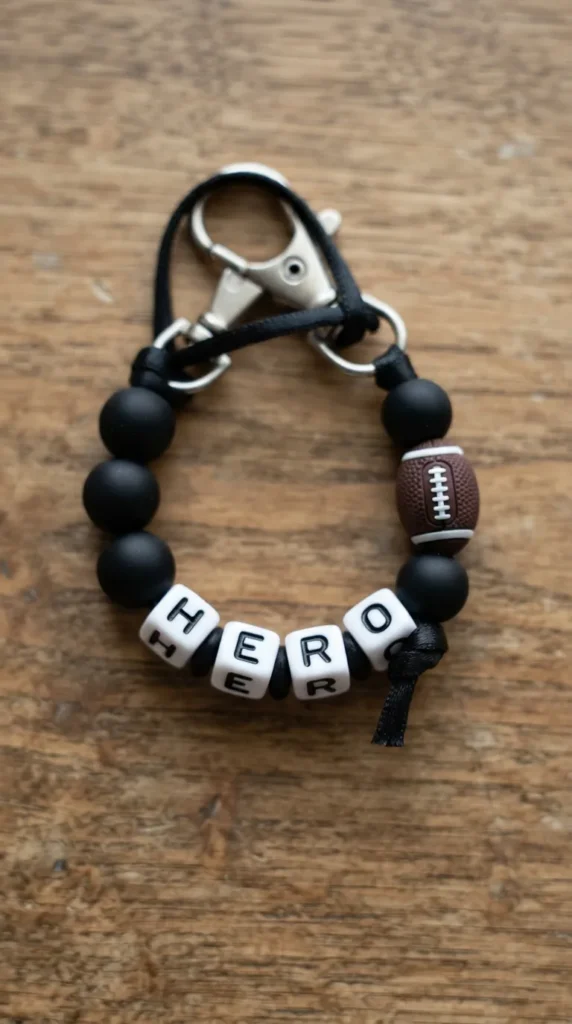
Keychains offer a quick, tactile activity where kids string silicone, wooden, and alphabet beads onto paracord or leather cord to spell names or build custom color patterns.
Materials Required
- 2mm satin nylon cord or thin faux leather cord
- Split key rings and swivel snap hooks
- Alphabet beads (square or round)
- Silicone & wooden focal beads (sports balls, skulls, game controllers)
- Crafting scissors
Step-by-Step Instructions
- Anchor the Cord: Fold a 12-inch piece of cord in half and secure it to the key ring with a simple lark’s head knot.
- Arrange Beads: Have kids lay out their desired bead sequence (name letters plus accent beads) on a flat bead tray.
- Thread Sequence: String the beads over both strands of cord, pushing them tight against the top anchor knot.
- Tie Secure Stop: Create a firm double overhand knot directly beneath the bottom bead.
- Trim and Fuse: Trim excess cord ends, leaving 1/2 inch of fringe, or have an adult fuse nylon ends to prevent unraveling.
Pro Tips & Creative Variations
- Carabiner Clips: Swap basic key rings for colorful aluminum carabiners so kids can clip keychains onto school backpacks right away.
- Glow-in-the-Dark Spacer Beads: Insert glowing rubber spacer beads between letter blocks for high visibility.
Mistakes to Avoid
Avoid using cord that is too thick for the center holes of your alphabet beads. Do not skip the final lock knot, or beads will quickly slide off during everyday use.
10. Foam Ninja Star & Weapon Crafting
What This Craft Means
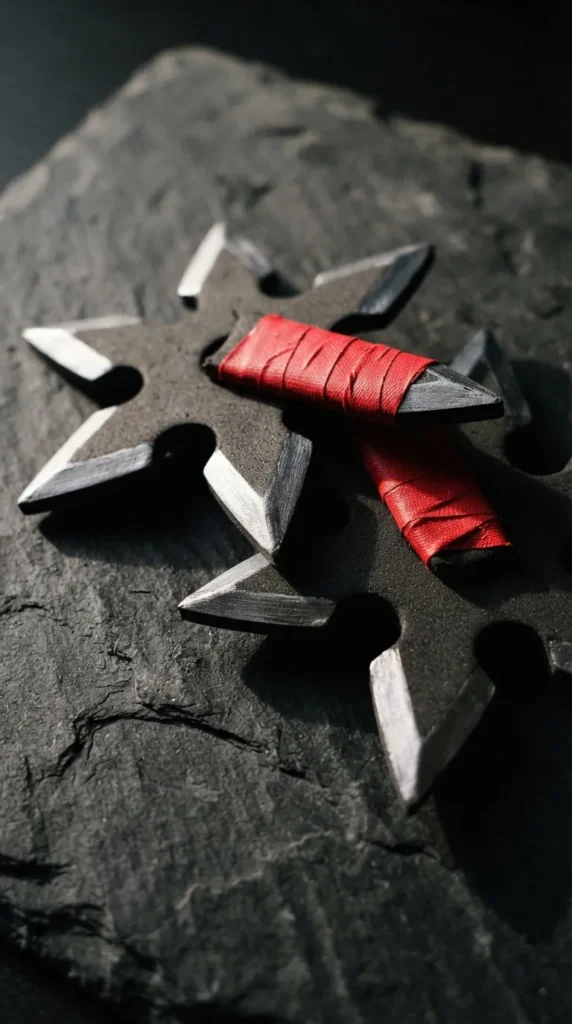
Foam Ninja Star Crafting allows kids to construct soft, safe action props using dense EVA foam shapes. Kids shape, layer, and wrap stars and mini daggers inspired by traditional ninja gear.
Materials Required
- High-density EVA foam sheets (5mm thick, pre-cut star templates)
- Metallic silver & dark gray paint pens
- Colored grip tape (hockey or tennis grip tape)
- Self-adhesive metallic vinyl foil sheets
- Safety scissors
Step-by-Step Instructions
- Trace & Cut: Kids trace ninja star or blade templates onto 5mm EVA foam sheets and carefully cut them out using safety scissors.
- Bevel Edges: Use metallic silver paint markers along the outer outer edges to create the illusion of a sharpened metal edge.
- Wrap Handles: On foam daggers or dual-stars, wrap colored grip tape tightly around the handle area for an authentic feel.
- Detail Foil Accents: Apply pre-cut self-adhesive metallic vinyl decals to center star points for extra contrast.
Pro Tips & Creative Variations
- Target Throwing Game: Set up a hook-and-loop target board at the party venue so kids can test out their foam stars right after building them.
- Dual-Tone Layers: Sandwich two contrasting layers of 2mm foam together to form 3D star blades with recessed center accents.
Mistakes to Avoid
Avoid thin, flimsy craft foam (under 2mm), which sags and won’t hold shape when thrown. Never use hard plastic or wooden cores inside foam weapons intended for active play.


11. Upcycled Robot Sculpture Building
          +-----------------------+
          |     TIN CAN HEAD      |
          |    ( Googly Eyes )    |
          +-----------------------+
                     ||
       +-----------------------------+
       |     CARDBOARD BOX TORSO     |
       |  ( Bottle Cap Buttons )     |
       |  ( Metallic Spray Paint )   |
       +-----------------------------+
             //             \\
      [ WIRE ARMS ]     [ WIRE ARMS ]
What This Craft Means
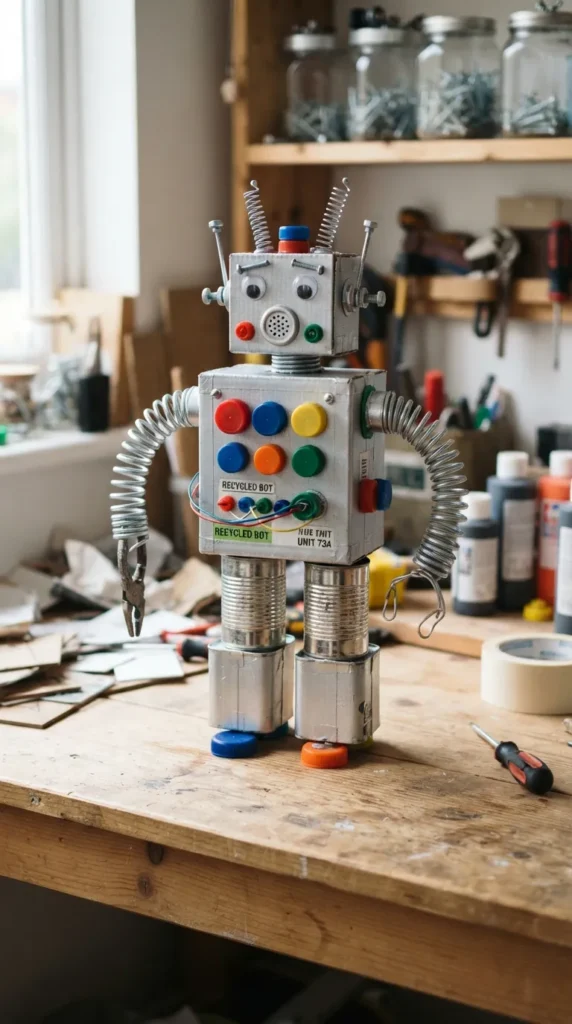
Upcycled Robot Building invites kids to assemble futuristic robot sculptures out of recycled household objects, hardware parts, and metallic paints.
Materials Required
- Small cardboard boxes, tins, and paper tubes
- Plastic bottle caps, washers, nuts, springs, and wire strands
- Chrome silver & copper craft paint
- Large googly eyes
- Tacky glue or low-temp glue guns
Step-by-Step Instructions
- Structure the Body: Attach a small box or tin “head” to a larger cardboard “torso” using tacky glue or low-temp hot glue.
- Base Painting: Paint the assembled robot structure with silver or copper acrylic paint to give it a solid metallic look.
- Attach Hardware: Glue metal washers, plastic bottle caps, nuts, and coiled wire onto the torso to create control panels and meters.
- Add Character: Glue googly eyes onto the head and attach flexible coiled wire for arms and antennae.
Pro Tips & Creative Variations
- LED Light Eyes: Insert tiny battery-powered tea lights inside hollowed head units for glowing eyes.
- Jointed Limb Movement: Use brass brads or paper fasteners to connect arms and legs, allowing them to pivot.
Mistakes to Avoid
Avoid using heavy metal scraps that overload cardboard frames. Ensure all recycled metal cans are fully checked for sharp edges before giving them to kids.
12. Customized Mini Skateboard Decks
What This Craft Means
Custom Skateboard Decks lets kids play skate-park graphic designer on blank 96mm mini fingerboard decks using permanent markers, grip tape, and vinyl graphics.
Materials Required
- Unfinished wooden mini fingerboard deck blanks
- Miniature wheel/truck sets with tiny screws & screwdriver tool
- Self-adhesive black grip tape sheets
- Fine-tip permanent paint markers (white, black, bright red, neon yellow)
- Mini skate stickers
Step-by-Step Instructions
- Grip the Top: Apply black self-adhesive grip tape to the top side of the wooden deck and trim flush around the outer edges using scissors.
- Design the Bottom Graphic: Flip the board over and draw custom street-art graphics or abstract patterns on the bottom face using fine-tip markers.
- Apply Decals: Place mini stickers and logo decals over the bottom graphics.
- Mount Trucks & Wheels: Attach metal trucks and wheels to the pre-drilled holes on the deck using the provided miniature screwdriver.
Pro Tips & Creative Variations
- Fingerboard Park Station: Build a simple mini wooden ramp or rail grind bench where kids can try out their custom fingerboards.
- Stencil Graphics: Provide mini cardstock stencils featuring flame designs, skulls, and geometric lines for clean graphic shapes.
Mistakes to Avoid
Avoid using thick, water-based paints on small screw holes, which clogs threads and makes truck assembly difficult. Do not cover the top surface with paint—stick to textured grip tape for an authentic look.
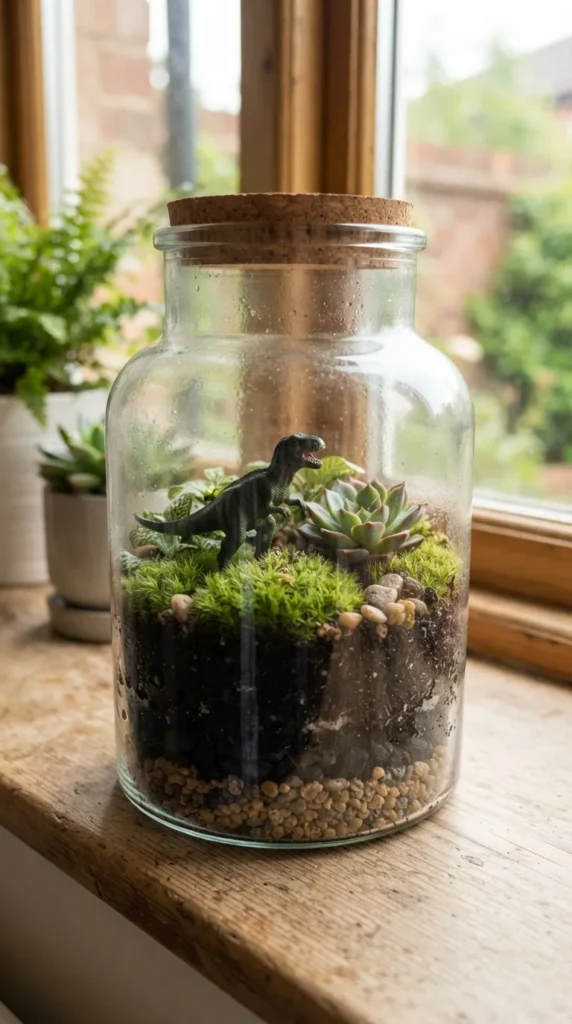
13. Terrarium in a Jar (Dino/Space/Jungle)
        +-----------------------------+
        |   [ AIRTIGHT GLASS LID ]    |
        |=============================|
        |  Plastic Figures / Faux Moss|  <- Top Layer
        |-----------------------------|
        |  Potting Soil / Charcoal    |  <- Middle Layer
        |-----------------------------|
        |  Pea Gravel & Small Rocks   |  <- Drainage Base
        +-----------------------------+
What This Craft Means
Terrarium in a Jar combines living or artificial botanical elements inside clear jars, themed with mini dinosaurs, space explorers, or jungle animals.
Materials Required
- 16 oz wide-mouth glass jars or clear shatterproof plastic jars
- Pea gravel & decorative river stones
- Activated charcoal & potting soil (or artificial green moss for dry terrariums)
- Miniature plastic figures (dinosaurs, astronauts, wild animals)
- Faux mini succulents or live hardy sedum plants
Step-by-Step Instructions
- Drainage Layer: Fill the bottom inch of the jar with pea gravel to capture excess water and prevent root rot.
- Soil Layer: Add a 2-inch layer of potting soil mixed with a sprinkle of activated charcoal over the gravel base.
- Planting: Plant a small succulent, or place structural faux moss across the soil surface for zero maintenance.
- Theme Detailing: Arrange river stones, miniature plastic figures, and tiny decorative trees inside to build a mini scene.
- Light Watering: Lightly mist live terrariums with a spray bottle before sealing the lid loosely.
Pro Tips & Creative Variations
- Glow-in-the-Dark Pebbles: Sprinkle glowing aquarium gravel over the top soil layer for night lighting effects.
- Lid Art: Paint jar lids black, green, or silver to match the mini landscape theme inside.
Mistakes to Avoid
Avoid overwatering sealed terrariums with real plants; excess water leads to mold and plant decay within days. Do not block viewable glass sides with oversized rocks or bulky figures.
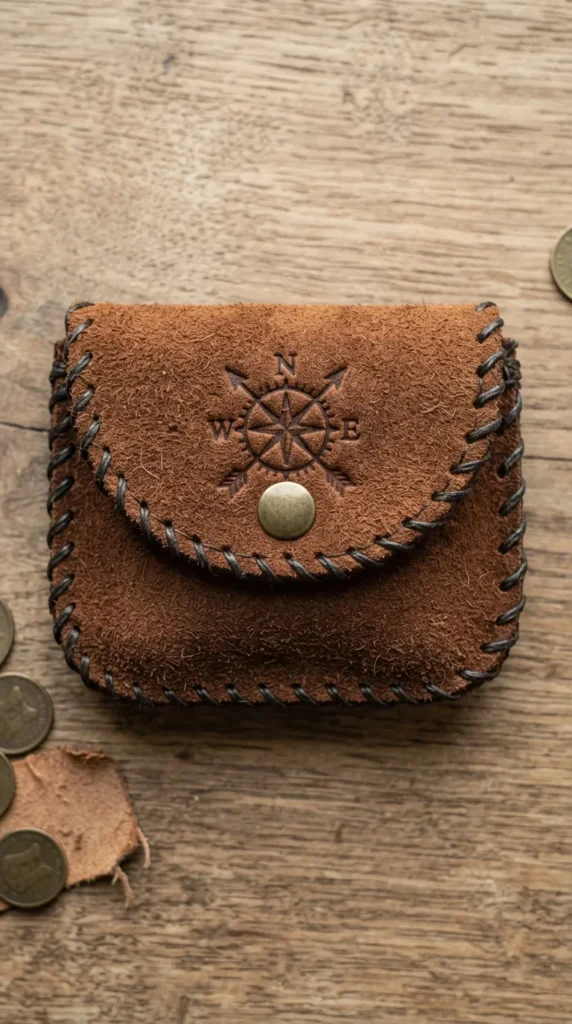
14. DIY Leather (Faux) Coin Pouches
What This Craft Means
Faux Leather Coin Pouches introduce simple leatherworking techniques. Kids assemble, lace, and stamp real or faux leather pieces to create functional belt pouches.
       UNFOLDED PATTERN                   FINISHED POUCH
       +---------------+                 +---------------+
       |    FLAP COVER |                 |   [ BUTTON ]  |
       +---------------+  === Lacing ==> | +-----------+ |
       |  LEFT | RIGHT |  === Edge  ==>  | |  POCKET   | |
       |   PANEL   PANEL|                | +-----------+ |
       +---------------+                 +---------------+
Materials Required
- Pre-punched faux leather or suede pouch blanks
- Heavy waxed polyester cord or suede lacing strips
- Dull plastic tapestry needles
- Metal snap button sets (pre-installed on blanks)
- Wooden leather stamps & non-toxic ink pads
Step-by-Step Instructions
- Decorate Flat Panels: Lay pre-punched leather panels flat. Stamp decorative symbols or initials onto the outer flap using ink pads and stamps.
- Thread the Needle: Thread a 3-foot length of waxed cord into a plastic tapestry needle.
- Lace Outer Edges: Fold the pouch into shape and pass the needle through pre-punched holes using a whipstitch or running stitch.
- Knot and Anchor: Tie off internal ends tightly with a double overhand knot and trim excess cord.
- Secure Snap: Fasten the front snap closure to complete the pouch setup.
Pro Tips & Creative Variations
- Beaded Tassels: Thread colorful pony beads onto the tail ends of the lacing cord for added texture and style.
- Belt Loops: Add slit cuts along the back panel so kids can slide the finished pouch directly onto their belts.
Mistakes to Avoid
Avoid trying to punch holes in thick synthetic leather during the party; pre-punched blanks save time and prevent hand strain. Do not use thin, un-waxed sewing thread, which snaps easily under tension.
15. Superhero Cape Stenciling
What This Craft Means
Superhero Cape Stenciling lets kids design custom hero wear. Using blank satin capes, fabric paints, and stencils, kids build personalized emblem combinations.
Materials Required
- Satin blank capes with neck hook-and-loop fasteners (24-inch length)
- Adhesive graphic stencils (crests, lightning bolts, shields, stars)
- Fabric paint sponge dabbers (gold, electric blue, silver, white)
- Wax paper sheets (to place under capes while painting)
- Fabric marker pens
Step-by-Step Instructions
- Prep the Surface: Lay satin capes flat over wax paper sheets to protect table surfaces from paint bleed-through.
- Position Stencils: Peel and press adhesive stencils securely onto the center back of the cape.
- Dab Paint: Using foam sponge dabbers, lightly dab fabric paint into stencil cutouts. Avoid heavy brushing, which causes edge bleeding.
- Peel and Detail: Carefully peel off stencils while paint is damp. Add outlines or initials using fine fabric markers once the base coat sets.
Pro Tips & Creative Variations
- Monogram Centerpiece: Provide letter stencils so kids can add their initial inside their hero emblem.
- Felt Emblems: Pre-cut felt shapes for quick layer application using fabric glue for a raised 3D effect.
Mistakes to Avoid
Avoid using wet, dripping brushes on slippery satin fabrics, as paint will run under stencil edges. Do not fold capes before fabric paint has cured completely.


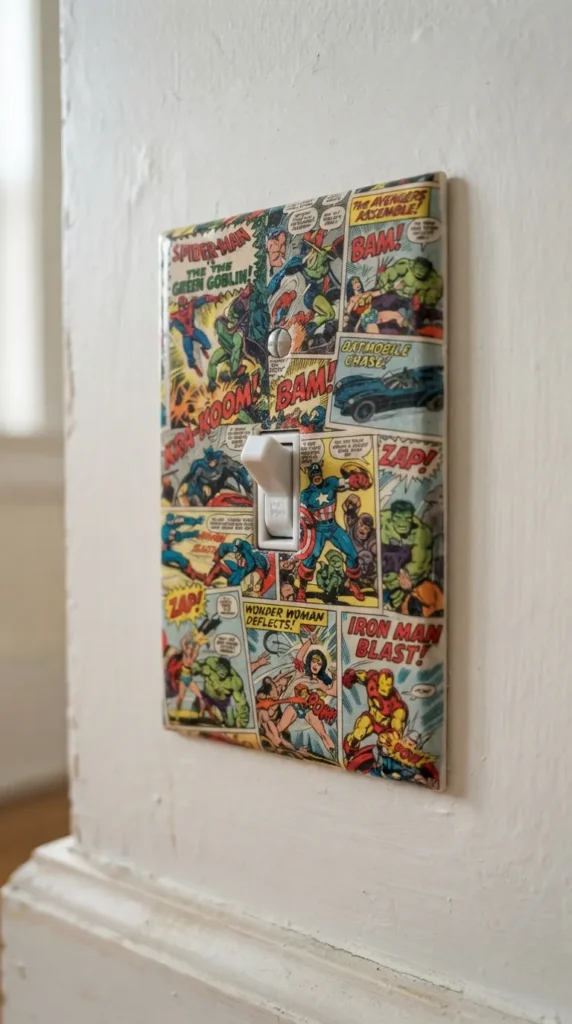
16. Comic Book Collage Light Switch Plates
              +---------------------------+
              |   LIGHT SWITCH PLATE      |
              |   +-------------------+   |
              |   |  COMIC STRIP CUT  |   |
              |   |   "POW!"  "BAM!"  |   |
              |   +-------------------+   |
              |     (  ) TOGGLE  (  )     |
              +---------------------------+
What This Craft Means
Comic Book Light Switch Plates turn basic wall plates into retro art pieces. Kids cut out comic book scenes and decouple them onto plastic switch covers using Mod Podge.
Materials Required
- Single-toggle white plastic light switch plates
- Recycled original comic books or high-quality comic printouts
- Mod Podge (Matte or Gloss finish)
- Foam paintbrushes
- Small detail scissors & hole punchers
Step-by-Step Instructions
- Select Strips: Have kids search comic pages for favorite characters, action words (“BAM!”, “POW!”), and graphic scenes.
- Trim to Fit: Cut panels into overlapping strips sized slightly larger than the plastic wall plate face.
- Apply Base Glue: Brush a thin layer of Mod Podge directly onto the plastic switch plate surface.
- Collage Layering: Lay comic clippings over the glued surface, smoothing out air bubbles with fingers from center to edges.
- Seal & Trim: Brush a protective coat of Mod Podge over the entire top face. Once dry, wrap edges neatly around the back and clear the center toggle slot with scissors.
Pro Tips & Creative Variations
- Glow-in-the-Dark Highlights: Accent key comic sound effects (“BOOM!”) using glow-in-the-Dark paint accents prior to final sealing.
- Glow Screws: Paint the heads of mounting screws with fluorescent paint to match the wall plate theme.
Mistakes to Avoid
Avoid applying thick, heavy layers of Mod Podge in a single pass; thin coats dry clearer and prevent paper warping. Do not forget to clear out center toggle and screw holes before the adhesive hardens fully.
17. Custom Painted Wooden Yoyos
What This Craft Means
Wooden Yoyos give kids a classic, mechanical toy craft. Painting, detailing with geometric markers, and stringing yoyos yields a fun, working toy that builds fine motor skills.
Materials Required
- Turn-hewn blank wooden yoyos (pre-strung or with extra cotton strings)
- Quick-drying acrylic paint pens (fine and broad tips)
- Painter’s tape strips (for crisp geometric lines)
- Clear protective polish spray (applied by adult)
- Mini round logo stickers
Step-by-Step Instructions
- Design Layout: Place painter’s tape across half of each wooden side disc to create clean, split geometry designs.
- Color Fill: Paint exposed wood sections using bright acrylic paint pens.
- Remove Tape & Detail: Peel tape off to reveal bare wood contrast; draw rings, dots, or spiraling patterns across both sides.
- Optical Spin Detailing: Draw contrasting spiral lines near the outer rims so the pattern creates visual effects when spun.
- Adjust String Length: Attach or adjust cotton yoyo strings, fitting the loop to each child’s waist height.
       FRONT VIEW SPIN PATTERN       SIDE PROFILE VIEW
          /  \     /  \               +----+
         |    *---*    |              | |  |=== String
          \  /     \  /               +----+
         Spiral Pattern
Pro Tips & Creative Variations
- Optical Illusion Discs: Print black-and-white optical illusion templates that kids can color and glue directly onto yoyo faces.
- Glow String Upgrades: Replace basic cotton strings with bright neon or glow-in-the-dark replacement strings.
Mistakes to Avoid
Avoid painting inside the center string groove or axle, which increases friction and stops the yoyo from sleeping or returning properly. Do not use heavy oil paints that take days to dry.
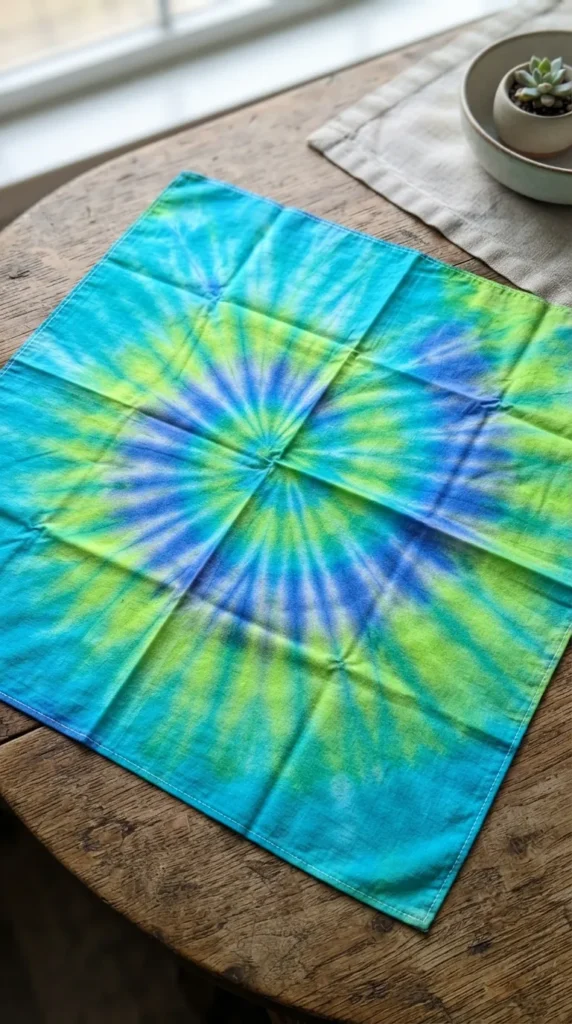
18. DIY Tie-Dye Bandanas
What This Craft Means
Tie-Dye Bandanas offer an approachable fabric dyeing experience. Kids fold, twist, and bind white cotton squares with rubber bands, then apply vivid dye colors to create unique wear.
       FOLD & TWIST PATTERN         APPLY DYE SECTORS
        /\   /\   /\   /\            (Red) | (Blue)
       /  \ /  \ /  \ /  \          -------+-------
      (    CENTER SPIRAL  )          (Yellow)|(Green)
       \  / \  / \  / \  /          [ RUBBER BANDS ]
        \/   \/   \/   \/
Materials Required
- 100% white cotton square bandanas (22×22 inches)
- Fiber-reactive squeeze bottle dyes (pre-mixed, non-toxic colors)
- Heavy-duty rubber bands
- Disposable plastic trays & wire racks
- Sealable plastic bags (for sending home damp)
Step-by-Step Instructions
- Dampen Fabric: Lightly wet white cotton bandanas and wring out excess water completely.
- Pinch & Spiral: Pinch the center of the square and twist the fabric continuously into a flat, round disk shape.
- Bind with Bands: Wrap 3–4 rubber bands crisscross around the disc, dividing the circle into 6–8 distinct wedge sections.
- Apply Colors: Squeeze different dye colors onto each wedge section, ensuring dye penetrates deep into folds.
- Bag & Cure: Place dyed bandanas inside individual zip bags labeled with child names to set for 12–24 hours before rinsing home.
Pro Tips & Creative Variations
- Bullseye Fold: Pinch from the center straight up and place bands every 2 inches down the fabric column to make concentric rings.
- Ice Dye Technique: Cover folded bandanas with ice cubes and sprinkle dry dye powder on top for a marbled, watercolor effect.
Mistakes to Avoid
Avoid synthetic polyester bandanas, which cannot absorb water-based fabric dyes. Do not skip sending home care instructions; parents must rinse items individually in cold water before machine washing.
19. Cardboard Desk Organizers
What This Craft Means
Desk Organizers let kids build useful room decor out of pre-cut cardboard tubes and trays. Kids assemble multi-tiered pencil holders, paint them, and add geometric patterns.
       +------------------------------------+
       |       CARD-DESK ORGANIZER          |
       |  +----+  +---------+  +---------+  |
       |  | T  |  | MEDIUM  |  | SHORT   |  |
       |  | A  |  | TUBE    |  | TUBE    |  |
       |  | L  |  | (Pens)  |  | (Clips) |  |
       |  | L  |  +---------+  +---------+  |
       |  +----+   BASE BOARD TRAY LAYER    |
       +------------------------------------+
Materials Required
- Heavy-wall cardboard tubes (cut into varying heights: 3″, 4″, 5″)
- Rigid cardboard base plates (6×8 inches)
- Acrylic paints & sponge brushes
- Washi tapes (various patterns and widths)
- Tacky craft glue
Step-by-Step Instructions
- Arrange Layout: Have kids experiment with arranging three different-height tubes onto their rectangular base plate.
- Paint Components: Paint the outside and inside rims of cardboard tubes and base plates using quick-drying acrylic paints.
- Wrap Accents: Wrap colorful patterns of patterned washi tape around the top and bottom edges of each tube section.
- Glue to Base: Apply generous amounts of tacky craft glue along bottom rim cuts, pressing tubes firmly onto base plates until set.
Pro Tips & Creative Variations
- Name Plate Front: Supply small wooden craft sticks so kids can write their name and glue it to the front base rim.
- Decoupage Wrap: Wrap tubes in patterned map paper or comic sheets before assembling onto the base.
Mistakes to Avoid
Avoid thin paper towel rolls, which crush easily under hand pressure. Use heavy-wall postal tubes or thick craft rolls for long-lasting stability.
20. Custom Printed Snapback Hats
What This Craft Means
Custom Printed Snapbacks let kids design wearable streetwear. Kids use fabric paints, iron-on patches, and fabric markers to turn plain caps into custom apparel.
          +-----------------------+
          |     SNAPBACK CAP      |
          |   +---------------+   |
          |   | CUSTOM EMBLEM |   |
          |   |  PATCH AREA   |   |
          |   +---------------+   |
          |   _________________   |
          |  /   FLAT BRIM     \  |
          +-----------------------+
Materials Required
- Blank cotton snapback hats (flat brim, solid panels)
- Heat-seal embroidered patch sets (skate, video games, space)
- Mini craft iron (operated strictly by adults)
- Fabric paint markers
- Painter’s masking tape
Step-by-Step Instructions
- Plan Layout: Kids place embroidered patches across the front panels and visor of blank caps to build their arrangement.
- Iron Patches: An adult presses an iron over each patch for 30 seconds to heat-seal adhesive backings to front canvas panels.
- Brim Detailing: Mask areas of the flat visor with painter’s tape and draw custom street-art graphics using fabric markers.
- Personalize Back: Use fine-tip fabric paint markers to write names or initials near the rear snap-closure strap.
Pro Tips & Creative Variations
- Stenciled Visors: Provide stencils specifically sized for flat cap brims to create uniform geometric graphics.
- Glow In The Dark Patches: Include glowing embroidered patches so the hat pops under blacklight environments.
Mistakes to Avoid
Avoid pressing hot irons directly onto synthetic mesh netting sections found on trucker caps, which melts fabric instantly. Always use a thin protective pressing cloth over embroidered patches.
Future Additions
More ideas to come in future addition.