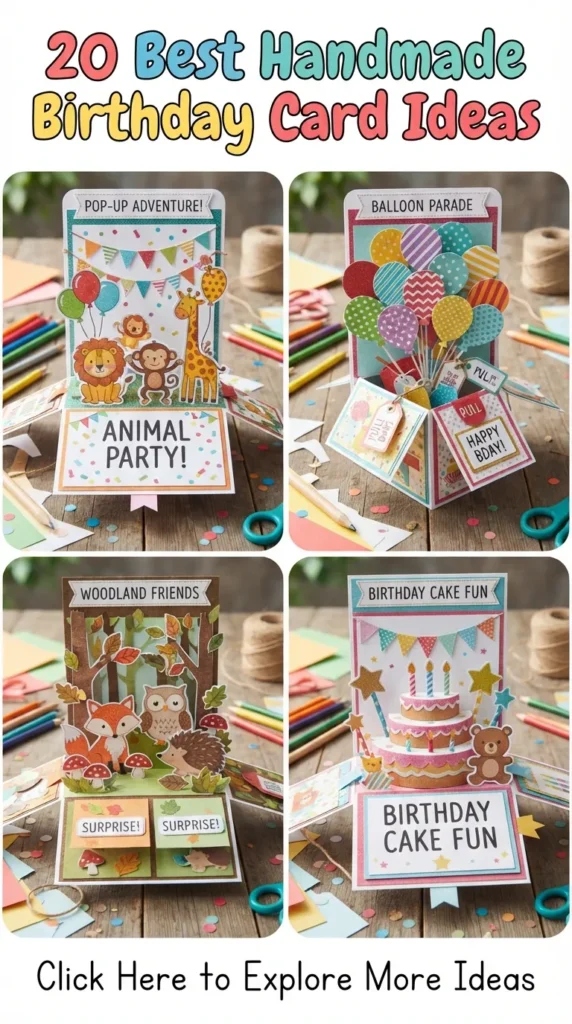
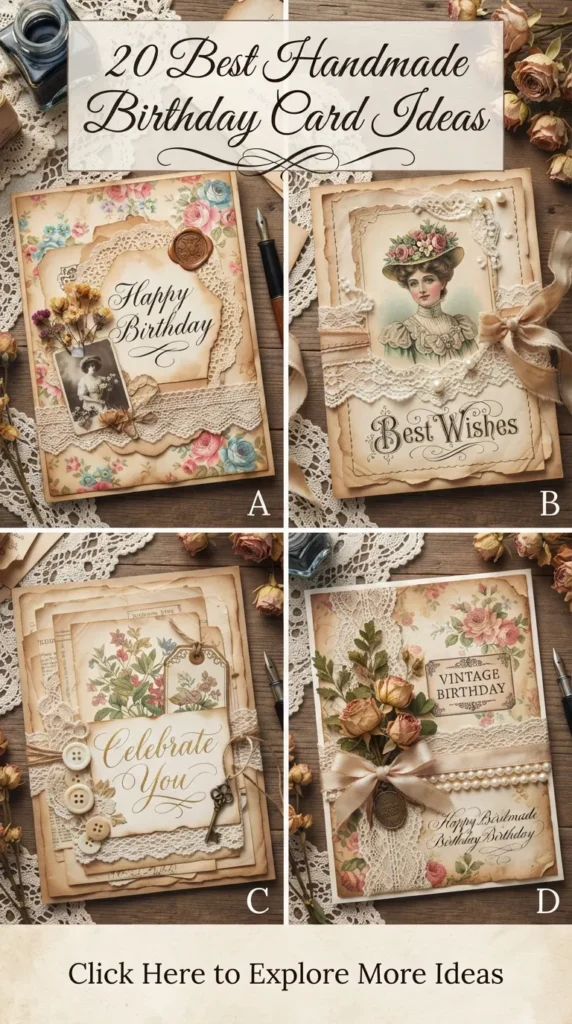
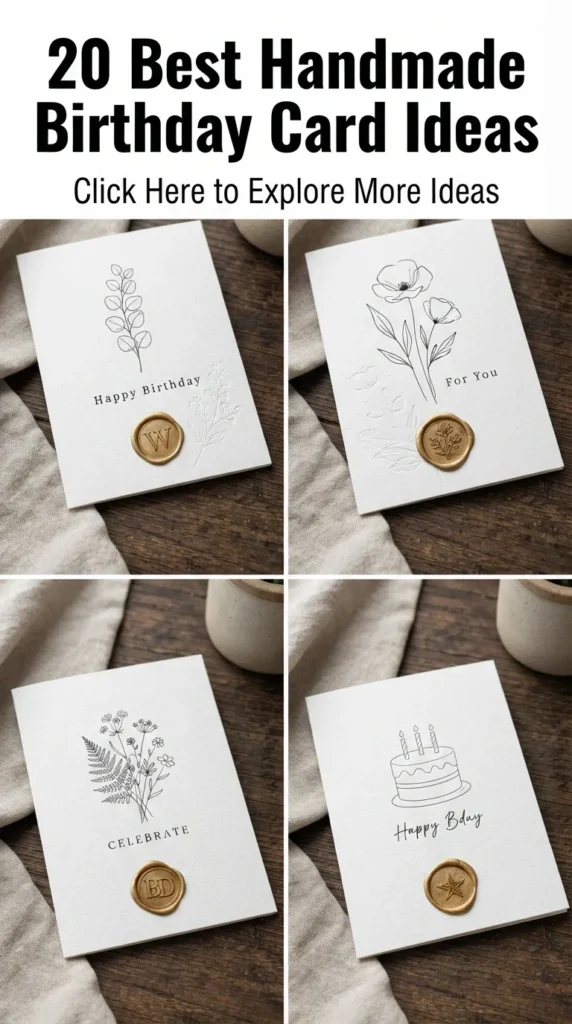
Creating a custom handmade birthday card is one of the most thoughtful ways to show someone you care. In a world full of quick digital messages, a tangible, hand-crafted card stands out as a memorable keepsake. Whether you are an experienced paper crafter or a beginner looking to explore your creative side, this comprehensive guide offers twenty unique, charming, and stylish birthday card designs that will delight anyone on their special day.


1. Pressed Flower & Dried Botanical Glassine Card
Concept & Overview
This design combines organic textures with transparent elegance. By placing real dried blooms between translucent glassine paper or acetate and framing them with heavy cardstock, you create a delicate window that showcases nature’s innate beauty. It is ideal for nature lovers, vintage aesthetic enthusiasts, and spring or summer birthdays.
Essential Materials
- Heavyweight cotton or kraft cardstock (300 GSM)
- Translucent glassine paper or clear acetate sheet
- Assorted pressed flowers, ferns, and dried petals
- Craft tweezers
- Acid-free clear PVA glue or double-sided tape runner
- Fine-tip metallic gold marker
Step-by-Step Crafting Guide
- Fold a piece of 300 GSM cardstock in half to form a standard card base (5×7 inches).
- On the front cover, use a craft knife and ruler to cut out a rectangular window measuring 3×5 inches, leaving a clean border.
- Cut two pieces of glassine paper slightly larger than the cut-out window.
- Using craft tweezers, arrange your pressed flowers on one sheet of glassine paper until you achieve a balanced arrangement.
- Apply tiny dabs of clear PVA glue beneath the central stems to hold them securely.
- Place the second sheet of glassine paper over the arrangement to seal the botanicals inside.
- Secure the glassine sandwich onto the inside front panel using double-sided tape so the floral window aligns perfectly with the cutout.
- Accentuate the frame on the front using a fine-tip metallic gold marker, writing a soft “Happy Birthday” below the window.
Creative Tips & Variations
- Monochrome Theme: Use exclusively white pressed petals against a dark navy cardstock frame for a striking, modern contrast.
- Herbarium Aesthetic: Write the botanical names of the pressed flowers in neat calligraphy below each bloom for a scientific vintage journal look.
Things to Avoid
Avoid using freshly picked flowers that have not been completely dried, as remaining moisture will mold over time inside the glassine panel. Steer clear of applying heavy liquid glue directly on delicate petals, which will cause staining and translucent wet spots.
2. Interactive Layered Waterfall Pull-Tab Card
Concept & Overview
A waterfall card features cascading rectangular panels that flip sequentially when a bottom tab is pulled. This interactive layout adds dynamic movement to your card, allowing you to reveal sequential birthday messages, decorative patterns, or tiny hand-drawn illustrations with a satisfying slide mechanism.
Essential Materials
- Standard cardstock base (8.5×11 inches cut down)
- Coordinating patterned paper or solid colored cardstock
- Sliding mechanism strip (2×9 inches)
- Anchor strip (1×5 inches)
- Strong double-sided craft tape
- Birthday stamps, stickers, or gel pens
Step-by-Step Crafting Guide
- Cut four identical square panels (2.5×2.5 inches) from cardstock to serve as your flipping pages. Decorate each panel with stamps, artwork, or lettering.
- Take your 2×9 inch slider strip and score horizontal lines across it at 2, 2.5, 3, and 3.5 inches from one end.
- Fold along each score line to create four flexible flappable sections.
- Attach the bottom edge of each decorated square panel to one of the scored sections on the strip using strong double-sided tape.
- Adhere a 1×5 inch anchor strip horizontally across your card base, leaving the central portion raised slightly.
- Thread the waterfall slider underneath the anchor strip, fold the bottom tail over, and secure the anchor strip only at its outer edges.
- Pulling the bottom tab now flips each panel forward smoothly in a cascading waterfall motion.
Creative Tips & Variations
- Milestone Memory Tracker: Use four flipping squares to display milestone numbers (e.g., “30 Years of Joy”) or four micro polaroid photos of happy moments.
- Ombré Color Way: Cut the four panels from four shades of the same color, graduating from light to dark as the card unfurls.
Things to Avoid
Avoid applying glue across the middle of the anchor strip or slider track, as this will lock the mechanism and prevent the card from sliding. Don’t use bulky 3D embellishments on the flipping panels, as they will catch on each other during the sliding motion.
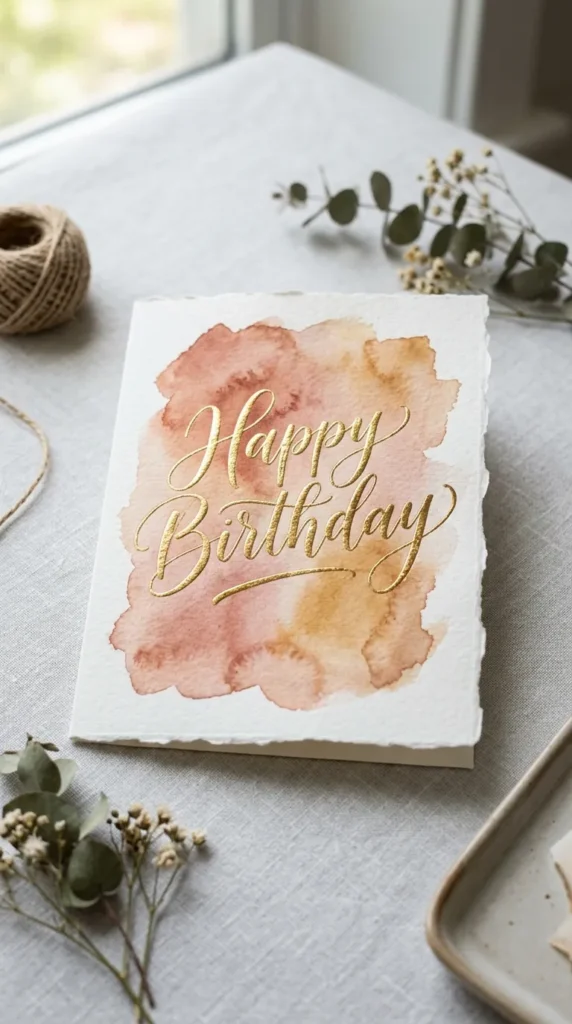
3. Minimalist Watercolor Wash & Gold Foil Lettering Card
Concept & Overview
This sleek design merges soft, organic watercolor gradients with bold, shimmering typography. By layering an effortless wet-on-wet paint wash under crisp metallic foil accents, you achieve a sophisticated, boutique-style card that looks effortlessly modern and polished.
Essential Materials
- 140lb (300 GSM) cold-press watercolor paper
- Professional liquid watercolors or pan sets
- Soft round watercolor brushes (Size 8 or 10)
- Heat foil pen or hot foil stamping tape (or gold gel pen / leafing pen)
- Painter’s masking tape
Step-by-Step Crafting Guide
- Secure the edges of your watercolor cardstock to a flat board using low-tack painter’s tape to prevent warping.
- Wet the front panel of the card using clean water and a large brush.
- Drop two or three harmonious watercolor shades (such as dusty rose, terracotta, and warm gold) onto the wet surface, allowing them to bleed naturally together.
- Let the watercolor wash dry completely, or speed up the drying process with a heat craft tool.
- Carefully peel away the masking tape to reveal crisp white borders around the watercolor wash.
- Using a gold foil transfer pen or metallic gold calligraphy pen, hand-letter “Happy Birthday” boldly across the center of the watercolor wash.
- Accentuate with tiny hand-drawn gold stars or specks surrounding the primary text.
Creative Tips & Variations
- Galactic Vibe: Use deep indigo, teal, and violet watercolor washes, then splash fine white gouache splatters before adding gold foil lettering to mimic a galaxy.
- Geometric Mask: Place geometric masking tape strips across the watercolor panel before painting to create crisp negative-space patterns.
Things to Avoid
Avoid using standard thin printer paper or light cardstock, which will buckle, tear, and bleed heavily when wet watercolor is applied. Never attempt to apply foil pens or ink over watercolor that is still damp, as it will smudge and ruin the metallic finish.
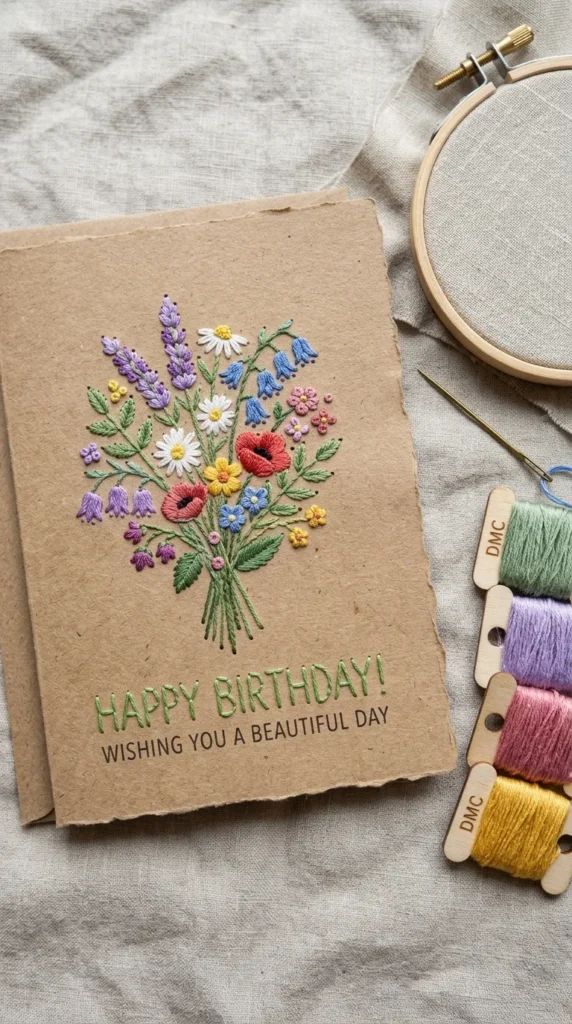
4. Embroidered Thread & Kraft Paper Stitched Card
Concept & Overview
Combining textile arts with papercraft, an embroidered card introduces rich tactile warmth. Stitching colorful embroidery floss directly through heavy kraft paper creates crisp, textured line art, geometric shapes, or floral patterns that elevate a simple birthday card into a frameable piece of fiber art.
Essential Materials
- Heavy kraft cardstock (250-300 GSM)
- Embroidery floss in complementary colors
- Piercing tool or pushpin
- Piercing mat or dense sponge
- Size 22 tapestry needle
- Washi tape or masking tape
Step-by-Step Crafting Guide
- Lightly sketch your desired design (e.g., a birthday balloon, simple flower bouquet, or block lettering) onto the reverse side of your card panel using a soft pencil.
- Place the panel face-up on a piercing mat or dense sponge.
- Using a piercing tool or needle, poke small, evenly spaced holes along the lines of your penciled design.
- Thread your tapestry needle with three strands of embroidery floss and knot the end.
- Stitch through the pre-punched holes using basic stitches like the backstitch, French knot, or satin stitch.
- Once completed, secure the thread ends on the back panel using strips of washi tape to keep everything flush.
- Glue a thin blank insert paper inside the card to cover the messy rear stitches completely.
Creative Tips & Variations
- Constellation Stitch: Trace a zodiac constellation corresponding to the birthday recipient’s birth sign, using French knots for the star nodes and straight stitches for connecting lines.
- Monogram Initial: Stitch a large, bold capital letter representing the recipient’s name using multi-colored ombre thread.
Things to Avoid
Avoid spacing pierced holes too close together; punching holes closer than 2 millimeters can cause the paper between them to tear, creating large, unwanted gaps. Avoid pulling thread too tightly while stitching, which will buckle and curl the paper panel.
5. Pop-Up 3D Layered Birthday Cake Surprise Card
Concept & Overview
A classic pop-up design brings structural joy the moment the recipient opens the card. Featuring a multi-tiered birthday cake that stands upright automatically upon opening, this card provides an engaging 3D surprise while storing completely flat when closed in its envelope.
Essential Materials
- Two sheets of contrasting heavyweight cardstock
- Patterned paper or decorative cardstock scraps
- Precision craft knife and cutting mat
- Bone folder or scoring tool
- Craft glue or double-sided tape
- Glitter accents, miniature pom-poms, or sequins
Step-by-Step Crafting Guide
- Take your interior card panel sheet and fold it in half.
- Near the center fold, measure and cut two parallel vertical slits about 1.5 inches long and 2 inches apart through the folded edge.
- Create two additional sets of smaller parallel slits above the first set to form three tiers.
- Push the cut tabs inward toward the center fold so they pop out as rectangular step platforms when the card opens at a 90-degree angle.
- Decorate three separate rectangular strips of patterned paper to resemble iced cake tiers.
- Glue these decorative cake strips onto the vertical front faces of the popped-out step platforms.
- Add tiny hand-drawn paper candles topped with yellow glitter flame cutouts on top of the upper tier.
- Glue the outer edges of this inner pop-up structure inside a slightly larger main card cover panel, ensuring no glue touches the pop-up tabs themselves.
Creative Tips & Variations
- Light-Up Candle: Integrate a thin micro LED copper wire light behind the paper flame to make the cake candle actually illuminate when opened.
- Pastel Bakery Styling: Use soft pastel pink, mint green, and lemon yellow paper layers adorned with tiny real cake sprinklings glued along the cake edges.
Things to Avoid
Avoid applying glue directly onto the fold lines or behind the internal popping mechanism, as this will prevent the 3D structure from rising when opened. Do not make the cut steps too wide, or they will stick out beyond the edges of the card when closed.


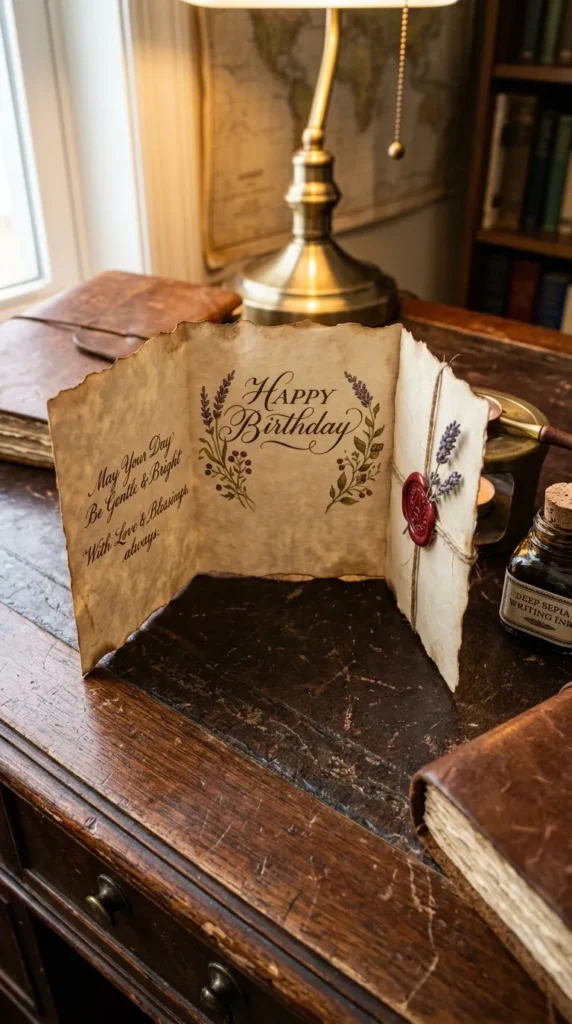
6. Vintage Wax-Sealed Parchment Envelope Card
Concept & Overview
Transporting the recipient to a bygone era, this old-world design features antiqued parchment paper, hand-distressed edges, botanical sprigs, and a custom wax seal closure. It functions both as an letter and card, offering a nostalgic and tactile experience.
Essential Materials
- Heavyweight parchment or tea-stained paper
- Sealing wax beads and wax furnace/spoon
- Metallic stamp head (e.g., botanical design, initial, or balloon)
- Ink pad (walnut or dark brown) and sponge dauber
- Dried lavender sprigs or rosemary stems
- Twine or jute cord
Step-by-Step Crafting Guide
- Take a sheet of parchment paper and trim it into a tri-fold folded envelope format or classic folded card layout.
- Tear the outer edges manually using a ruler wet with water to achieve an authentic deckled, feathery paper edge.
- Lightly rub a sponge dauber dipped in dark brown ink across the torn edges to create a weathered, aged patina.
- Handwrite your heartfelt birthday message inside using a fountain pen or dark brown calligraphy ink.
- Fold the card shut and wrap fine jute twine twice around the center of the outer card fold.
- Place a small sprig of dried lavender beneath the twine on the outer cover.
- Melt 3 to 4 sealing wax beads in your furnace spoon, pour the molten wax over the center of the twine cross section, and press your stamp firm into the pool.
- Allow the wax to set completely for 30 seconds before lifting the stamp head cleanly away.
Creative Tips & Variations
- Map Liner: Line the inside folds of the parchment card with a print of an antique vintage world map for travel lovers.
- Gold Dusting: Highlight the raised details of the set wax seal by gently dabbing a finger dipped in gold mica powder or metallic paste over the top.
Things to Avoid
Avoid pouring wax that is overheated and boiling, as it will create air bubbles and thin out, failing to yield a crisp impression. Avoid using brittle, cheap waxes that crack easily during transit; choose flexible craft-grade sealing wax instead.
7. Quirky Origami Shaker Pocket Card
Concept & Overview
Combining interactive playfulness with geometric origami folding, this card features a clear, sealed window filled with loose sequins, glitter, and paper confetti. When the recipient shakes or tilts the card, the internal elements move freely, making it a bright, festive, and engaging choice.
Essential Materials
- Patterned origami paper or lightweight cardstock
- Thick foam tape or 3D adhesive strips
- Clear acetate plastic film
- Assorted sequin mix, glitter shapes, and micro confetti
- Strong double-sided tape runner
- Handheld decorative paper punches
Step-by-Step Crafting Guide
- Fold your main cardstock base into a standard folded layout.
- On the front panel, use a circular die cutter or craft knife to cut out a clean circular window (3 inches in diameter).
- Cut a square piece of clear acetate slightly larger than the cut circle and tape it securely to the reverse side of the front window opening.
- Apply thick 3D foam tape around the perimeter of the acetate window on the inside, ensuring there are no gaps in the foam loop.
- Pour your customized collection of colorful sequins, micro-beads, and confetti directly into the center of the window area over the acetate.
- Peel off the backing paper of the foam tape and seal it shut with a backing piece of decorative origami paper.
- Accentuate the outer front ring with a folded origami star or bow to complete the whimsical look.
Creative Tips & Variations
- Theme-Based Fillers: Match the internal shaker elements to the recipient’s hobbies (e.g., tiny paper stars for stargazers, coffee bean shapes for coffee lovers).
- Double-Window Shaker: Create two smaller overlapping shaker windows instead of one large circle for balanced visual diversity.
Things to Avoid
Avoid leaving any micro gaps in the foam tape boundary ring, or fine glitter and tiny sequins will leak out continuously. Do not overcrowd the inside of the shaker pocket with too many sequins, as they need room to move around freely when shaken.
8. Elegant Quilled Floral Wreath Card
Concept & Overview
Paper quilling involves rolling, shaping, and gluing narrow paper strips into intricate decorative designs. A quilled floral wreath card features delicate rolled paper petals, leaves, and coils arranged symmetrically around a central birthday greeting, offering stunning relief texture and artistic artistry.
Essential Materials
- 1/8-inch wide paper quilling strips (assorted colors)
- Slotted paper quilling tool
- Fine-tip liquid craft glue (with precision applicator tip)
- Quilling sizing board or ruler template
- Heavyweight linen-textured cardstock base
- Craft tweezers
Step-by-Step Crafting Guide
- Lightly draw a faint pencil circle in the center of your cardstock to serve as your guide ring for the wreath layout.
- Insert one end of a colorful quilling paper strip into the slot of your quilling tool and roll it tightly to form a solid coil.
- Slide the coil off the tool, allow it to expand slightly inside a sizing template, and pinch the end shut with a dot of precision liquid glue.
- Pinch one side of the circular coil to form a teardrop shape (for leaves), or pinch both opposite sides to create eye-shaped marquise petals.
- Repeat this process to create 15-20 coils, petals, and leaf accents in coordinating colors.
- Using tweezers, dip the flat underside of each quilled piece lightly into liquid glue and place them down along your faint pencil ring.
- Arrange the pieces to form a full, lush circular floral wreath, interspersed with small tight circular coils acting as berries.
- Carefully hand-letter or stamp “Happy Birthday” in the center opening of the quilled wreath.
Creative Tips & Variations
- Monochrome Pastel Palette: Use soft cream, blush pink, and pale mint strips on a dark textured background to create a serene, modern aesthetic.
- 3D Quilled Centerpiece: Layer smaller quilled flowers directly on top of larger quilled leaves using elevated foam dots to build dramatic multi-layered depth.
Things to Avoid
Avoid applying excessive liquid glue directly from a wide nozzle onto quilled pieces; excess glue will seep out, warp the cardstock, and dry into shiny, unappealing patches. Take care not to crush quilled shapes with heavy pressure while gluing.
9. Rustic Burlap, Twine & Button Collage Card
Concept & Overview
Embracing cozy, natural textures, this rustic card design combines natural burlap fibers, textured kraft paper, natural twine, and vintage buttons. It is a fantastic choice for those who love farm-house decor, earthy tones, and tactile, handcrafted aesthetic compositions.
Essential Materials
- Natural kraft cardstock base
- Natural woven burlap fabric scraps
- Jute twine or cotton baker’s twine
- Assorted wooden or vintage plastic buttons
- Fabric scissors and hot glue gun
- Heavyweight patterned cardstock (plaid or vintage floral)
Step-by-Step Crafting Guide
- Cut a rectangular panel of burlap slightly smaller than your front card cover.
- Gently fray the outer edges of the burlap piece by pulling out 2 to 3 warp and weft threads manually on each side.
- Adhere the frayed burlap panel centered onto your kraft cardstock base using a thin layer of hot glue or strong fabric adhesive.
- Layer a smaller strip of plaid or floral paper over the burlap to build visual contrast.
- Wrap natural jute twine around the card spine three times and tie it into a crisp, neat bow on the front cover.
- Select 3 to 5 complementary buttons of varying sizes and colors.
- Thread short pieces of twine through the button holes and tie tiny knots to give them a finished, functional appearance.
- Use hot glue dots to fix the buttons in a pleasing cluster near the twine bow.
- Stamp or hand-letter a simple “Warmest Birthday Wishes” tag and tuck it partially beneath the burlap layer.
Creative Tips & Variations
- Lace Integration: Layer a strip of off-white crocheted lace ribbon directly down the middle of the burlap panel for a shabby-chic romantic touch.
- Mini Banner: String tiny kraft paper triangular pennants onto the twine strip, writing one letter of “HAPPY” across the individual flags.
Things to Avoid
Avoid using liquid PVA glue to attach raw burlap fabric, as the thin glue will soak through the loose weave and leave stiff, discolored dark spots. Take care not to leave visible hot glue strands or strings stretched across the finished card face.
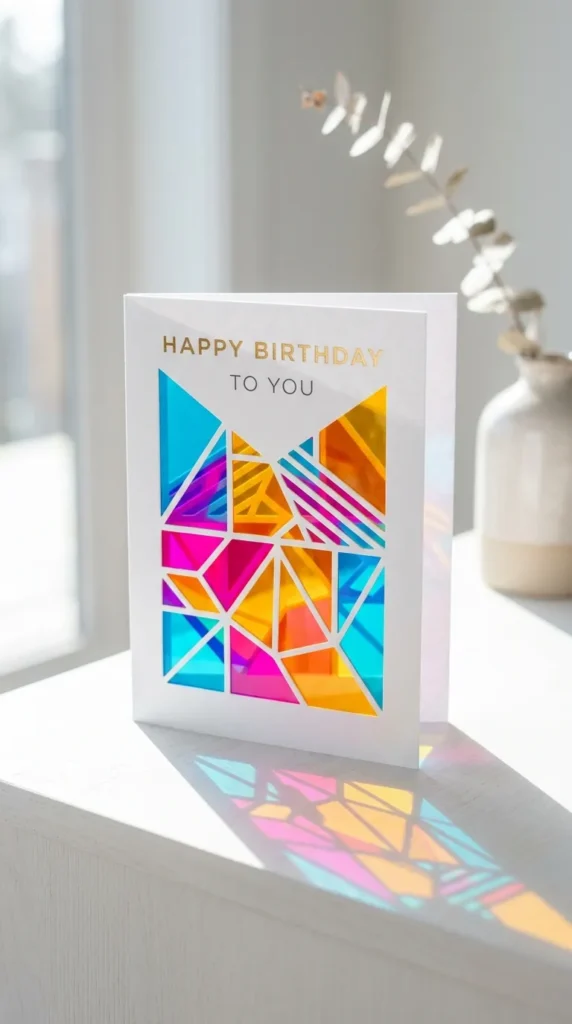
10. Geometric Color-Blocked Acetate Window Card
Concept & Overview
Modern, sleek, and striking, this architecture-inspired design utilizes transparent colored acetate sheets cut into clean geometric shapes. When layered over a cutout window frame on the front cover, it creates vibrant color overlaps and shadows when light passes through the open card.
Essential Materials
- Crisp white or matte black heavyweight cardstock (300 GSM)
- Translucent colored acetate sheets (cyan, magenta, yellow, or gold)
- Precision craft knife, metal ruler, and cutting mat
- Ultra-clear double-sided adhesive sheets or tape
- Graphic fine-liner pens
Step-by-Step Crafting Guide
- Fold your card base cleanly using a bone folder for a razor-sharp spine fold.
- On the front panel, trace a series of overlapping geometric cutouts (such as triangles, circles, or hexagons) using a pencil and ruler.
- Carefully cut out these shapes using a sharp craft knife on a cutting mat to create negative spaces.
- Cut matching pieces from colored transparent acetate sheets slightly larger than the cut openings.
- Secure the colored acetate pieces behind the cutouts on the inside of the front panel using thin, clear double-sided tape.
- Layer different colored acetate panels so they overlap over certain geometric sections, creating secondary color hues where they cross.
- Frame the outer cutout lines on the front face using crisp, dark fine-liner pen lines for a polished graphic finish.
- Stamp or write a minimal greeting along the bottom margin.
Creative Tips & Variations
- Stained Glass Look: Outline all outer geometric acetate border lines with thick black dimensional paint or puff paint to imitate leaded stained glass windows.
- Mid-Century Modern Vibe: Choose mustard yellow, teal, and burnt orange acetate shades paired with a matte charcoal grey cardstock frame.
Things to Avoid
Avoid getting fingerprints or smudges on the clear acetate sheets; handle panels by their edges or wear lint-free cotton gloves during assembly. Do not use standard liquid glue on acetate, as it will smear, bead up, and fail to adhere smoothly.


11. Calligraphy Monogram Wax Resist Card
Concept & Overview
This technique combines liquid masking fluid or clear wax with watercolor washes to create an elegant resist design. The initial monogram or message remains pristine white or gold beneath vibrant watercolor pools, providing a classic custom feel with high artistic appeal.
Essential Materials
- 140lb Cold-press watercolor paper
- White wax crayon OR liquid masking fluid
- Calligraphy dip pen or small pointed detail paintbrush
- Liquid watercolors or watercolor pan set
- Soft paper towel or tissue
Step-by-Step Crafting Guide
- Lightly sketch a large, ornate monogram initial representing the birthday person’s first name in the center of your card layout.
- Trace over the penciled monogram using a white wax crayon or apply liquid masking fluid using a detail brush.
- Allow the masking fluid to dry completely until it becomes a rub-proof, rubbery film (skip drying if using the wax technique).
- Wet the entire front card surface with a light layer of clean water using a broad flat brush.
- Paint rich watercolor washes over the monogram; the wax or masking fluid will repel the water-based paint, preserving the letter beneath.
- Once the watercolor wash is completely dry, use a clean rubber cement eraser or your fingers to gently roll off the dried masking fluid film.
- The crisp white initial will be revealed against the colorful watercolor background.
- Add fine detail calligraphy around the monogram to complete the full greeting.
Creative Tips & Variations
- Gilded Resist: Apply metallic gold leaf adhesive instead of wax, then wash deep indigo watercolor over it to leave an illuminated gold letter shining through.
- Floral Framing: Draw a wreath ring of leaves using white wax, then apply vibrant green and olive watercolor over the top to reveal detailed leaf veins.
Things to Avoid
Avoid applying watercolor washes over masking fluid before it has dried completely, or the latex compound will smear into your paint layer permanently. Do not use rough, cheap paintbrushes to apply masking fluid, as the latex formula will ruin natural hair brush bristles quickly.
12. Pop-Out Accordion Photo & Keepsake Card
Concept & Overview
Combining a greeting card with a mini photo album, this accordion-fold (concertina) design unfolds into a long multi-panel display. It is perfect for milestone birthdays, allowing you to incorporate cherished personal memories, milestone dates, mini polaroids, and handwritten notes in one continuous presentation.
Essential Materials
- Extra-long cardstock strip (e.g., 6×24 inches) OR multiple connected panels
- Bone folder and scoring board
- Mini printed photographs or polaroid prints
- Decorative patterned paper, corner slots, or washi tape
- Ribbons for outer tie closure
Step-by-Step Crafting Guide
- Cut a long strip of heavyweight cardstock to 6×24 inches (or join two 6×12 inch pieces using a neat hidden connecting tab).
- Score vertical lines across the long strip at 4-inch intervals using a scoring tool and metal ruler.
- Fold along the scored lines, alternating directions (mountain fold, valley fold) to form a multi-panel accordion structure.
- Cut decorative patterned paper panels slightly smaller than each 4×6 inch section and paste them onto both sides of the accordion panels.
- Mount mini photos or handwritten keepsake note cards onto individual accordion pages using decorative photo corners or patterned tape strips.
- Attach a long length of silk ribbon to the outer back panel, running horizontally across the middle.
- Collapse the accordion structure flat and tie the ribbon around the front cover in a bow to keep the folded album securely closed.
Creative Tips & Variations
- Year-in-Review: Dedicate each panel to a specific highlight or memory from the past year of the recipient’s life.
- Pocket Album: Add tiny envelope pockets onto alternating accordion folds to hold folded personal letters, gift cards, or secret birthday wishes.
Things to Avoid
Avoid using heavy, bulky wooden or metal charms inside the inner accordion panels, as these will prevent the card from folding down completely flat. Take care not to reverse scoring directions randomly, which will ruin the crisp accordion folding pattern.
13. Hand-Painted Botanical Leaf & Fern Impression Card
Concept & Overview
Using real botanical leaves as natural stamps, this technique transfers leaf structures, veins, and silhouettes directly onto heavy paper. The resulting organic leaf impressions give your card a fine-art botanical print feel, making every single design one-of-a-kind.
Essential Materials
- Freshly picked sturdy leaves (e.g., ferns, monstera, oak, or maple)
- Acrylic paints or block printing inks
- Foam roller (brayer) or dense sponge brush
- Heavyweight cotton paper or cardstock (250+ GSM)
- Scrap paper or newsprint sheets
Step-by-Step Crafting Guide
- Collect fresh, firm leaves that feature prominent raised veins on their undersides.
- Lay your selected leaf face-down on a scrap piece of paper so the veined underside faces up.
- Apply a thin, even coat of acrylic paint or printing ink across the veined side of the leaf using a foam roller or sponge brush.
- Carefully pick up the painted leaf by its stem and place it painted-side-down onto your front card panel.
- Cover the leaf with a clean piece of scrap paper and press down firmly across every section with the palm of your hand or a clean roller.
- Lift the leaf straight up in one smooth motion without sliding it to reveal the crisp botanical impression.
- Repeat with different leaf shapes and colors to build a multi-tonal botanical arrangement.
- Allow the print to dry completely before adding hand-lettered birthday sentiment below the design.
Creative Tips & Variations
- Negative Impression (Silhouette): Place the unpainted leaf down on the card first, then sponge paint over the leaf and surrounding edges; lift the leaf to reveal a crisp white silhouette.
- Metallic Botanicals: Use bronze, gold, and copper metallic acrylic paints on dark charcoal cardstock for a sophisticated nighttime garden feel.
Things to Avoid
Avoid overloading the leaf with wet, dripping paint, as this will result in blobs and smudges rather than delicate vein details. Do not use brittle, dried leaves that will crumble into bits under pressing pressure.
14. Interactive Spinner Wheel Celebration Card
Concept & Overview
A spinner card features a rotating mechanical paper wheel mounted inside the card cover. As the recipient turns the exposed wheel edge, different illustrations, messages, or birthday wishes reveal themselves sequentially through an open window slot on the card front.
Essential Materials
- Two sheets of matching cardstock
- Metal brad fastener (split pin)
- Circle cutter or compass and scissors
- Stamp set or fine gel pens
- Dimensional 3D foam dots or foam tape
Step-by-Step Crafting Guide
- Cut a circular wheel (4.5 inches in diameter) from sturdy cardstock to serve as your rotating message wheel.
- Fold a card panel (5×7 inches) to act as the outer front cover.
- Cut a small window opening (e.g., arc, rectangle, or circle) on the right side of the front cover.
- Cut a tiny notch along the outer right edge of the front cover so a small section of the inner wheel will extend out for easy thumb turning.
- Divide your circular wheel into four equal pie sections using faint pencil lines and write a different mini birthday message or symbol inside each slice.
- Pin the center of the circular wheel behind the front cover using a metal split brad, ensuring it rotates smoothly.
- Apply elevated 3D foam tape around the outer edges of the interior cover, ensuring space is left for the wheel to spin without friction.
- Mount the assembly onto the main interior card base so the wheel stays hidden inside, except for the view window and thumb turn notch.
Creative Tips & Variations
- Age Counter: Design the spinning wheel to show changing milestone numbers through the window, accompanied by playful captions.
- Color Wheel: Paint each segment of the spinner wheel a different rainbow color so the window changes hue dynamically as it is turned.
Things to Avoid
Avoid placing foam tape too close to the spinning wheel’s outer perimeter, as it will pinch the wheel and lock it in place. Take care not to pinch the center metal brad pin too tightly against the paper, which restricts rotation.
15. Shimmering Embossed Metallic Leaf Birthday Card
Concept & Overview
Heat embossing creates raised, glossy, and metallic dimensional patterns that feel luxurious to touch. Using a heat gun, embossing ink, and fine metallic powders, this technique renders intricate birthday graphics, ornate typography, or delicate filigree borders with a metallic finish.
Essential Materials
- Slow-drying clear embossing ink pad (VersaMark)
- Metallic heat embossing powder (Gold, Silver, or Rose Gold)
- Craft heat tool / heat gun
- Desired birthday rubber stamps
- Anti-static powder tool or pouch
- Smooth, heavy cardstock (matte finish)
Step-by-Step Crafting Guide
- Rub an anti-static powder pouch thoroughly over the front surface of your cardstock to eliminate stray oils and static electricity.
- Press your chosen rubber stamp firmly into the clear, slow-drying embossing ink pad.
- Stamp the image cleanly onto your cardstock with firm, even pressure.
- Generously sprinkle metallic embossing powder over the freshly stamped image until all clear wet ink lines are completely covered.
- Tap the edge of the cardstock over a piece of folded scrap paper to knock off all excess loose powder.
- Plug in your craft heat tool, allow it to warm up for 15 seconds, and hold it roughly 2 inches away from the dusted design.
- Watch as the dull powder melts and turns into a raised, brilliant metallic liquid line; sweep the heat tool across the rest of the image evenly.
- Allow the embossed surface to cool for 5 seconds until it sets into a hard, glossy shine.
Creative Tips & Variations
- Clear-on-Black Contrast: Emboss brilliant white or bright gold powders onto pitch-black matte cardstock for a high-contrast visual punch.
- Resist Wash Combination: After heat embossing a pattern, paint watercolor over the entire panel; the raised metallic powder will resist the paint entirely.
Things to Avoid
Avoid using a standard hair dryer instead of a specialized craft heat tool; hair dryers blow too much air at low temperatures, scattering loose powder everywhere before it melts. Do not hold the heat gun in one spot for too long, or you will scorch and singe the paper.



16. Cute Felt Appliqué & Fabric Scraps Card
Concept & Overview
Incorporating soft textiles onto paper crafts introduces a cozy visual contrast. By layering cut felt shapes, fabric scraps, and simple stitching, you can create adorable 3D characters, birthday balloons, or cozy mini bunting banners that give your card a charming, handmade warmth.
Essential Materials
- Soft craft felt sheets in bright colors
- Assorted patterned fabric scraps
- Fabric shears or sharp precision scissors
- Fabric glue or high-tack craft adhesive
- Fine point fabric markers or embroidery floss
- Textured cardstock base
Step-by-Step Crafting Guide
- Choose a central motif for your card (e.g., a tiny felt birthday cake, a soft party hat, or mini felt balloons).
- Trace your design shapes onto felt sheets and cut them out cleanly using sharp fabric shears.
- Cut thin triangular pennants from colorful patterned fabric scraps to build a mini party banner layout.
- Adhere the fabric pennants along the top edge of your card cover using a light application of fabric glue.
- Hand-draw a fine string line beneath the banner using a dark gel pen or stitch a real thread line across.
- Glue your cut felt shapes in the central section of the card face, layering overlapping elements to build simple 3D relief.
- Draw fine detail facial features or decorative stitch lines onto the felt using fine-point fabric markers.
- Add a stamped or written greeting along the bottom section.
Creative Tips & Variations
- Padded Felt Motif: Place a tiny bit of cotton batting beneath the central felt shape before gluing the edges down to turn it into a soft, squishy plush appliqué.
- Mixed Media Collage: Pair felt shapes with rustic buttons, lace ribbon trims, and paper cuts to create a rich scrapbooking collage composition.
Things to Avoid
Avoid using dull household paper scissors to cut felt, as they will chew and fray the felt edges rather than making clean cuts. Avoid over-saturating thin fabric scraps with liquid glue, which causes dark wet stains on light-colored fabrics.
17. Vintage Newspaper & Scrapbook Decoupage Card
Concept & Overview
Decoupage is the art of layering cut paper elements onto a surface and sealing them under coats of finish. Using antiqued newspaper prints, vintage book pages, botanical ephemera, and postage stamps, this design creates a nostalgic collage bursting with history, texture, and artistic complexity.
Essential Materials
- Vintage paper scraps (old book pages, vintage newsprint, music sheets)
- Decoupage glue and sealer (e.g., Mod Podge matte)
- Flat synthetic wash brush
- Ephemera cutouts (vintage butterflies, old postal stamps, ticket stubs)
- Ink pad for distressing edges
- Heavy kraft or cardboard card base
Step-by-Step Crafting Guide
- Tear vintage book pages, sheet music, and newsprint into irregular small strips and shapes.
- Lightly distress the torn paper edges by rubbing them against a brown ink pad to accentuate their aged texture.
- Brush a thin layer of decoupage glue onto a section of your kraft cardstock cover.
- Lay down paper pieces one by one, overlapping their edges to create a rich collage background.
- Apply a light top coat of decoupage glue over the layered paper background to seal everything smooth and flat.
- Once dry, arrange focal ephemera cutouts (such as a vintage flower illustration, a retro birthday stamp, or a frame tag) over the collage.
- Adhere the main focal cutouts using elevated foam tape to separate them visually from the busy decoupaged background.
- Hand-letter a classic birthday message on a clean paper strip tag and mount it across the collage.
Creative Tips & Variations
- Color Tinting: Apply a very light, diluted wash of tea or walnut ink over the completed decoupage layer to blend all disparate paper elements under one warm vintage tone.
- Sewn Edges: Stitch around the outer perimeter of the decoupaged panel with a sewing machine before mounting it onto the card base for an authentic mixed-media look.
Things to Avoid
Avoid applying thick coats of decoupage glue all at once, which will cause underlying paper strips to wrinkle, bubble, and warp heavily. Take care not to use original, irreplaceable historic documents—use printed reproductions or royalty-free vintage prints instead.
18. Celestial Constellation & Night Sky Card
Concept & Overview
Inspired by cosmic beauty, this deep midnight design features celestial elements, glowing starry nebulae, gold foil constellations, and moon phases. It is a mystical, captivating choice for stargazers, astrology lovers, and anyone who appreciates the vast beauty of the night sky.
Essential Materials
- Deep navy blue or black watercolor paper (or matte dark cardstock)
- White gouache paint or opaque white acrylic
- Gold metallic paint, metallic ink, or metallic gel pen
- Old toothbrush for splattering
- Fine detail paintbrush (Size 00)
- Compass or circular template
Step-by-Step Crafting Guide
- Take a panel of dark navy blue cardstock or heavy watercolor paper.
- Mix white gouache paint with a tiny splash of water until it reaches the consistency of cream.
- Dip an old toothbrush into the white paint, face it toward your panel, and flick the bristles back with your thumb to scatter fine white star specks across the paper.
- Allow the background star field to dry completely.
- Using gold metallic ink and a fine detail brush, paint a large central moon phase or celestial moon wheel.
- Trace out specific star constellations (matching the birthday recipient’s zodiac sign) by painting tiny gold star nodes.
- Connect the star nodes with thin, delicate gold ink lines.
- Write a celestial-themed birthday greeting like “Written in the Stars” or “Wishing You a Stellar Birthday” in elegant script across the bottom.
Creative Tips & Variations
- Pierced Light Holes: Use a fine piercing needle to punch clean tiny holes right through the main gold constellation nodes; when the card is held up to light, the stars actually shine through!
- Glowing Nebula: Blend purple, magenta, and cyan chalk pastels softly across the center of the dark cardstock before splattering stars to mimic deep space nebulae.
Things to Avoid
Avoid making star splatters too heavy by using a toothbrush loaded with excess watery paint; this will result in large wet blobs rather than delicate starry skies. Test your splatter technique on scrap paper first before trying it on your final card.
19. Interactive Scratch-Off Reveal Birthday Card
Concept & Overview
Adding an element of surprise, a scratch-off card allows you to hide a secret birthday message, coupon, or gift reveal beneath a metallic scratchable coating. The recipient uses a coin to scratch away the surface coating, making the unwrapping process interactive and playful.
Essential Materials
- Heavy cardstock base
- Liquid acrylic paint (Silver or Metallic Gold)
- Liquid dish washing soap
- Clear self-adhesive packing tape OR clear contact paper
- Small detail paintbrush or foam brush
- Fine gel pens for secret messages
Step-by-Step Crafting Guide
- Write your primary birthday greeting on the card front, and design 3 small circular “gift bubbles” or “prize boxes” along the middle section.
- Write secret hidden messages, wishes, or gift offers (e.g., “Free Coffee on Me!”, “A Giant Hug”, “Dinner Treat”) inside each bubble using colorful gel pens.
- Cover the secret bubbles completely with a strip of crystal-clear self-adhesive packing tape, smoothing out all air bubbles.
- Mix 2 parts metallic acrylic paint with 1 part liquid dish soap thoroughly in a small mixing cup.
- Paint a thin layer of this paint-soap mixture directly over the clear tape sections covering your secret messages.
- Allow the first coat to dry for 20 minutes, then apply 2 to 3 additional thin coats until the text beneath is completely opaque and hidden.
- Decorate the surrounding card area with instructions like “Scratch Here with a Coin!”.
- Pair the finished card with a shiny coin tucked into a small envelope notch inside.
Creative Tips & Variations
- Lotto Ticket Theme: Style the whole card cover to look like a playful handmade birthday lottery scratch-off ticket complete with lucky numbers.
- Multi-Choice Gift Card: Hide three different outing options under separate scratch panels and let the recipient choose which gift option they want to redeem.
Things to Avoid
Avoid applying the paint mixture directly onto bare paper without applying clear tape first; without the smooth tape barrier, the paint will soak into the paper fibers and will not scratch off cleanly. Avoid painting single thick coats, which crack easily and take a long time to dry.
20. Pocket Gift Tag & Mini Note Cascade Card
Concept & Overview
This functional design integrates mini pockets directly onto the inner or outer card panels. These pockets hold removable gift tags, mini love letters, pressed keepsakes, or gift cards, creating an interactive unboxing experience where the recipient pulls out hidden treasures step by step.
Essential Materials
- Heavyweight cardstock for card base
- Coordinating patterned papers for pockets
- Pocket punch board OR craft knife and double-sided foam tape
- Assorted baker’s twine, ribbons, and eyelets
- Blank gift tags or mini note cards
- Rubber stamps and ink pads
Step-by-Step Crafting Guide
- Create a folded card base measuring 5×7 inches.
- Cut two rectangular strips of patterned paper (3×5 inches and 2.5×5 inches) to form tiered pockets.
- Apply thin double-sided tape runner along three edges (left, right, bottom) of each pocket piece, leaving the top edge completely open.
- Adhere the pockets onto the inner or outer card panel, layering the smaller pocket directly over the larger one to create two cascading levels.
- Craft three mini tags or note cards using coordinating cardstock, punching a clean hole at the top of each.
- Thread colorful baker’s twine through the tag holes and tie off with small knots.
- Write personal messages, birthday quotes, or attach a physical gift card onto the tags.
- Slide the completed tags neatly into the cascading pockets so their ribboned tops pop out invitingly.
Creative Tips & Variations
- Envelope Cascades: Use three mini glassine envelopes stacked vertically on top of each other instead of paper pockets to house secret folded letters.
- Photo Tag Hybrid: Paste mini photos onto the reverse sides of the pull-out tags so they double as personal photo keepsakes.
Things to Avoid
Avoid applying wide strips of tape inside the pockets, as this restricts the internal pocket space, making it impossible to slide tags in and out smoothly. Do not use overly thick cardstock for the tags, which will stretch out the pockets and make the card bulge awkwardly when closed.