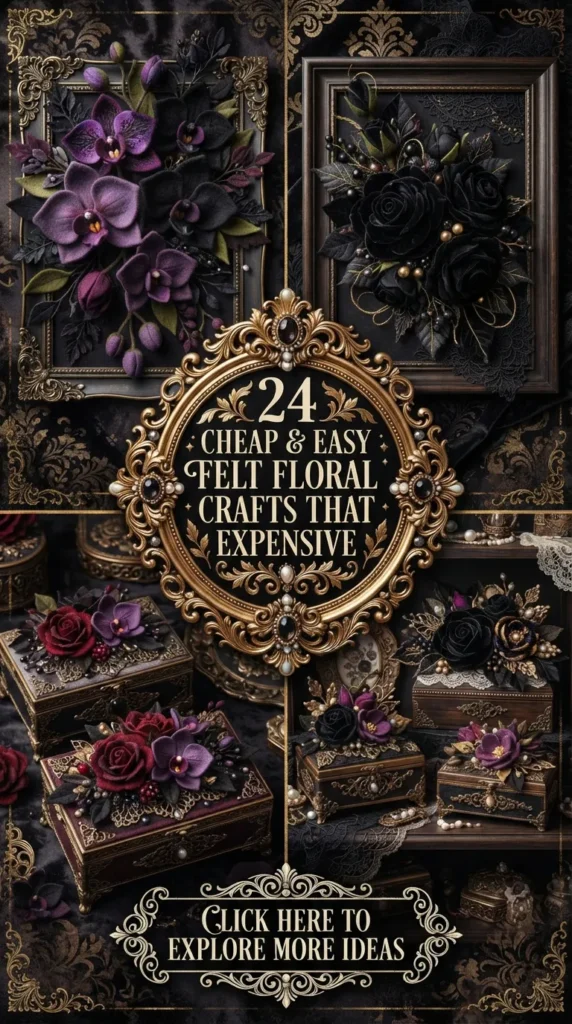
Felt floral crafting has quietly emerged as one of the most stylish, versatile, and budget-friendly trends in modern home decor and DIY aesthetics. Unlike paper flowers that tear easily or plastic faux greenery that can look artificial, felt offers a soft, sculptural texture that mimics the organic beauty of real blooms. Using affordable materials—primarily synthetic or wool-blend felt sheets, floral wire, hot glue, and scissors—you can create stunning handcrafted botanicals that look like high-end designer accent pieces from boutique shops.
Whether you are looking to curate an elegant centerpiece, elevate a gallery wall, or build a seasonal wreath that lasts for years, felt florals provide an approachable starting point. This comprehensive guide walks you through twenty creative, easy-to-make felt floral crafts designed to look luxurious without stretching your budget.


1. Dimensional Felt Peony Statement Wall Art
What This Idea Means
Dimensional felt peony wall art replaces flat canvas prints with tactile, 3D botanical sculptures mounted inside deep shadow box frames. By layering softly curved felt petals, you create a realistic, romantic bloom that pops off the wall, capturing light and shadows in a way flat art cannot.
Needs to Make This
- 1mm to 2mm soft felt sheets (blush pink, cream, and olive green)
- Deep shadow box frame (10×10 inches or 12×12 inches)
- Fabric scissors
- High-temp hot glue gun and glue sticks
- Heavy cardstock or linen fabric for the background backing
How to Make It
- Prepare the Backing: Open your shadow box frame and cover the wooden backing board with textured neutral linen or heavy cream cardstock using a thin layer of glue.
- Cut Peony Petals: Cut 5 distinct sizes of petals from blush felt, starting with 6 small heart-shaped inner petals (approx. 1 inch wide) up to 10 large outer petals (approx. 2.5 inches wide).
- Shape the Petals: Pinch the bottom base of each petal and apply a tiny dab of hot glue to create a cup-like, realistic curve.
- Assemble the Center: Roll a small strip of yellow or fringe felt to create the stamen center. Glue the smallest petals around this core in a overlapping spiral pattern.
- Layer to Fullness: Continue gluing medium and large petals outward, staggered between the previous layers to build a dense, lush bloom.
- Mount: Glue dark green felt leaves underneath the base of the flower, then hot glue the entire completed bloom securely into the center of the prepped shadow box frame before closing.
Tips and Variations
- Tip: Lightly stretch the rounded upper edge of each felt petal with your fingers before gluing to create natural, wavy edges.
- Variation: Swap blush pink for deep crimson or midnight blue to create a moody, dramatic artwork suitable for modern or moody dark-academia interiors.
2. Velvet-Touch Felt Hydrangea Stem Clusters
What This Idea Means
Hydrangeas are famous for their lush, abundant volume, but buying realistic faux stems can be expensive. This project uses hundreds of tiny cut felt florets bunched tightly together onto a sturdy floral stem to recreate the classic, grand cluster look of fresh hydrangeas.
Needs to Make This
- Wool-blend felt in powder blue, dusty violet, or crisp white
- 18-gauge floral stem wire
- Green floral tape
- Miniature four-petal die-cut punch or sharp scissors
- Pearl-headed stamen pins or small beads
- Hot glue gun
How to Make It
- Cut the Florets: Cut dozens of tiny four-petal shapes (about 0.75 inches wide) out of your soft felt. You will need around 60 to 80 small florets per full flower head.
- Prep the Small Stems: Cut thin 2-inch pieces of light floral wire. Thread a small bead or stamen onto the end, folded over to secure it.
- Form Individual Florets: Pierce the center of a felt four-petal floret with the wire, pushing it up to the bead, and secure it with a tiny drop of glue on the underside.
- Bunch into Sub-Clusters: Group 5 to 7 individual wire florets together, wrapping their stem wires tightly with green floral tape.
- Build the Main Stem: Take 6 to 8 of these sub-clusters and attach them together along a central 18-gauge floral wire, wrapping downwards with floral tape to form a round, mounded dome shape.
- Finish with Leaves: Glue two large, notched green felt leaves directly under the base of the flower cluster.
Tips and Variations
- Tip: Use two slightly different shades of blue or purple felt within the same cluster to add depth and natural dimensional variation.
- Variation: Keep stems short to create low-profile bowl fillers for entry tables or dining credenzas.
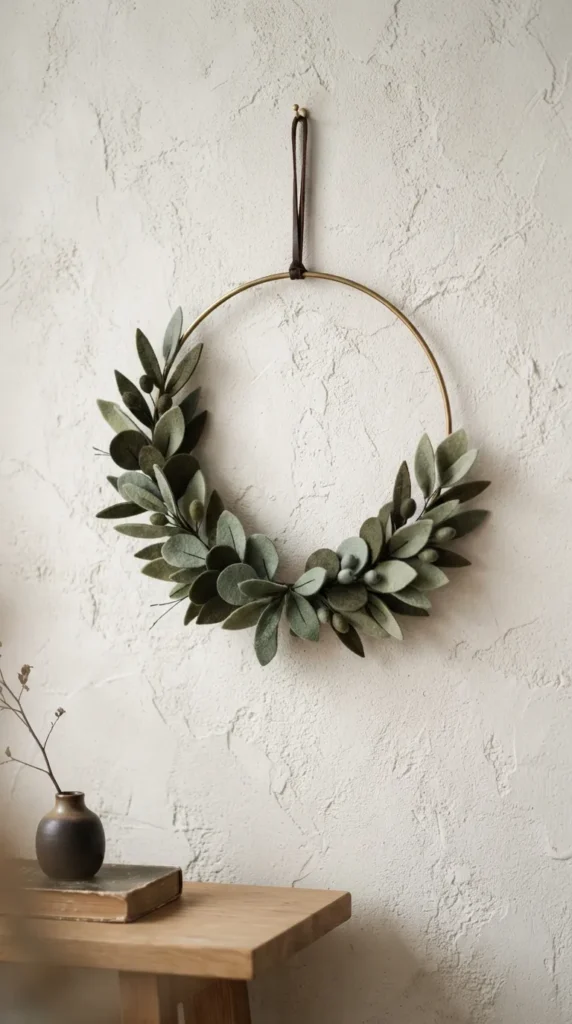
3. Minimalist Felt Eucalyptus & Olive Leaf Wreath
What This Idea Means
This craft focuses on clean lines and muted foliage rather than dense floral petals. A minimalist wreath featuring trailing felt eucalyptus and olive leaves wrap around a modern brass or wooden hoop, delivering an airy, Scandinavian-inspired decor piece.
Needs to Make This
- 12-inch or 14-inch metal hoop (gold or brass) or embroidery hoop
- Sage green, eucalyptus green, and dark olive felt sheets
- 22-gauge green paddle wire
- Hot glue gun
- Fine-tip permanent marker or fabric pen
How to Make It
- Cut Foliage: Cut pairs of round eucalyptus leaves in varying sizes (1 inch to 2 inches) and elongated oval olive leaves from your green felt shades.
- Stem the Leaves: Glue matching leaf pairs together with a thin piece of paddle wire sandwiched down the center line, leaving an exposed wire tail at the bottom.
- Assemble Vines: Twist wire leaf tails together in an alternating pattern to build two continuous foliage vines (about 12 inches long each).
- Attach to Hoop: Wrap the base of the vines around the bottom half of your metal hoop, securing with subtle wraps of paddle wire or discreet dabs of hot glue.
- Add Detail: Draw subtle center leaf veins with a fine fabric pen for added realistic texture.
- Balance the Layout: Leave the top half of the brass hoop bare for a sleek, contemporary asymmetrical balance.
Tips and Variations
- Tip: Mix stiff felt for larger leaves and soft felt for smaller leaves to help the foliage keep its shape without sagging.
- Variation: Add small cream-colored felt berries spaced evenly along the olive branches for a seasonal winter subtle touch.
4. Vintage Botanical Felt Rose Napkin Rings
What This Idea Means
Elevate any dinner party or holiday table setting with handmade heirloom-style napkin rings featuring compact, elegant felt garden roses attached to textured wooden or ribbon-wrapped bands.
Needs to Make This
- Dusty rose, ivory, or terracotta felt
- Wooden napkin rings (plain) or thick felt strips
- Fabric scissors
- Hot glue gun
- Gold paint or metallic wax highlight (optional)
How to Make It
- Cut Rose Spirals: Cut a 4-inch circle out of your chosen felt sheet. Cut the circle in a continuous spiral from the outside edge toward the center, making the inner cut slightly wavy.
- Roll the Rose: Starting from the outer tail of the spiral, roll the felt tightly inward toward the central circle base.
- Secure the Base: Apply a generous dollop of hot glue onto the bottom circular flap and press it against the rolled underside to lock the rose shape in place.
- Add Leaf Accents: Cut two small leaf shapes from sage felt and glue them under the base of the completed rose bloom.
- Attach to Ring: Hot glue the bottom base of the rose securely onto the top surface of a wooden napkin ring.
Tips and Variations
- Tip: Lightly rub metallic gold wax onto the outer felt petal edges for an antique, luxurious shimmer.
- Variation: Replace wooden rings with velvet ribbon ties that can wrap around cloth napkins or guest favors.
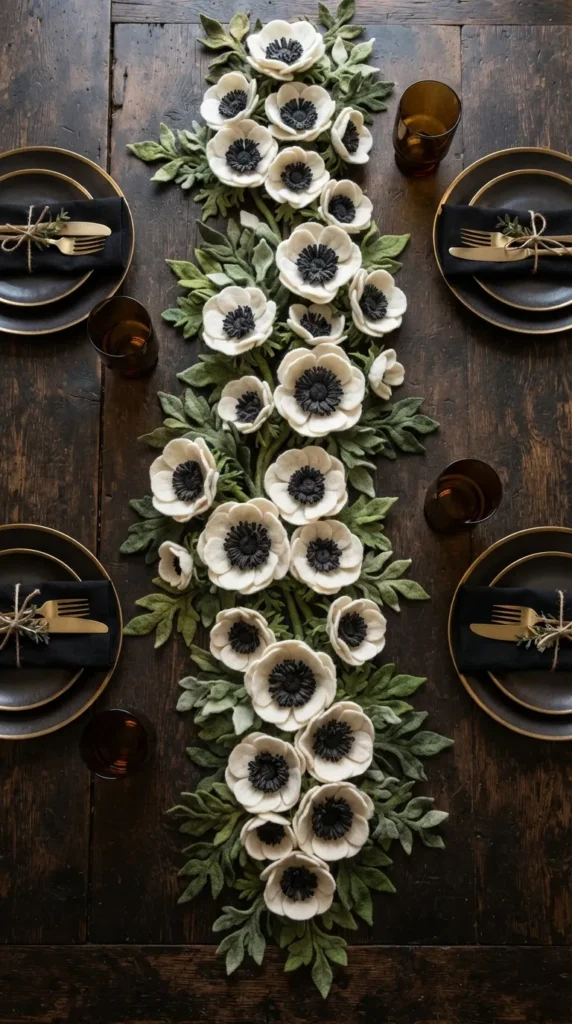
5. Modern Felt Anemone Table Runner
What This Idea Means
Instead of a standard fabric table runner, this project links individual felt anemone blossoms and trailing leaves together into a flexible, flat-laying botanical garland runner that sprawls down the center of your dining table.
Needs to Make This
- Bright white, ivory, and charcoal black felt sheets
- Dark green felt for foliage
- Thick felt backing strips (1 inch wide by desired length)
- Hot glue gun
- Sharp detail scissors
How to Make It
- Create Anemone Centers: Cut 1-inch black felt circles and fringe the edges fine-toothed. Roll a small black ball of felt in the middle to create the iconic dark anemone center.
- Cut Petals: Cut 6 wide, teardrop-shaped white felt petals for each flower blossom.
- Assemble Anemones: Glue the 6 petals in a circular flat pattern, then attach the fringed black center directly over the middle intersection.
- Prep Runner Base: Cut long strips of thick green felt to serve as the hidden structural base connecting your garland runner.
- Arrange Layout: Lay out green felt branches and leaves flat along the base strip, gluing them securely.
- Mount Flowers: Scatter and glue your assembled felt anemones evenly down the foliage spine, ensuring blooms overlap leaf edges for a organic look.
Tips and Variations
- Tip: Keep flower bases flat by omitting wire stem components so the runner lies completely flat under candleholders and tableware.
- Variation: Use deep navy blue or plum felt for petals to create an moody autumnal feast layout.


6. Luxury Felt Magnolia Centerpiece Bowl Filler
What This Idea Means
Grand magnolia blooms with thick, dramatic petals are handcrafted from heavyweight wool felt and gathered into a large decorative ceramic bowl or wooden dough bowl for a classic, sophisticated home decor accent.
Needs to Make This
- Heavyweight 2mm white or off-white felt
- Chocolate brown felt (for outer stem and bud bases)
- Golden yellow felt (for central carpel/stamen)
- Floral wire and tape
- Decorative wooden or ceramic bowl
How to Make It
- Build Stamen Core: Cut a 1.5-inch strip of yellow felt, fringe the top edge, and roll it tightly around the top of a thick wire stem, gluing as you roll.
- Cut Magnolia Petals: Cut 9 thick, pointed oval petals out of heavyweight white felt: 3 small inner, 3 medium, and 3 large outer petals.
- Form Center: Wrap the 3 smallest inner petals tightly around the yellow stamen core so they stand almost vertical.
- Add Outer Petals: Flare the medium and large petals slightly outward, gluing them around the central cluster in alternating tiers.
- Add Brown Sepals: Wrap the base of the bloom with small triangular pieces of chocolate brown felt to replicate real magnolia sepals.
- Display: Omit long stems and place 5 to 7 oversized magnolia heads together inside a decorative bowl with moss.
Tips and Variations
- Tip: Lightly spray stiffener spray onto white felt petals so they retain their signature wide, sculpted curve without drooping over time.
- Variation: Add small brown felt magnolia seed pods to give the bowl filler an authentic seasonal autumn feel.
7. Handcrafted Felt Wildflower Bouquet in Ceramic Pitcher
What This Idea Means
Capture the casual, charming essence of a freshly gathered field bouquet. This craft mixes vibrant felt poppies, chamomile daisies, and lavender spires arranged loosely inside a vintage ceramic pitcher.
Needs to Make This
- Multi-color felt pack (poppy red, daisy white, yellow, lavender, grass green)
- Cloth-covered floral wire stems
- Yellow felt beads or pom-poms
- Hot glue gun
- Wire cutters
How to Make It
- Make Daisies: Glue a yellow felt ball center to white daisy petal rings, attaching to a wire stem.
- Make Poppies: Cut 4 overlapping black-centered red petals, forming a shallow bowl shape around a dark green stem hub.
- Make Lavender: Take a 2×8-inch lavender felt strip, fold in half lengthwise, cut fine fringe along the folded fold, and wrap spirally down the top 3 inches of a stem wire.
- Assemble Stems: Wrap all exposed lower wire stems neatly with brown or green floral wrap.
- Arrange: Combine 3 poppies, 5 daisies, and 4 lavender spires in hand, crisscrossing stems before placing them into a farm-style ceramic jug.
Tips and Variations
- Tip: Bend stems at slightly varying heights to prevent a stiff, artificial arrangement look.
- Variation: Swap the pitcher for a clear glass vase filled with acrylic fake water for an realistic floral display.
8. Sculpted Felt Succulent & Cacti Terrarium
What This Idea Means
Felt succulents combine rich texture with zero-maintenance convenience. Designed with layered rosette geometric felt patterns, these faux plants sit inside geometric glass terrariums or rustic clay pots.
Needs to Make This
- Stiff felt sheets in succulent colors (dusty jade, plum, mint, muted purple)
- Terrarium glass container or small terra cotta pots
- Decorative pea gravel, river rock, or potting soil
- Hot glue gun
- Chalk pastels (for edge shading)
How to Make It
- Cut Star Rosettes: Cut 6 to 8 star-shaped layers of felt in decreasing sizes for an echeveria-style succulent.
- Shade Edges: Rub a smudge of burgundy or pink chalk pastel along the outer tip edges of each green felt star for botanical realism.
- Layer and Glue: Stack and rotate star layers from largest to smallest, placing a small dot of glue between each layer to build a plump rosette.
- Pinch Inner Leaves: Pinch the center-most tiny leaves upward and secure with glue to hide the center stack point.
- Prep Container: Fill your glass terrarium bottom with small river rocks.
- Set Plants: Place 3 to 4 varied felt succulents onto the stone bed, tucking small felt string-of-pearls trailing vines around the edges.
Tips and Variations
- Tip: Mix stiff and soft felt across different plants in the same terrarium to provide visual variety.
- Variation: Mount succulents onto a piece of driftwood instead of a glass container for an organic table piece.
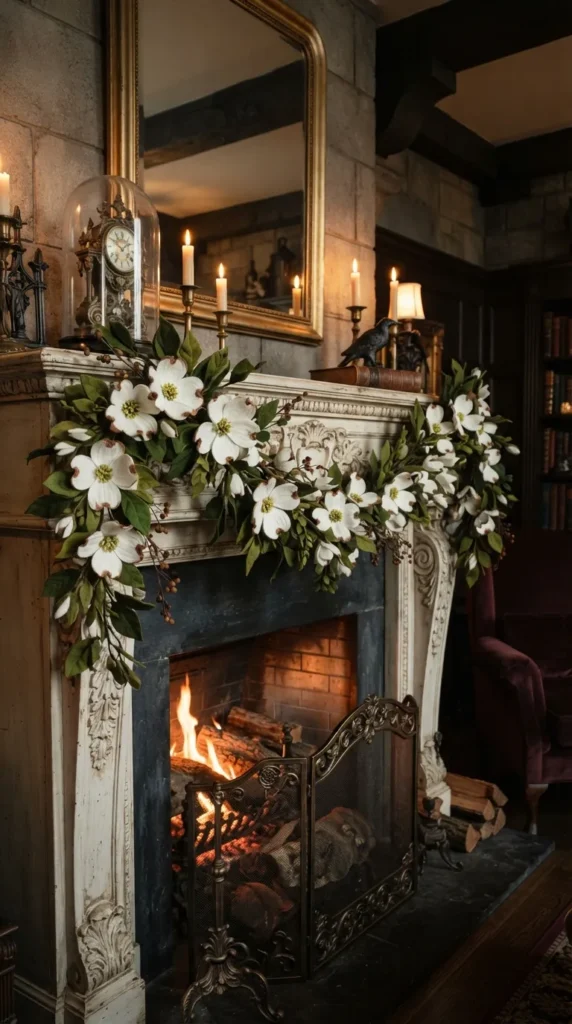
9. Regal Felt English Garden Dogwood Garland
What This Idea Means
Inspired by classic English estates, this craft features long trailing garlands woven with distinctive four-petal dogwood blossoms and dark leaves. Perfect for draping across fireplace mantels, mirrors, or stair bannisters.
Needs to Make This
- Crisp white or soft cream felt
- Rusty brown felt (for petal tips)
- Bright yellow-green felt (for centers)
- 6-foot thick jute twine or floral vine rope
- Hot glue gun
How to Make It
- Cut Dogwood Petals: Cut classic 4-petal cross shapes from white felt. Snip a tiny notch into the top center of each of the 4 petal edges.
- Color Tip Notches: Lightly touch the notched tips with a brown fabric marker or brown felt dabs to capture signature dogwood details.
- Create Tufted Centers: Roll tiny strips of light yellow-green fringed felt into small tight buttons and glue one in the center of each white flower.
- Cut Foliage: Cut pairs of dark green, veined leaves.
- Attach to Rope: Hot glue green leaves directly onto the 6-foot jute twine at 3-inch intervals.
- Mount Flowers: Secure dogwood blooms directly on top of leaf pairs along the entire length of the rope garland.
Tips and Variations
- Tip: Gently bend individual petals forward to create a slight cup shape so flowers don’t lay completely flat.
- Variation: Add small twinkling fairy lights along the vine rope before mounting flowers for evening ambience.
10. Moody Felt Crimson Dahlia Hanging Wall Hoop
What This Idea Means
A dramatic, moody botanical craft featuring a large, multi-petaled felt dahlia in deep wine crimson, mounted off-center on a modern circular hanging embroidery hoop with subtle greenery accents.
Needs to Make This
- Deep crimson, burgundy, and plum felt sheets
- 10-inch wooden embroidery hoop
- Hot glue gun
- Fabric scissors
- Hanging leather cord or ribbon
How to Make It
- Cut Dahlia Petals: Cut 40 to 50 small cone/diamond-shaped petals from burgundy felt, scaling up slightly in size for outer layers.
- Form Petal Cones: Pinch and glue the lower edges of each petal together to form a tube-like, pointed cone shape.
- Build Core: Cut a small 2-inch circle base from felt. Glue the tiny central petaled cones vertically in a tight central cluster.
- Glue Outer Layers: Expand outward in concentric circles, gluing additional cone petals until you have a dense, fully rounded dahlia head.
- Prep Hoop: Thread a simple leather cord loop to the top screw of your embroidery hoop for hanging.
- Mount Dahlia: Hot glue two dark leaves onto the bottom-left arch of the wood hoop, then secure the large crimson dahlia bloom directly over them.
Tips and Variations
- Tip: Layer slightly lighter plum petals in the outer rows to mimic how daylight hits real dahlia blooms.
- Variation: Leave the wood hoop unpainted for warm contrast, or spray-paint it matte black for modern dramatic decor.



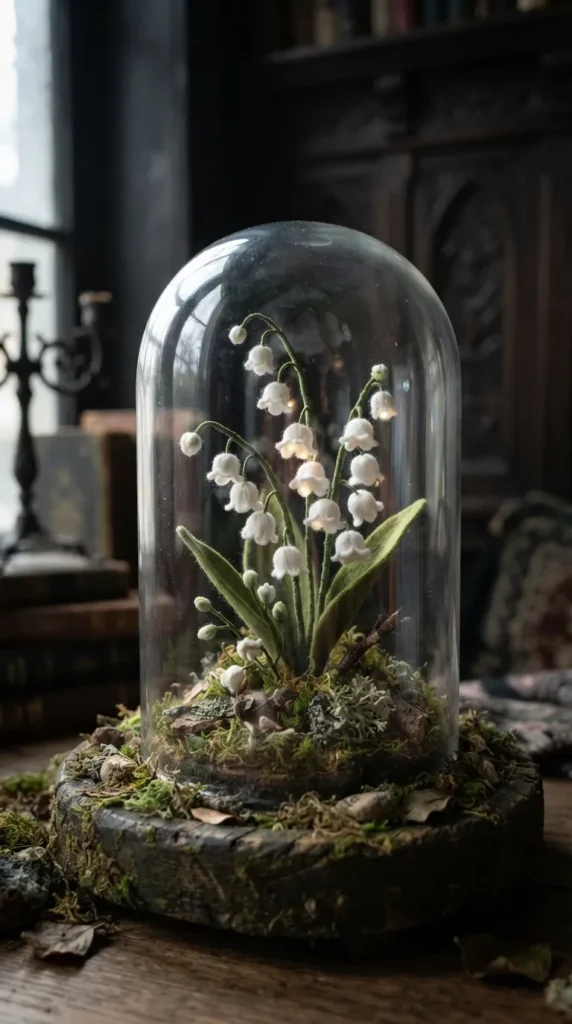
11. Delicate Felt Lily of the Valley Bell Jar Display
What This Idea Means
An elegant, glass-encased cloche display featuring tiny, bell-shaped white felt Lily of the Valley flowers hanging gracefully from thin stems over a bed of natural moss.
Needs to Make This
- Thin, soft white felt
- Deep forest green felt (for wide leaves)
- Fine green wrapped floral stem wire
- Glass cloche display jar with wooden base
- Preserved dried moss
- Hot glue gun
How to Make It
- Form Tiny Bells: Cut tiny scallop-edged circles (0.5 inch diameter) from thin white felt. Cut a slit to the center, roll into a tiny cup shape, and glue closed.
- Attach Bells to Stems: Bend tiny loops at the end of thin branch wires and glue a white bell flower over each loop, pointing down like a cup.
- Build Stem Spire: Attach 5 to 7 bell flowers along a curved main wire stem, spacing them sequentially from small at the top to larger at the bottom.
- Make Leaves: Cut 2 wide, upright sheath leaves from forest green felt and glue them around the base of the flower stem.
- Prep Cloche Base: Cover the cloche’s wooden base with preserved green moss using hot glue.
- Mount and Cover: Glue the flower base securely into the center of the moss base, then lower the glass jar cover over top.
Tips and Variations
- Tip: Curve the main flower wire into a gentle arching bend so the tiny bell blossoms drop gracefully downward under the glass.
- Variation: Insert a tiny battery-powered LED warm micro light wire under the moss bed to illuminate the bells at night.
12. Chic Felt Ranunculus Boutonnieres & Corsages
What This Idea Means
Ideal for weddings, anniversaries, or formal events, these chic felt ranunculus boutonnieres offer an enduring, keepsake alternative to delicate real flowers, accented with linen ribbon and brass pins.
Needs to Make This
- Soft pastel felt (apricot, soft yellow, cream, or sage)
- Boutonniere safety pins or lapel magnet backings
- 1/2-inch wide frayed linen or velvet ribbon
- Fine wire stem
- Hot glue gun
How to Make It
- Cut Ranunculus Petals: Cut 20 to 25 small round-edged petals from soft pastel felt.
- Form Dense Inner Core: Roll a tiny ball of green felt on wire stem, then glue inner petals overlapping tightly around it to mimic the papery, compact layers of a ranunculus.
- Layer Petals Outward: Continue adding petals, keeping each row smooth and tightly wrapped around the core.
- Trim Base: Cut away excess stem wire at the flower base using wire cutters, leaving a short 1.5-inch tail.
- Add Leaf & Backing: Glue two small felt leaves behind the bloom, then tightly wrap the short stem tail with linen ribbon.
- Attach Pin: Glue a metal lapel pin or magnet strip neatly onto the back of the foliage base.
Tips and Variations
- Tip: Use thin, high-quality 100% wool felt so the many overlapping petals remain delicate and light rather than bulky.
- Variation: Combine two mini blooms with sprigs of felt eucalyptus to create a matching wrist corsage on an elastic velvet band.
13. Scandinavian Felt Botanical Mobile for Nursery or Living Spaces
What This Idea Means
A soothing, minimalist hanging mobile made with lightweight felt greenery sprigs, soft white blossoms, and natural wooden beads floating balanced from a wooden hoop.
Needs to Make This
- Neutral felt sheets (cream, oatmeal, sage, mustard yellow)
- 8-inch light wood embroidery inner hoop
- Natural unfinished wood beads (assorted sizes)
- Clear monofilament thread or white cotton cord
- Small scissors & needle
How to Make It
- Craft Mini Botanicals: Make 5 simple mini felt flowers (like daisies or single-layer wild roses) and 10 small green leaf pairs.
- Prep Hanging Lines: Cut 5 strands of white cotton cord, each about 18 to 24 inches long.
- Thread Botanicals & Beads: Using a needle, thread cotton cord through felt leaf pairs, wooden beads, and mini flowers, tying small knots under items to fix their height.
- Attach Lines to Hoop: Tie the 5 completed botanical strands at equal distances around the wooden hoop.
- Gather Top Cord: Tie 4 equal cord lengths to the hoop rim, bringing them together at a central top knot ring for balanced hanging.
- Adjust Balance: Shift strand knot points until the mobile hangs level.
Tips and Variations
- Tip: Keep elements lightweight so gentle natural room air currents encourage subtle, calming movement.
- Variation: Choose a color scheme matching specific room palettes, such as blush pink and terracotta or slate grey and navy.
14. Luxury Felt Sunflower & Wheat Autumn Door Swag
What This Idea Means
A warm, welcoming seasonal autumn door hanging that replaces traditional round wreaths with a cascading teardrop swag of large felt sunflowers, autumn leaves, and handcrafted felt wheat sprigs.
Needs to Make This
- Golden yellow, rust brown, dark chocolate, and olive green felt
- Thick floral swag base or wrapped wire stem spine
- Burlap or wide wire-edged ribbon
- Hot glue gun
- Scissors
How to Make It
- Craft Sunflower Centers: Cut a 1×12-inch strip of dark chocolate felt, fringe fine cuts along its length, and roll tightly into a wide 1.5-inch disk center.
- Add Sunflower Petals: Glue two staggered rows of pointed golden yellow felt petals around the brown fringed disk.
- Craft Felt Wheat: Cut tiny oval grains out of oatmeal felt, gluing them spirally down a thin wire stem to imitate fresh wheat stalks.
- Build Swag Base: Assemble olive green and rust-colored felt oak leaves along a sturdy central stem spine, fanning outward at the top and narrowing at the bottom.
- Mount Blooms: Glue 3 large felt sunflowers down the center of the foliage swag base.
- Add Bow & Loop: Tie a rustic burlap bow at the top junction, attaching a strong wire loop on the back for easy hanging.
Tips and Variations
- Tip: Darken the centers of yellow petals with a light stroke of orange chalk pastel for warm depth.
- Variation: Incorporate small felt felted acorns with real acorn caps near the top bow knot.
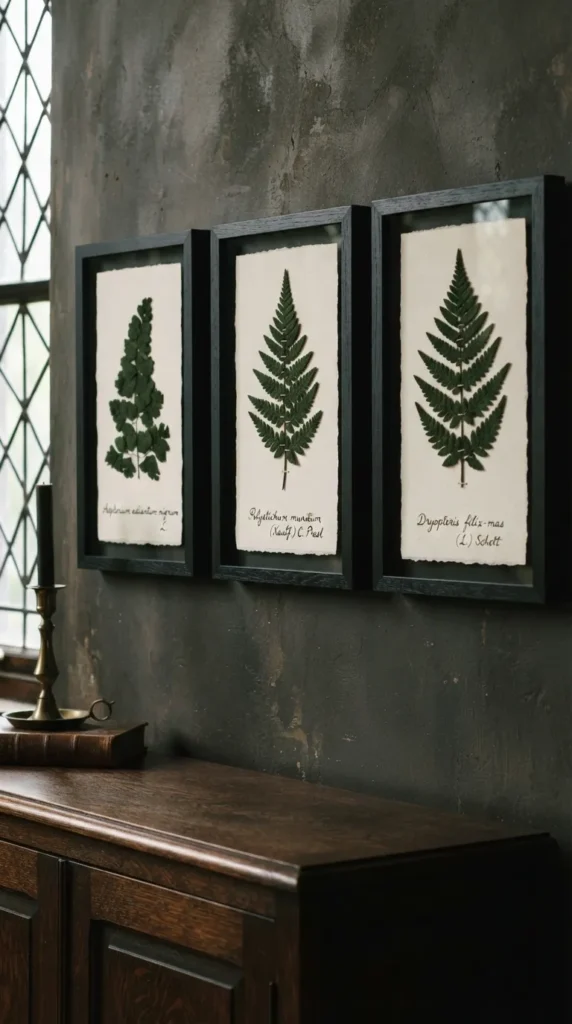
15. Modern Framed Felt Herbarium Specimen Art
What This Idea Means
Inspired by antique pressed-botanical herbarium sheets, this craft mounts individual, delicately cutout felt fern fronds or Ginkgo biloba leaves onto textured paper inside slim glass frames, labeled with handwritten faux botanical titles.
Needs to Make This
- Stiff dark green, sage, or muted gold felt
- Glass float frames or document frames
- Heavy watercolor paper (100lb or thicker)
- Fine black calligraphy pen
- Craft scalpel/X-Acto knife or sharp detail scissors
- Double-sided clear craft tape or tiny dots of glue
How to Make It
- Trace Botanical Outlines: Trace delicate Ginkgo leaf silhouettes or fern fronds onto stiff felt sheets using a light pencil.
- Cut Details carefully: Precision cut leaf shapes using sharp detail scissors or a craft knife on a cutting mat.
- Prep Paper: Cut watercolor paper to fit inside your frame dimensions.
- Write Labels: Write Latin-style botanical labels (e.g., Ginkgo biloba or Adiantum pedatum) in small neat handwriting near the lower right margin of the paper.
- Mount Felt Specimen: Position the felt leaf cutout flat in the center of the paper, securing with tiny dots of glue on the stem and center line.
- Frame: Mount paper securely inside your glass frame and hang as a botanical gallery set.
Tips and Variations
- Tip: Use stiff felt rather than soft felt to ensure sharp, clean leaf silhouette cutouts.
- Variation: Create a grid set of 4 matching framed specimens featuring different leaf species for a high-end wall layout.



16. Felt Hydrangea & Boxwood Topiary Ball Accent
What This Idea Means
A sophisticated, structured sphere accent piece featuring dense felt boxwood leaves and mini hydrangea florets wrapped around a foam ball, resting atop a wooden candlestick or inside a urn pot.
Needs to Make This
- 5-inch styrofoam or foam sphere
- Boxwood green and cream felt sheets
- Small pearl decorative pins or hot glue
- Wooden candlestick pillar or small urn planter
- Leaf punch or scissors
How to Make It
- Cut Boxwood Leaves: Cut hundreds of small oval leaves (approx 0.75 inch) out of vibrant green felt.
- Cut Hydrangea Accents: Cut small cream felt four-petal flowers to mix in among foliage.
- Cover Foam Sphere: Starting from the top, glue or pin leaf pairs closely together in overlapping layers over the entire foam ball surface.
- Incorporate Flowers: Scatter cream hydrangea florets evenly among green leaf layers to create contrast.
- Prep Stand: Coat the top cup of a wooden candlestick holder with generous hot glue.
- Mount Ball: Press the completed topiary ball firmly onto the candlestick top until fully set.
Tips and Variations
- Tip: Ensure no white foam shows through by spray-painting your foam ball dark green before adding felt foliage.
- Variation: Omit the candlestick stand and place 3 topiary balls of varying sizes inside a decorative glass trough or bowl.
17. Handcrafted Felt Camellia Tissue Box Cover
What This Idea Means
Transform an everyday household necessity into an elegant decor item by constructing a structured felt box cover adorned with romantic, multi-layered felt camellia blossoms and dark glossy leaves.
Needs to Make This
- Stiff 2mm felt sheets (linen beige or heather grey for cover)
- Cream, coral, or blush pink felt for camellia flowers
- Hot glue gun
- Ruler and fabric chalk
- Square tissue box (standard boutique size)
How to Make It
- Measure Box Cover: Measure your target tissue box dimensions. Cut 4 side panels and 1 top panel with an oval tissue dispenser slot from stiff 2mm grey felt.
- Assemble Box: Hot glue or hand-stitch side seams together to form a fitted sleeve box cover that slides over the tissue box.
- Craft Camellias: Cut rounded-edge camellia petals, curling edges slightly, and build 2 dense flower heads with central stamen loops.
- Cut Deep Green Leaves: Cut broad, glossy-style dark green leaves with notched edges.
- Decorate Top Corner: Hot glue leaves and two camellia blooms tightly onto one corner of the top panel around the tissue opening.
- Finish: Slide cover over your tissue box for an instant bedside or bathroom upgrade.
Tips and Variations
- Tip: Use heavy-weight 2mm stiff felt for the structural cover so sides remain flat, crisp, and vertical.
- Variation: Add simple hand-stitched blanket stitching along the box edges in contrasting thread for a tailored look.
18. Whimsical Felt Tulip Bulb Stem Bouquet
What This Idea Means
A cheerful, classic spring accent featuring plump, three-dimensional felt tulip heads on sturdy green floral stems, gathered in a simple clear glass vase or tied with twine.
Needs to Make This
- Colorful felt sheets (Dutch orange, soft yellow, soft pink, lilac)
- Green felt for long sheath leaves
- Thick 16-gauge floral wire
- Polyester fiberfill stuffing
- Hot glue gun & thread
How to Make It
- Cut Tulip Petals: Cut 4 petal shapes (curved teardrops) for each tulip bloom.
- Stitch Petal Cups: Stitch or hot-glue side edges of petals together, leaving base open to create a hollow pouch shell.
- Stuff Bloom: Lightly pack a small pinch of fiberfill stuffing inside the tulip shell to give it a soft, plump shape.
- Insert Stem Wire: Insert a green floral stem wire into the open base opening, gather the bottom felt around wire, and wrap tightly with thread and glue.
- Add Long Leaves: Cut long, slender tulip leaves from green felt and glue them lower down the stem wire.
- Bundle: Combine 7 to 9 colorful stems together and place in a clear glass cylinder vase.
Tips and Variations
- Tip: Pinch the top edges of petals together slightly to retain the iconic closed cup shape of fresh tulips.
- Variation: Create a monochromatic bundle (all white or all pale pink tulips) for a clean modern aesthetic.
19. Textured Felt Pinecone & Winter Floral Candle Ring
What This Idea Means
A cozy, winter-themed tabletop center ring featuring handcrafted felt pinecone scales, holly leaves, red felt berries, and winter roses nestled around a central glass pillar candle cylinder.
Needs to Make This
- Tan brown, dark green, winter red, and cream felt
- 6-inch flat cardboard or felt ring base
- Small styrofoam egg shapes (for pinecone cores)
- Glass cylinder candleholder and pillar candle
- Hot glue gun
How to Make It
- Craft Felt Pinecones: Cut dozens of small brown teardrop scales. Glue scales in overlapping rows upward around a small styrofoam egg shape until covered.
- Craft Holly & Berries: Cut notched green holly leaves. Roll small squares of red felt into tight ball berries.
- Craft Winter Roses: Roll simple cream felt spirals to make winter rose blossoms.
- Prep Ring Base: Cut a flat 6-inch doughnut-shaped ring base from stiff felt or heavy cardboard.
- Assemble Wreath Layout: Glue pinecones, holly leaves, red berries, and cream roses densely along the ring base surface.
- Display: Set a clear glass pillar cylinder candle in the hollow center of your completed ring.
Tips and Variations
- Tip: Lightly dusting white paint onto pinecone tips gives a realistic frosted snowfall appearance.
- Variation: Swap winter colors for muted greens and terracotta tones to turn this into an all-season candle wreath.
20. Artisanal Felt Botanical Garland Curtain Tie-Backs
What This Idea Means
Elevate plain window drapery with custom artisanal tie-backs composed of long braided linen cords anchored by thick clusters of sculpted felt greenery, vines, and wild garden blooms.
Needs to Make This
- Mixed felt palette matching your drapery tone
- Thick cotton rope, linen cord, or braided yarn (approx. 24 inches per tie-back)
- Hot glue gun
- Drapery wall hooks or simple tie-back hardware
How to Make It
- Prepare Cord: Cut a 24-inch piece of thick cotton rope or braided linen cord. Tie a neat loop at both ends.
- Craft Flower Cluster: Make 3 medium felt blooms (such as open garden roses or anemones) and multiple cascading leaf branches.
- Create Backing Pad: Cut a 3-inch oval of heavy felt to serve as the structural anchor base plate.
- Assemble Floral Arrangement: Glue leaves and blooms densely onto the oval felt backing pad in an attractive arrangement.
- Attach to Cord: Securely hot glue the finished floral pad directly onto the center section of your braided rope cord.
- Wrap Curtains: Wrap rope around your curtain panel, attaching end loops to your wall hook to showcase the decorative floral cluster.
Tips and Variations
- Tip: Match at least one felt color in the flower cluster to your wall paint or curtain fabric to pull room design together.
- Variation: Omit large flowers and craft purely green foliage tie-backs (eucalyptus, fern, and ivy) for modern organic home style.