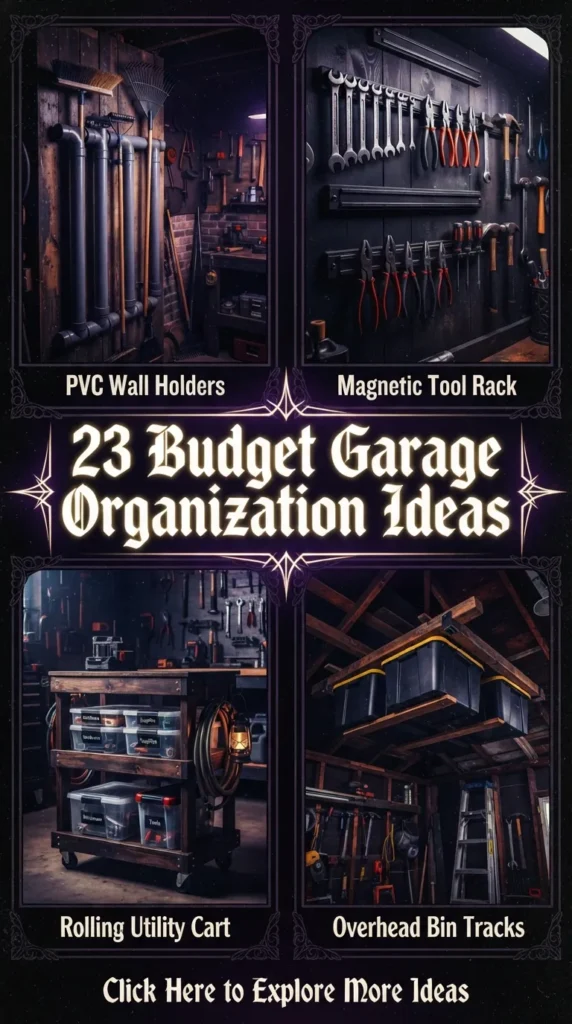
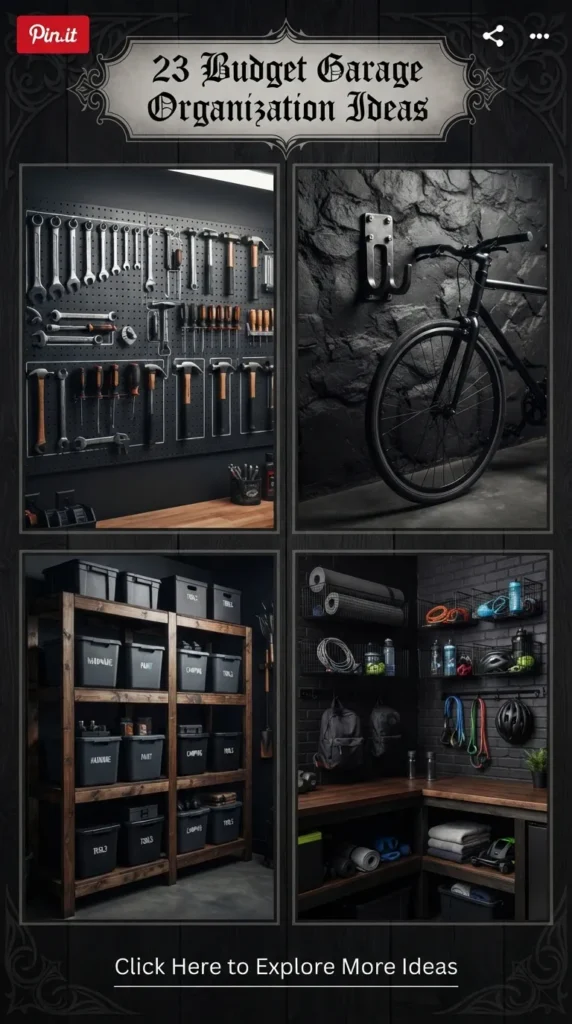
Transforming a cluttered, chaotic garage into a streamlined, functional space doesn’t require a high-end contractor or thousands of dollars. With a few thoughtful DIY hacks, clever repurposing, and budget-friendly hardware store items, you can reclaim your floor space and build an aesthetic, organized setup.
Here are 20 budget-friendly garage organization ideas designed to keep your home tidy, efficient, and visually inspiring.


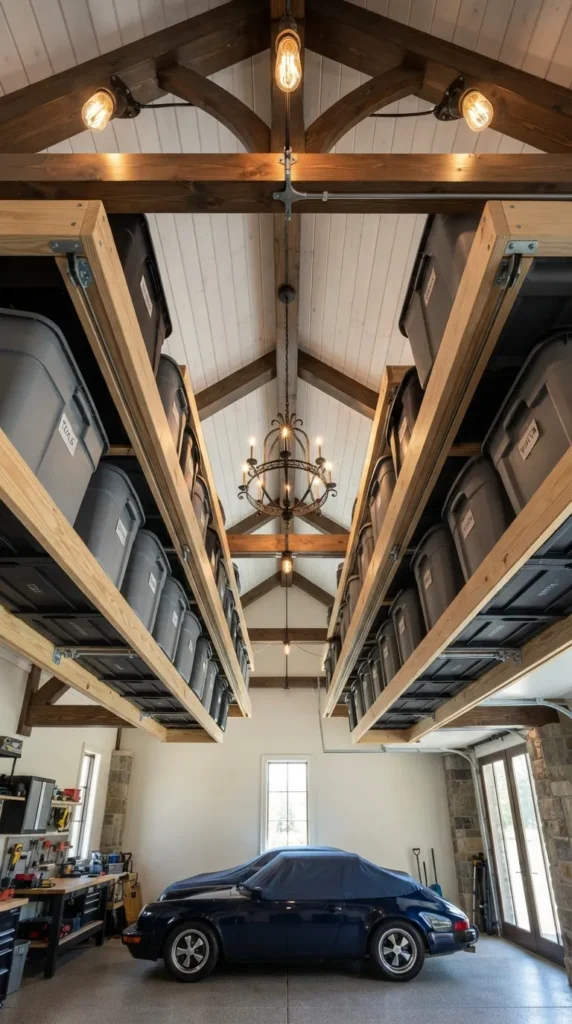
1. Overhead Ceiling Storage Racks
Introduction
Overhead storage utilizes the vast, underappreciated space right above your parked vehicles. It keeps seasonal items, holiday decor, and lightweight bins completely off the ground.
What This Idea Means
Overhead ceiling racks involve securing heavy-duty wooden or metal frames to structural ceiling joists to hold bins and totes vertically overhead, maximizing unused vertical real estate.
How to Make It
- Locate ceiling joists using a stud finder and mark your anchor points.
- Measure and cut 2×4 lumber frames or assemble pre-built budget metal angle irons.
- Secure main support brackets directly into ceiling joists with 3-inch lag screws.
- Attach plywood platforms or crossbars to support plastic totes sliding across the rails.
Supplies Needed
- 2×4 lumber or metal angle irons
- 3-inch lag screws and washers
- Stud finder, tape measure, level, drill
Tips & Variations
- Group totes by season (e.g., winter gear on the left, summer camping on the right).
- Use clear plastic bins so you can easily identify contents from below without pulling them down.
2. French Cleat Wall System
Introduction
The French cleat system is the ultimate customizable wall-storage solution. It allows you to move, swap, and reconfigure shelves, hooks, and tool holders instantly without redrilling walls.
What This Idea Means
A French cleat is a simple joinery method where a strip of wood cut at a 45-degree angle is mounted to the wall, and matching 45-degree cleats attached to boxes or tools hook directly onto it.
How to Make It
- Rip 3/4-inch plywood strips down the center at a 45-degree angle using a table saw.
- Mount the wall cleats horizontally across wall studs with the angled slope facing UP and IN toward the wall.
- Attach opposing angled cleats (slanted DOWN and OUT) to the back of shelves, tool holders, or bins.
- Hang your holders onto the wall cleat system seamlessly.
Supplies Needed
- 3/4-inch hardwood plywood sheets
- Table saw or circular saw with bevel guide
- 2.5-inch wood screws, level, stud finder
Tips & Variations
- Sand edges smoothly for a clean, sleek finish.
- Paint the back wall a contrasting modern dark charcoal color before installing raw wood cleats for a trendy garage workshop look.
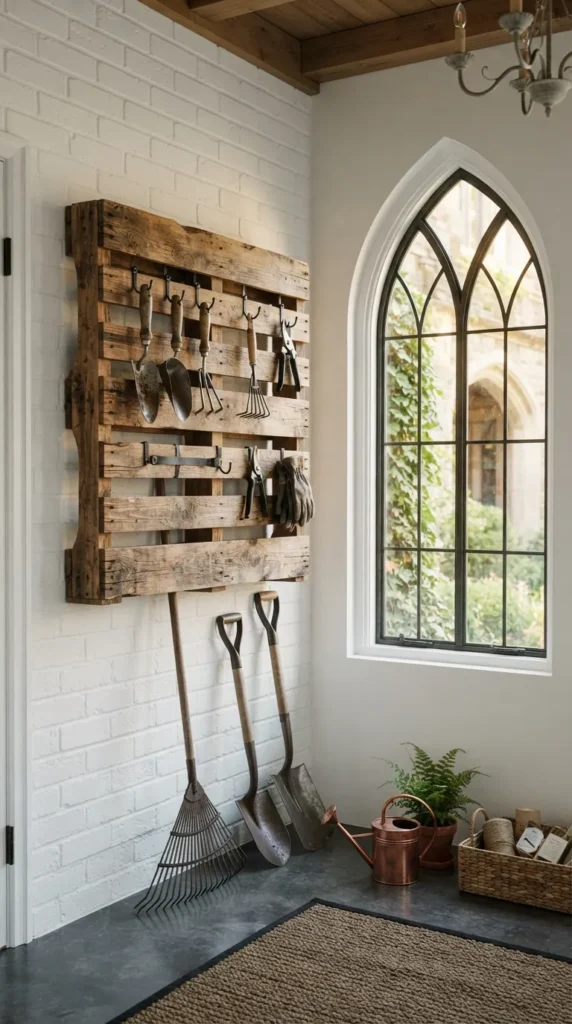
3. Repurposed Wooden Pallet Tool Rack
Introduction
If long-handled yard tools like shovels, rakes, and brooms constantly tip over in corners, a simple wooden shipping pallet offers an immediate, free standing fix.
What This Idea Means
A wooden pallet is secured vertically against a wall stud, using its internal channels as natural vertical slots to hold tall lawn tools safely upright.
How to Make It
- Sand down any rough splinters on a clean, damage-free pallet.
- Position the pallet upright against wall studs with open slots facing upward.
- Drill pilot holes through top support boards into wall studs.
- Secure pallet firmly using heavy-duty screws and washers so it cannot tilt forward.
Supplies Needed
- Wood pallet
- Sandpaper or orbital sander
- 3-inch wall screws, washers, drill
Tips & Variations
- Add small screw-in hooks on the outer sides of the pallet to hang gardening gloves, trowels, and hand shears.
- Coat with clear outdoor sealant or matte black paint for an elevated rustic aesthetic.
4. Magnetic Tool Strips for Small Hardware & Metal Hand Tools
Introduction
Stop digging through cluttered drawers for screwdrivers, pliers, or drill bits. High-strength magnetic strips keep daily tools visible, accessible, and neatly aligned.
What This Idea Means
Mounting heavy-duty bar magnets above your workbench creates an instantaneous magnetic dock for steel hand tools, keeping work surfaces clear.
How to Make It
- Measure the wall length directly above your primary workbench.
- Mark level pilot holes into studs or use heavy drywall anchors.
- Screw heavy-duty magnetic bar strips directly into position.
- Organize your metal tools systematically by size or function.
Supplies Needed
- Heavy-duty magnetic tool bars
- Mounting hardware, drill, level
Tips & Variations
- Use them for organizing small paintbrushes with metal ferrules or organizing loose hardware tins.
- Mount two parallel strips spaced a few inches apart for holding longer metal items straight.
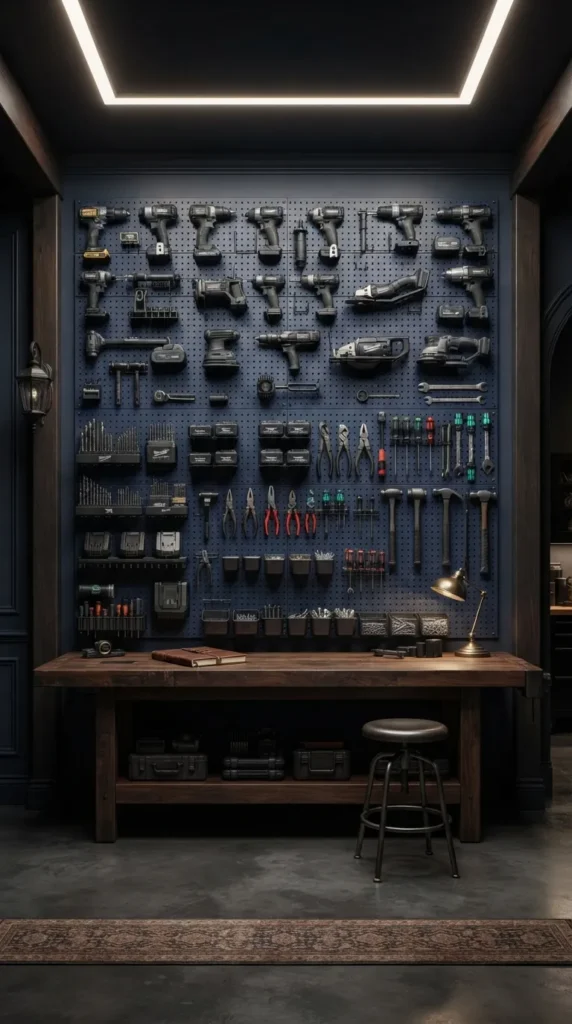
5. Wall-Mounted Pegboard Command Center
Introduction
Pegboards remain a garage classic for a reason: they are accessible, endlessly versatile, and budget friendly.
What This Idea Means
A perforated board installed with rear spacing allows metal hooks, baskets, and holders to snap in place for custom tool arrangement.
How to Make It
- Build a simple perimeter framing structure using 1×2 wood furring strips attached to wall studs.
- Mount pegboard sheets directly onto the furring strips, ensuring a 3/4-inch clearance gap behind the board for hook installation.
- Secure with pegboard screws around margins.
- Insert metal peg hooks, bin holders, and organized tool loops.
Supplies Needed
- 1/4-inch heavy-duty pegboard sheet
- 1×2 wood furring strips
- Wood screws, drywall anchors, peg hook set
Tips & Variations
- Trace tool outlines with a sharpie or vinyl tape so you always know where items return.
- Paint the pegboard in a crisp off-white or deep navy shade for a modern studio vibe.


6. PVC Pipe Lawn Tool & Extension Cord Organizers
Introduction
Short lengths of plastic PVC piping can be cut and configured to solve complex wall storage clutter for everything from rake handles to wrapped electrical extension cords.
What This Idea Means
Slicing low-cost PVC pipes at angles creates angled holsters and sturdy wall-mounted storage loops for tall or coiled items.
How to Make It
- Cut 2-inch or 3-inch diameter PVC pipes into 6-to-8-inch segments using a handsaw (cut ends at a slight angle for easier insertion).
- Drill pilot holes through one side of each PVC cylinder.
- Screw individual segments onto a wall-mounted wooden mounting runner strip at spaced intervals.
- Drop handles of brooms, mowers, or shovels straight down through the holders.
Supplies Needed
- 2-inch or 3-inch Schedule 40 PVC pipe
- Saw, drill, 1.5-inch wood screws
- 1×4 wood mounting strip
Tips & Variations
- Larger 4-inch PVC pipes cut horizontally with a side slot make excellent hanging holsters for cordless power drills.
- Spray paint PVC pipes matte grey or white to match garage wall colors.
7. Bungee Cord Sports Ball Cage
Introduction
Loose basketballs, soccer balls, and volleyballs rolling around garage floors create tripping hazards and clutter. A vertical bungee cage keeps balls contained while remaining easy to pull out.
What This Idea Means
Creating an open-front wooden box framework linked with flexible bungee cords keeps balls stacked vertically while allowing easy access by pulling them directly between elastic cords.
How to Make It
- Build a basic rectangular wooden frame (top, bottom, and back board runner) using scrap 2x4s.
- Drill top-and-bottom aligned vertical holes through front frame lips.
- Thread long bungee cords vertically through top and bottom holes and knot secured ends tightly.
- Mount frame securely to wall studs.
Supplies Needed
- Scrap 2×4 lumber or 3/4-inch plywood
- Heavy-duty elastic bungee cords (or elastic shock cord)
- Screws, drill, tape measure
Tips & Variations
- Build vertical height across unused corner nooks to maximize corner spaces.
- Add side hooks to hang sports bags or baseball mitts.
8. DIY Hanging Fold-Down Workbench
Introduction
If space is limited, traditional bulky workbenches take up permanent floor area. A wall-mounted fold-down desk provides flat workspace when needed and drops flat when parked.
What This Idea Means
A sturdy wooden table hinged against wall studs drops flat against the wall when unlatched, freeing up valuable floor space.
How to Make It
- Assemble a solid tabletop using 3/4-inch plywood reinforced with edge banding or 2×4 frames.
- Mount a sturdy 2×4 wall header board directly into wall studs at comfortable elbow height.
- Attach top using heavy-duty door hinges to the wall header.
- Install folding heavy-duty locking metal bracket arms beneath table to support heavy loads.
Supplies Needed
- 3/4-inch plywood or butcher block remnant
- Locking folding shelf brackets or heavy hinges
- Screws, level, drill
Tips & Variations
- Sand the tabletop thoroughly and seal with clear polyurethane for quick cleaning of oil or paint spills.
- Add a magnetic strip right above the fold-down bench to hold active tools mid-project.
9. Sliding Ceiling Track System for Storage Bins
Introduction
Take overhead storage a step further by creating dedicated wooden channel tracks on the ceiling that allow plastic totes to slide in and out like drawers.
What This Idea Means
By building T-shaped wooden runners on the ceiling spaced precisely to plastic storage tote lips, bins slide securely along ceiling channels without needing bulky shelves.
How to Make It
- Construct T-channel wood rails using 2×4 studs capped with wider 1×4 pine boards.
- Measure top lip widths of plastic storage totes.
- Mount T-channels horizontally into ceiling joists spaced exactly to slide tote rims securely between grooves.
- Test and slide totes smoothly along top rails.
Supplies Needed
- 2×4 and 1×4 pine boards
- Heavy-duty lag screws, washers
- Plastic totes with rigid reinforced lip rims
- Stud finder, level, tape measure
Tips & Variations
- Label both ends of each tote with clear bold lettering so items can be identified instantly from both sides.
- Maintain consistent bin sizes so all channels remain standardized across the ceiling.
10. Heavy-Duty DIY Tire Wall Racks
Introduction
Storing off-season tires, snow tires, or spare rims takes up massive garage floor space. Heavy-duty wall brackets lift tires up and safely out of harm’s way.
What This Idea Means
Constructing angled wooden or steel triangular shelf brackets anchored into garage framing lets off-season tires rest horizontally or vertically above head height.
How to Make It
- Build sturdy triangular support frames out of heavy 2×4 or 2×6 framing lumber.
- Secure horizontal support pipes or 2×4 rails between brackets.
- Anchor triangular brackets into wall studs using heavy lag bolts.
- Set seasonal tires onto rails securely.
Supplies Needed
- 2×4 or 2×6 framing lumber (or metal pipe conduit)
- Heavy 3.5-inch lag bolts and washers
- Drill, level, structural framing connectors
Tips & Variations
- Store tires inside protective tire bags to keep rubber dust off surrounding walls.
- Paint bracket wood flat black for a clean industrial garage finish.



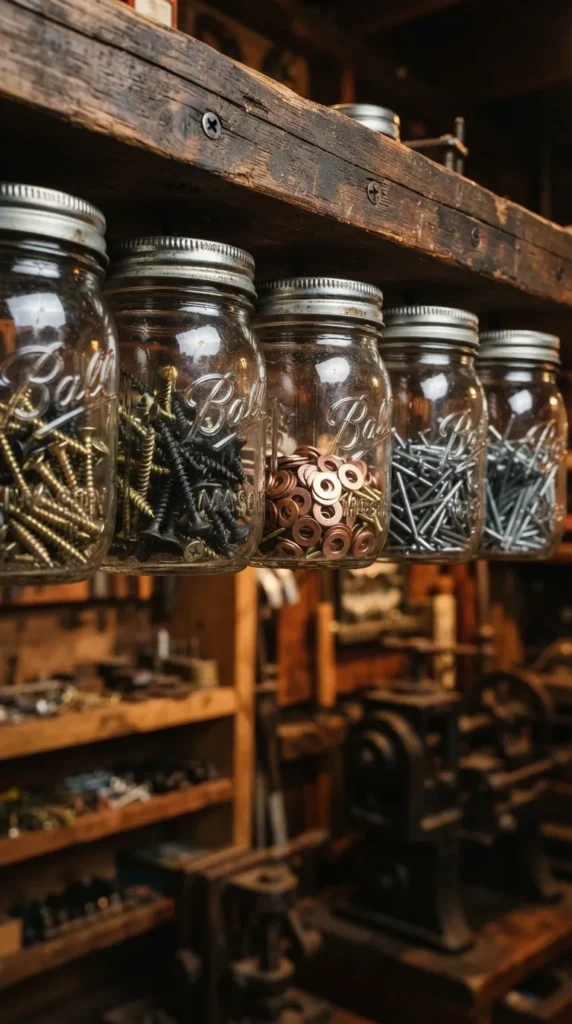
11. Upcycled Mason Jar Hardware Holders
Introduction
Tiny screws, nails, washers, and drill bits easily get misplaced in large bins. Threaded mason jars under shelves turn clear visibility into compact organization.
What This Idea Means
Screwing jar lids directly to the underside of a wooden shelf creates quick twist-off glass storage containers for loose hardware without wasting shelf top space.
How to Make It
- Remove metal lids from small mason jars or plastic screw-top containers.
- Fasten lids tightly to underside of lower shelf using short wood screws.
- Fill jars with hardware sorted by size/type.
- Screw filled jars into fixed overhead lids.
Supplies Needed
- Glass mason jars or clear plastic deli containers with screw lids
- Short wood screws, washers
- Drill, screwdriver, marker
Tips & Variations
- Place magnetic sheet cutouts inside jar bottoms to stop iron screws from rattling.
- Group hardware by metric vs. standard sizes for rapid workflow.
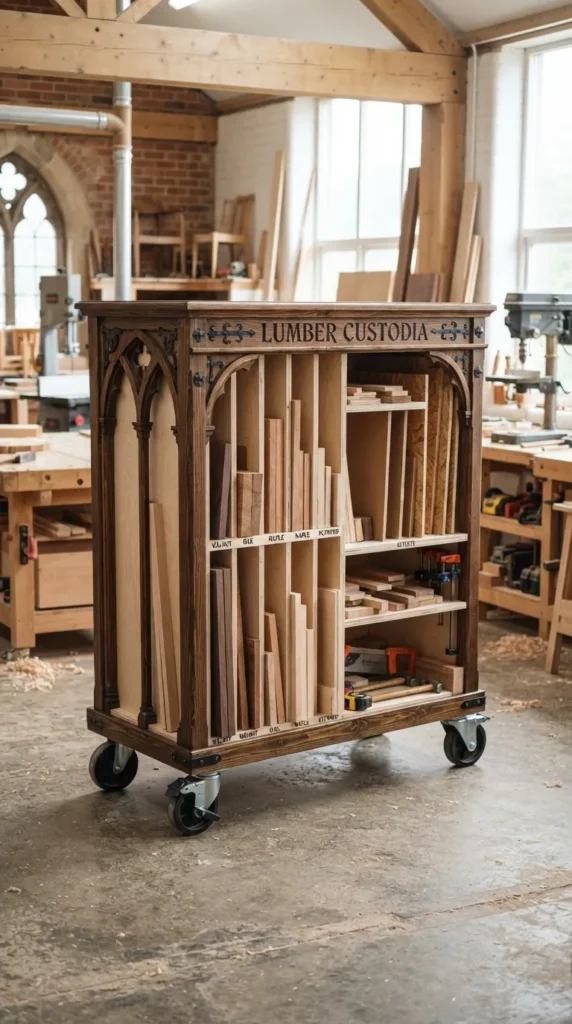
12. Modular Rolling Lumber & Plywood Cart
Introduction
Scrap wood, trim strips, and plywood sheets left leaning against walls create hazards and hide tools. A mobile rolling cart holds materials upright in a compact footprint.
What This Idea Means
An A-frame or compartment storage cart built on heavy caster wheels holds sheet goods vertically on one side and long lumber horizontally on the other.
How to Make It
- Construct heavy 2×4 base platform on four heavy-duty swivel caster wheels (2 locking).
- Build vertical A-frame interior divider wall using 2×4 studs and plywood facing.
- Dedicate flat side bay for full sheet goods and construct horizontal bin dividers on opposite side for long trim strips.
- Roll into empty garage corners.
Supplies Needed
- 2×4 studs and 3/4-inch plywood sheets
- 3-inch heavy-duty swivel caster wheels (min. 150 lbs rating each)
- Wood screws, pocket hole screws, drill
Tips & Variations
- Store smallest scrap blocks in low pull-out bins installed at base of cart.
- Attach side hook brackets to hold circular saw extension leads or clamps.
13. DIY Vertical Bike Hanger Wall Hooks
Introduction
Bicycles parked on kickstands consume wide floor spans and tilt easily. Hanging bikes vertically by their wheels clears floor tracks completely.
What This Idea Means
Using heavy-duty rubberized screw hooks mounted to wall studs allows bicycles to hang vertically by front rims perpendicular or angled to wall tracks.
How to Make It
- Locate high wall stud location near entryway or side passage.
- Drill pilot hole at height matching vertical length of bike wheel.
- Screw heavy-duty rubber-coated steel bike hook into center of stud until threads sit flush.
- Lift front wheel onto hook, letting rear tire rest against lower wall.
Supplies Needed
- Heavy-duty rubberized steel bike hooks
- Drill, pilot bit, tape measure
Tips & Variations
- Mount a small clear plastic guard plate on wall where rear tire meets drywall to prevent dirt scuffs.
- Stagger hook heights slightly to overlap handlebars and fit more bikes onto one wall section.
14. Labelled Clear Bin Storage Tower
Introduction
Standardizing storage into uniform plastic bins removes visual clutter and speeds up search times during weekend projects.
What This Idea Means
Building simple custom-sized wooden open shelving racks designed to match stackable transparent plastic storage totes converts cluttered walls into clear storage hubs.
How to Make It
- Measure exact dimensions of preferred clear plastic tote models.
- Build open framework tower shelves using inexpensive 2×4 structural lumber and 1/2-inch plywood.
- Space individual shelf heights 2 inches higher than tote height for smooth access.
- Label clear totes using high-contrast printed vinyl labels.
Supplies Needed
- Clear plastic storage totes with locking lids
- 2×4 studs and 1/2-inch plywood sheets
- Wood screws, level, label maker
Tips & Variations
- Color-code labels by category (Yellow = Electrical, Blue = Plumbing, Green = Outdoor/Garden).
- Store heaviest totes on lower shelves to keep tower center-of-gravity low and safe.
15. Under-Workbench Drawer Unit Repurposing
Introduction
Open space under heavy workbenches often turns into a messy pile of loose tools. Inserting old office dressers or file cabinets creates instant, sleek drawer storage.
What This Idea Means
Upcycling thrift store wooden nightstands, office drawer units, or metal file cabinets beneath workbenches adds deep organized drawer space for minimal investment.
How to Make It
- Measure height clearance under current garage workbench.
- Acquire old wooden dresser or metal file cabinet fitting clearance dimensions.
- Sand down unit exterior and apply durable enamel metal/wood coat.
- Slide unit into under-desk cavity and organize internal drawers with drop-in dividers.
Supplies Needed
- Secondhand dresser or file cabinet unit
- Durable coat enamel paint, sandpaper
- Drawer organizer trays/dividers
Tips & Variations
- Add locking swivel casters onto cabinet base for easy mobile access around space.
- Paint drawer fronts with chalkboard paint for customizable contents labeling.



16. Wall-Mounted Power Tool Charging Station
Introduction
Cordless drill batteries, chargers, and power tools cluttering work surfaces create tangled cord chaos. A wall-mounted station organizes tools and chargers in one neat vertical hub.
What This Idea Means
A compact wall wooden cabinet built with vertical lower slot holsters holds power drills securely, while upper shelf holds battery charging docks connected to a rear power strip.
How to Make It
- Construct open rectangular cabinet out of 3/4-inch plywood.
- Cut vertical slots along bottom shelf wide enough for drill handles to slide into upside down.
- Mount a multi-outlet power strip onto rear interior board.
- Mount station onto wall studs and organize power tools, extra battery packs, and charger bases.
Supplies Needed
- 3/4-inch plywood board scraps
- Multi-outlet power strip with surge protection
- Pocket hole screws, drill, hole saw (for cord passthrough)
Tips & Variations
- Include a small top shelf for storing drill bit boxes and driver sets right alongside tools.
- Add side-mounted hooks to hold safety goggles and ear protection.
17. Garden Hose & Extension Cord Hose Reels
Introduction
Kinked hoses and tangled cords look messy and break quickly. Wall-mounted reels keep heavy-duty cables neatly wrapped and ready for use.
What This Idea Means
Repurposing sturdy wall brackets or metal rim bases onto wall surfaces provides dedicated curved radius tracks to store long extension leads and garden hoses safely.
How to Make It
- Mount heavy metal hose hanger hook (or repurposed steel rim) into wall stud using lag screws.
- Ensure top height allows comfortable loop wrapping.
- Wrap extension cords or garden hoses in wide, loose circular loops over top curved bracket.
Supplies Needed
- Heavy-duty cast iron or metal curved hose hanger
- 2.5-inch lag screws, washer set
- Drill, level, stud finder
Tips & Variations
- Use Velcro cord wraps to bundle individual cords tightly before hanging on reel.
- Install reel near garage entrance for quick outdoor yard connection.
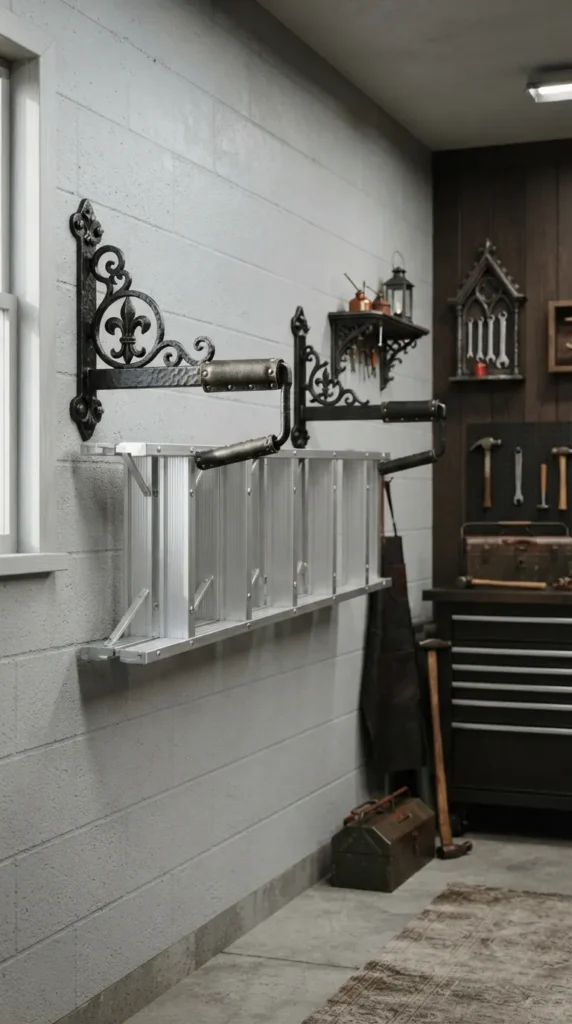
18. Foldable Wall-Mounted Ladder Rack
Introduction
Ladders left leaning flat on garage floors take up significant walkway space and tilt over easily. Wall hooks mount them flat against walls out of pathways.
What This Idea Means
Heavy-duty dual wall brackets mounted at equal heights secure heavy extension or step ladders horizontally along upper wall sections.
How to Make It
- Mark two stud locations spaced wide enough to support main rails of target ladder model.
- Install heavy-duty padded steel J-hooks into center of studs at overhead clearance height.
- Confirm hooks align using long level.
- Lift ladder and rest horizontal frame secure across both hooks.
Supplies Needed
- Padded steel J-hooks (heavy load rated)
- 3-inch lag screws, drill, level
Tips & Variations
- Secure a safety latch or lock cord across hooks if living in earthquake-prone regions.
- Store lightweight step stools lower down using single hook mounts for quick household access.
19. Overhead Fishing Rod Rack Holders
Introduction
Fishing rods, ski poles, and thin trim pieces are delicate, long, and hard to store without bending. Ceiling clips hold delicate long gear safe and flat.
What This Idea Means
Paired ceiling brackets equipped with foam slots or wire rings suspend long thin gear flat against high garage ceilings out of harm’s way.
How to Make It
- Attach twin wooden runner strips or wire hook racks to ceiling joists spaced a few feet apart.
- Add rounded cutouts or soft foam padding to protect rod handles and tips.
- Slide fishing rod handles into base loops and rest tips into matching secondary hooks.
Supplies Needed
- Wire ceiling hooks or notched wood strips
- Soft foam weatherstripping/padding
- Wood screws, ceiling stud finder, level
Tips & Variations
- Paint holder brackets same color as ceiling to make mounting framework blend visually.
- Use this exact setup to store thin, long moldings or aluminum channels safe from bends.
20. Corner Shelving Unit Utilization
Introduction
Garage corners often become dead zones filled with forgotten clutter piles. Custom triangular corner shelves turn neglected nooks into neat storage spots.
What This Idea Means
Mounting triangular wooden shelf platforms across wall junction corners creates compact storage without intruding on wall lengths needed for large tools or cars.
How to Make It
- Cut 90-degree right-triangle shelf panels out of 3/4-inch plywood.
- Fasten 1×2 wooden support cleats onto both walls along corner junction at desired shelf heights.
- Rest triangular plywood shelf tops onto cleats and secure with countersunk wood screws.
- Fill shelves with small bins, paint cans, or cleaning supplies.
Supplies Needed
- 3/4-inch plywood sheet
- 1×2 wooden support cleats
- Wood screws, drywall anchors, level, circular saw
Tips & Variations
- Store small chemical items, spray paint, or auto fluids high on corner shelves out of reach of children.
- Sand edges smooth and paint shelves light colors to keep dark corners looking clean and bright.