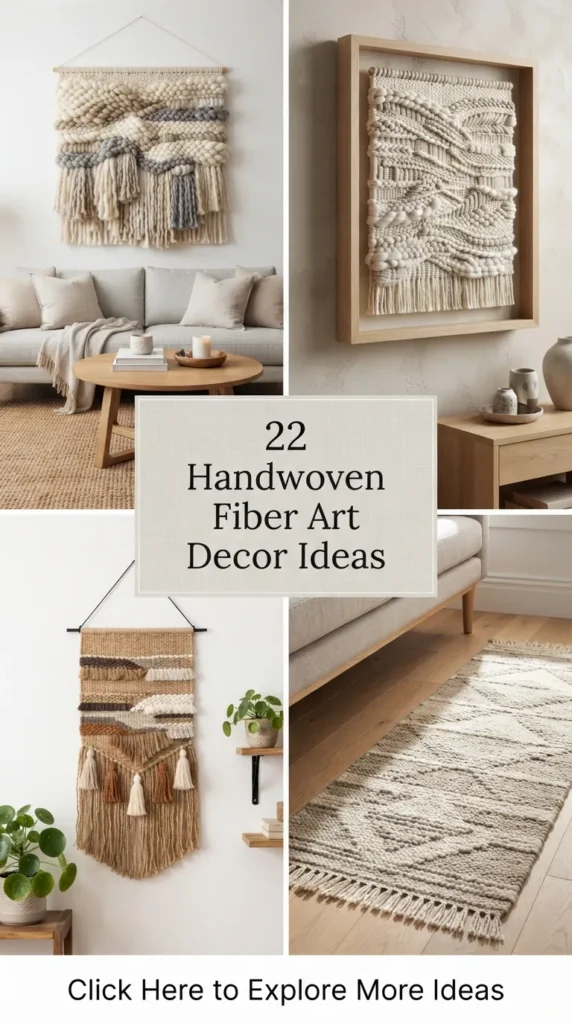
Fiber art has transformed from a nostalgic craft into one of the most prominent trends in modern interior design. Bringing organic texture, tactile warmth, and an artisanal touch into home spaces, handwoven decor bridges the gap between traditional craftsmanship and contemporary aesthetics. Whether your style leans toward minimalist Scandinavian, eclectic Bohemian, rustic farmhouse, or modern moody interior styles, woven elements introduce depth and character that paint and mass-produced art simply cannot replicate.
Incorporating textile art into your home design creates an inviting environment filled with movement and softness. Below is a curated collection of 20 unique, realistic handwoven fiber art decor ideas, complete with step-by-step guidance on how to bring each piece to life.



1. Chunky Wool Roving Wall Tapestry
What This Idea Means
A chunky wool roving tapestry is a rich, textural wall hanging made using thick, unspun wool fibers. Unlike fine yarn tapestries, roving creates dramatic volume, soft clouds of texture, and a luxurious visual weight that serves as an instant focal point in a living room or bedroom.
How to Make It
- Set up a simple wooden frame loom and string it with sturdy cotton warp thread.
- Draft unspun wool roving into workable sections.
- Weave the roving using a basic plain weave (over-under pattern) or a bubbly soumak stitch to create thick, undulating rows.
- Keep the tension loose to preserve the fluffy volume of the roving.
- Finish the bottom edge with thick tassels and secure the top onto a polished wooden dowel or branch.
Tips & Variations
- Tips: Handle wool roving gently, as overworking it can cause the fibers to fray or felt together.
- Variations: Mix natural white roving with muted sage or terracotta fibers to build subtle color blocking, or combine thick roving with thin cotton cords for high contrast.
2. Arch-Shaped Bohemian Frame Weaving
What This Idea Means
Architectural arches bring soft curves to straight-lined walls. Arch-shaped fiber art combines modern geometric silhouette trends with classic weaving techniques, creating a sleek yet textured statement piece.
How to Make It
- Build or purchase an arch-shaped wooden weaving frame or wire form.
- String the warp threads vertically following the curve of the top arch.
- Begin weaving from the bottom upward using wool yarns in varied weights, maintaining an even edge along the curved frame.
- Incorporate subtle loop stitches across the middle to break up flat textures.
- Trim any excess threads cleanly along the back to retain the crisp outer arch shape.
Tips & Variations
- Tips: Ensure the warp threads at the top of the curve are spaced evenly to prevent the yarn from bunching at the top.
- Variations: Leave the outer wooden arch exposed as a framed board, or weave all the way to the edges for a completely soft textile sculpture.
3. Layered Fringe Macraweave
What This Idea Means
A macraweave bridges the structural knotting of macramé with the soft, filled-in textures of traditional loom weaving. Layered fringe macraweaves feature multiple tiers of cascading fibers that create dramatic length, depth, and movement.
How to Make It
- Mount long cotton cord onto a wooden driftwood stick using lark’s head knots to form a macramé base.
- Create an upper geometric grid using square knots.
- Weave contrasting yarn colors and textures through the open sections of the macramé grid using a tapestry needle.
- Attach separate bundles of fringe using lark’s head knots at multiple tiered heights down the piece.
- Comb through the fringe with a fine-tooth comb and steam it straight before trimming into clean V-shapes or straight edges.
Tips & Variations
- Tips: Use a garment steamer on the hanging fringe to achieve a polished, straight finish.
- Variations: Experiment with asymmetrical fringe cuts, or weave metallic thread highlights into the central macramé section for subtle shine.
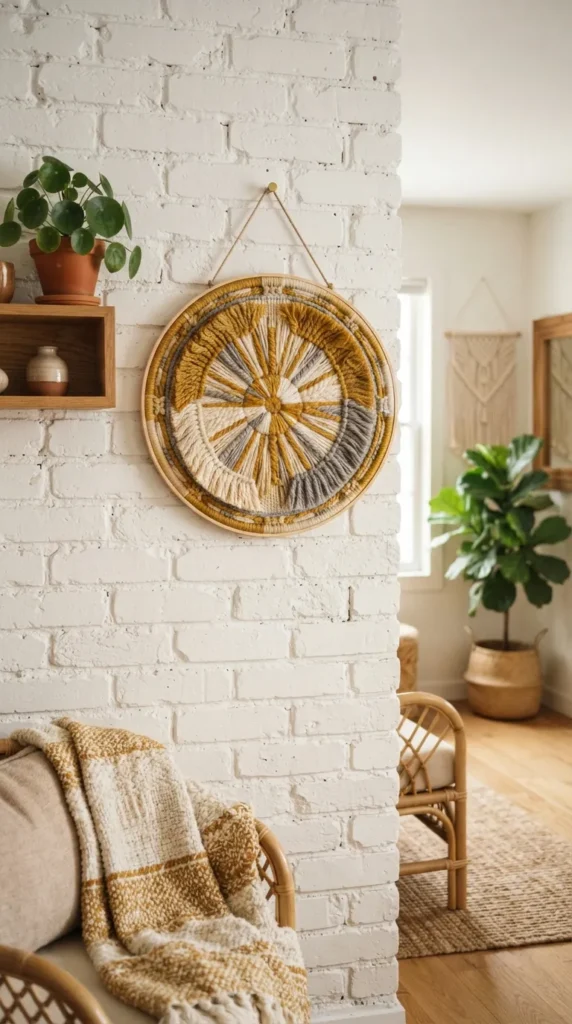
4. Circular Hoop Tapestry (Sunburst Style)
What This Idea Means
Circular woven art breaks away from traditional rectangular tapestries. Radial weaving on a round metal or wooden hoop creates a sunburst or mandala-like motif, bringing balance, harmony, and organic geometry to gallery walls.
How to Make It
- Take a round wooden embroidery hoop or metal ring.
- Warp the hoop by wrapping cotton string across the diameter in a spoke pattern, crossing at the exact center.
- Begin weaving from the center outward, using a tapestry needle to weave over and under the spokes in continuous circular rounds.
- Switch yarn colors and textures as you expand toward the outer rim.
- Finish by wrapping the outer wooden hoop tightly in yarn or leaving the natural wood exposed.
Tips & Variations
- Tips: Keep tension firm near the center so the core remains tight as the radius expands.
- Variations: Add long cascading fringe along the bottom arc of the hoop to combine circular and vertical dimensions.
5. Monochromatic 3D Texture Panel
What This Idea Means
Monochromatic fiber art relies entirely on texture rather than color contrast to make an impact. By using a single tone—such as warm cream, oatmeal, or deep charcoal—the focus shifts to loop piles, knots, and directional weave patterns that play with light and shadow.
How to Make It
- Warp a frame loom with strong, non-stretchy warp string.
- Select 4–5 different yarn types in identical shades (e.g., thick wool roving, velvet yarn, twisted cotton cord, slub yarn).
- Alternate between high-pile rya knots, raised soumak braids, and flat plain weaves across different geometric blocks.
- Build up heavy relief areas so sections stand out several inches from the background.
- Cut the woven piece off the loom and mount it inside a shadowbox frame or onto a sturdy canvas backing.
Tips & Variations
- Tips: Play with directional lighting; place this artwork near a window or accent light to highlight the cast shadows.
- Variations: Create a set of three matching monochromatic panels to display as a cohesive wall triptych.


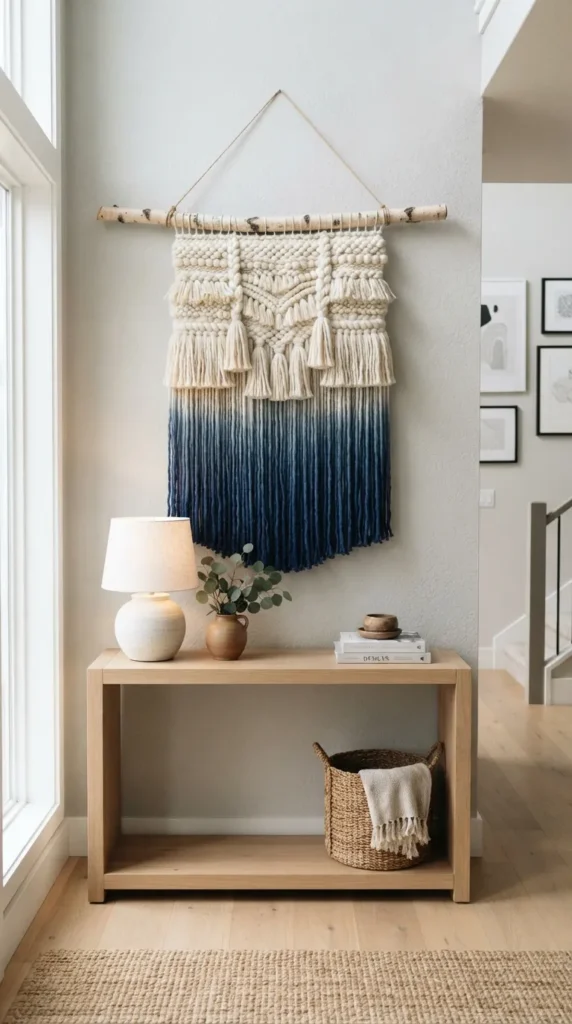
6. Dip-Dye Woven Wall Hanging
What This Idea Means
Dip-dyed fiber art introduces painterly color gradients to structural weaving. After weaving a raw white or off-white tapestry, the lower fringe is immersed in fabric dye, producing a soft ombre effect that transitions smoothly from deep tones to natural fibers.
How to Make It
- Weave a full tapestry using un-dyed, natural cotton and wool yarn on a frame loom.
- Leave long, untrimmed fringe along the bottom edge.
- Prepare a liquid fabric dye bath (e.g., indigo, terracotta, or eucalyptus green).
- Submerge the lower portion of the fringe into the dye bath for several minutes.
- Slowly pull the piece upward in stages to create a smooth, faded gradient, then rinse thorough under cool water and let dry flat.
Tips & Variations
- Tips: Dampen the fringe with clean water before dipping into the dye bath to help the color bleed smoothly without harsh lines.
- Variations: Try double-dipping using two complementary colors—one on the very tips and another higher up the tapestry.
7. Woven Fiber Mirror Surround
What This Idea Means
A woven fiber mirror fuses functional homeware with decorative textile craft. Frame a simple round or oval mirror with dense fiber work, transforming a plain mirror into a textured focal point for entryways or vanity nooks.
How to Make It
- Start with a sturdy wooden or thick cardboard ring backing slightly larger than your central mirror.
- Warp the outer border of the ring tightly.
- Weave dense rows of wool, jute, and cotton cord outward, adding thick fringe or fluffy loop stitches around the outer edge.
- Mount a round frameless mirror securely onto the flat center using heavy-duty mirror adhesive or strong craft glue.
- Affix a sturdy wall hanger onto the solid back board.
Tips & Variations
- Tips: Protect the glass surface with painter’s tape while weaving and attaching fibers around the mirror frame.
- Variations: Incorporate natural wooden beads, raffia strands, or brass rings into the woven border for mixed-media elegance.
8. Botanical Eucalyptus Driftwood Weaving
What This Idea Means
Integrating natural elements directly into textile art reinforces a connection to nature. This design utilizes a natural branch or dried eucalyptus piece as the supporting dowel, allowing green hues and natural wood grain to frame the fiber work.
How to Make It
- Forage and clean a sturdy piece of driftwood or cured wooden branch.
- Warp your frame loom as usual, or attach warp threads directly to the natural branch.
- Select a color palette inspired by nature: sage green, moss, cream, soft ochre, and bark brown.
- Weave organic, flowing hills or wave shapes using varied yarn weights.
- Transfer the completed warp loops directly onto the branch, tucking small preserved eucalyptus sprigs gently into the top woven knots.
Tips & Variations
- Tips: Ensure any foraged wood is completely dry and treated/cleaned to avoid introducing moisture or pests indoors.
- Variations: Swap eucalyptus for dried lavender, pampas grass, or dried palm spears tucked into the weave.
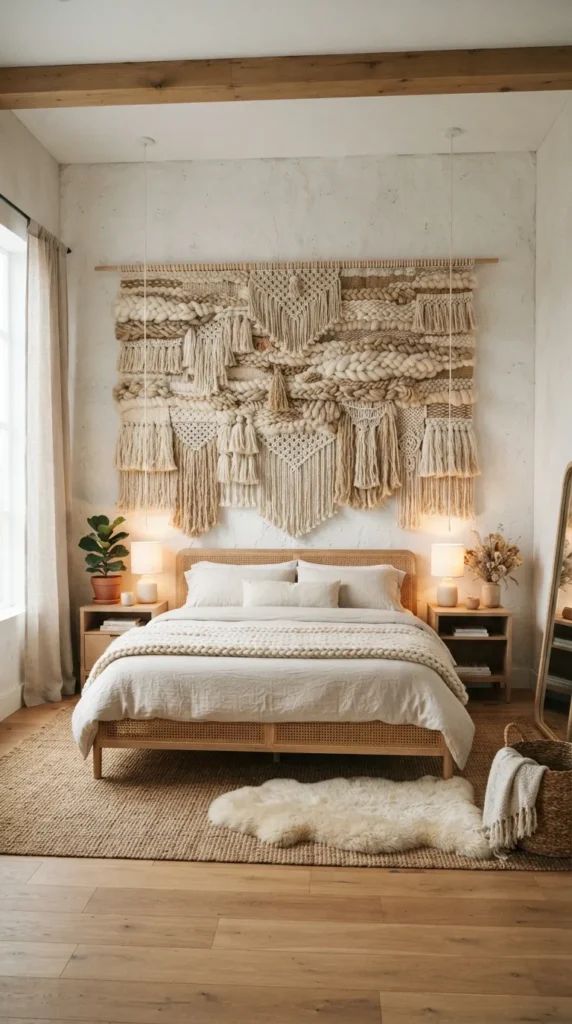
9. Textured Fiber Headboard Wall Display
What This Idea Means
Replacing a traditional headboard with an oversized textile weaving brings warmth, acoustic dampening, and tactile comfort to the master bedroom. These expansive installations anchor the bed visually while maintaining an inviting atmosphere.
How to Make It
- Obtain a long wooden drapery rod or polished brass pipe that spans the width of your mattress (e.g., 60–78 inches).
- Create multiple wide weaving sections on a large loom or mount multiple coordinating panels side by side.
- Use thick, durable materials like bulky wool roving, cotton rope, and chunky velvet yarn.
- Keep the lower fringe uniform and trimmed just above the top line of the pillows.
- Securely mount the rod to the wall studs using heavy-duty brackets centered above the bed frame.
Tips & Variations
- Tips: Keep overall weight in mind; lightweight fibers like unspun wool roving allow you to build vast scale without excessive wall strain.
- Variations: Create a modular look using three equal-sized vertical panels hung closely in a row above the headboard position.
10. Abstract Geometric Color-Blocked Tapestry
What This Idea Means
Geometric color-blocking in fiber art draws inspiration from Mid-Century Modernism and Bauhaus design. Sharp lines, contrasting color planes, and clean shapes create a graphic, artistic statement on neutral walls.
How to Make It
- Sketch a precise geometric design featuring intersecting triangles, rectangles, and diagonal lines.
- Warp a frame loom tightly to ensure crisp borders between shapes.
- Use the slit-weave or interlocking-weave technique to join different color sections seamlessly without leaving gaps.
- Choose high-contrast yarns in flat, smooth textures to emphasize sharp geometric definition.
- Finish with a straight, clean-cut fringe across the bottom edge.
Tips & Variations
- Tips: Maintain consistent yarn weight across all color sections so the weave surface remains flat and uniform.
- Variations: Combine matte cotton yarns with glossy silk or bamboo yarns to make specific geometric blocks pop under light.



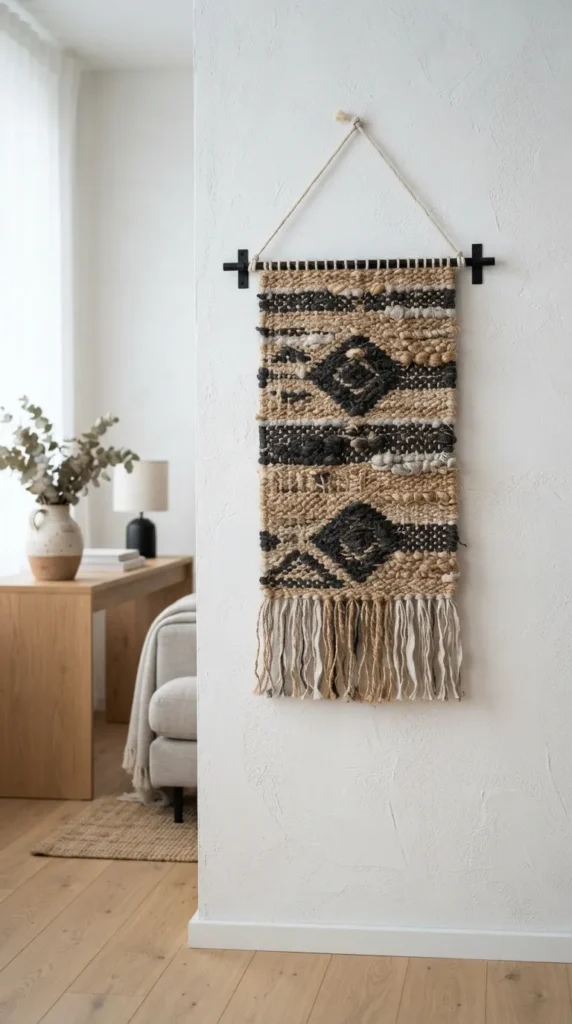
11. Minimalist Jute & Linen Wall Banner
What This Idea Means
Minimalist design focuses on raw material beauty, clean lines, and subtle textures. A jute and linen fiber banner uses neutral earth tones and restrained weaving techniques to complement modern, Scandinavian, or Wabi-Sabi interiors.
How to Make It
- Set up warp threads using natural, unbleached linen cord.
- Weave using raw jute twine, natural linen, and soft un-dyed cotton yarn.
- Stick primarily to basic plain weave, allowing the raw slubs and natural texture of the fibers to stand out.
- Leave generous negative space along the sides or top to emphasize a clean, banner-like structure.
- Finish the top on a minimalist black metal rod or slender oak dowel.
Tips & Variations
- Tips: Mist jute fibers lightly with water while working to soften them and make weaving easier on the hands.
- Variations: Add a subtle accent row of fine brass beads woven directly across the lower third of the banner.
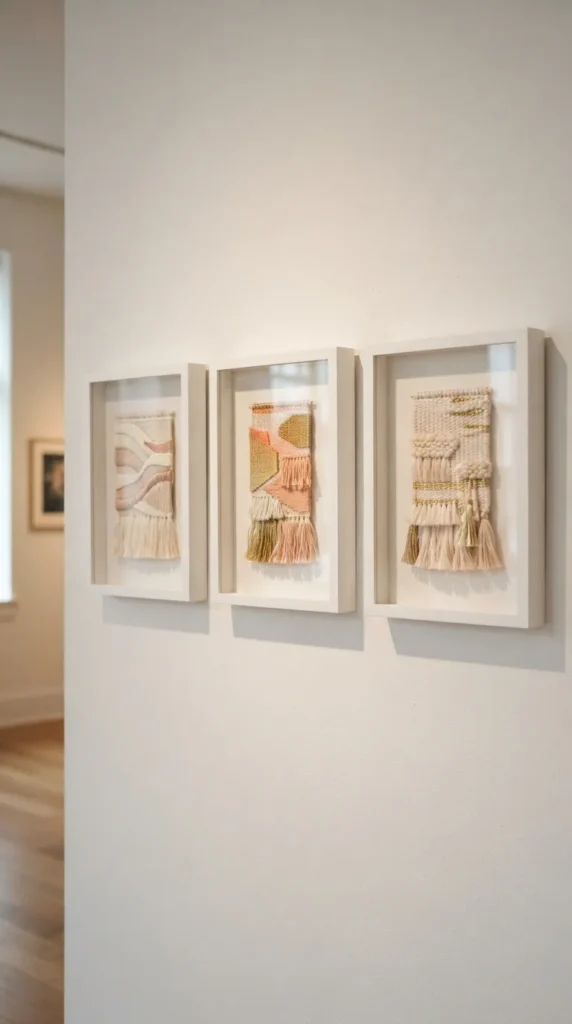
12. Framed Miniature Fiber Art Trio
What This Idea Means
Miniature fiber art offers a refined way to display textiles. By mounting small, intricately woven tapestries inside glass shadowbox frames, soft textile art transforms into sophisticated gallery-grade wall decor.
How to Make It
- Set up small loom warp setups to create three small textiles (e.g., 4×6 inches each).
- Weave fine-gauge wool, embroidery thread, and delicate metallic accents into detailed micro-patterns.
- Carefully trim and secure all end threads along the back of each mini-weave.
- Mount each miniature textile onto linen-covered backing boards using textile adhesive or subtle stitches.
- Encase the mounted pieces inside matching shadowbox frames with protective glass fronts.
Tips & Variations
- Tips: Shadowbox frames prevent dust accumulation while elevating small fiber crafts into elegant fine art displays.
- Variations: Create a theme across the trio, such as three distinct landforms (mountains, desert dunes, and ocean waves) rendered in mini weaves.
13. Chunky Loop-Pile Suncatcher Tapestry
What This Idea Means
Combining thick textured loop piles (similar to rug hooking) with translucent elements like faceted crystal prisms creates a dynamic piece of art that catches natural sunlight and scatters rainbows across the room.
How to Make It
- Warp a frame loom with strong cotton twine.
- Alternate between thick cut rya knots and raised wool loop stitches to build a plush, touchable surface.
- Weave a open central structural gap or leave lower hanging warp threads exposed.
- Suspend clear faceted crystal prisms within the open woven gaps or at the tips of central fringe cords.
- Hang the completed tapestry directly in a sunlit window frame or on an adjacent wall facing natural light.
Tips & Variations
- Tips: Position crystals where they will catch direct morning or afternoon sunlight for peak light effects.
- Variations: Integrate small brass sun medallions or polished sea glass pendants into the weave alongside the crystals.
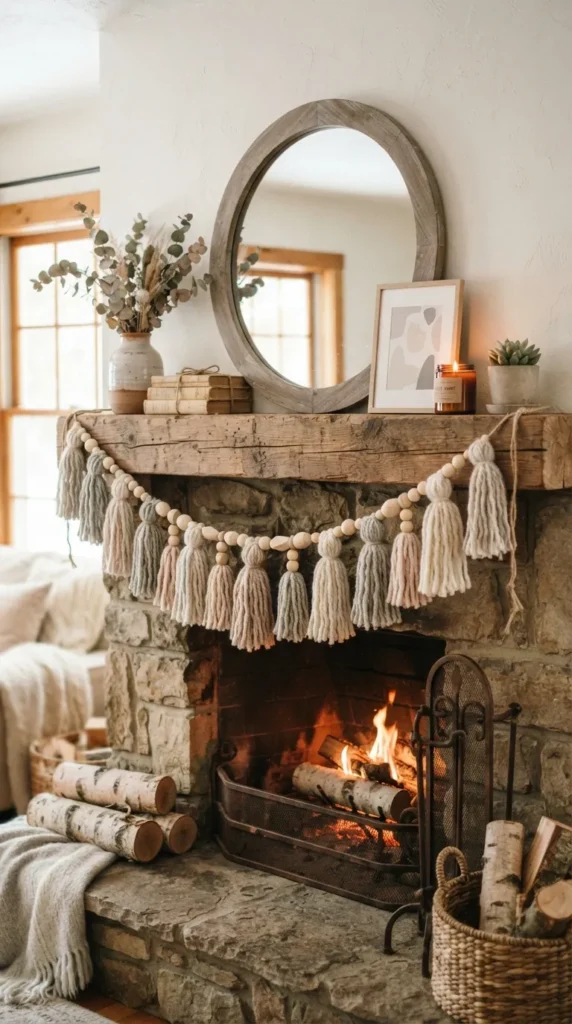
14. Modern Tassel Garland Accent
What This Idea Means
A modern fiber garland is a flexible, linear textile decoration ideal for draping over mantelpieces, floating shelves, bed frames, or nursery walls. It builds layered horizontal texture without taking up wall space.
How to Make It
- Twist or braid a long, durable length of multi-ply cotton rope to form the central hanging line.
- Make 10–15 oversized, dense tassels using mixed yarn textures (wool, cotton, velvet).
- Bind the top neck of each tassel using contrasting thread or metallic wire.
- Securely attach the tassels along the main braided rope at even intervals.
- Thread wooden accent beads between each tassel for added structure and polished finish.
Tips & Variations
- Tips: Keep all tassel lengths identical for a clean look, or graduate them from short at the ends to long in the center.
- Variations: Drape two or three garlands together at varied sagging heights for a fuller, cascading effect.
15. Organic Wave & Landscape Fiber Tapestry
What This Idea Means
Inspired by natural scenery, landscape fiber art translates rolling hills, ocean waves, or mountain horizons into fluid woven designs. Organic curves break up flat walls and introduce peaceful, nature-inspired motifs into your home decor.
How to Make It
- Draw a simplified contour map of rolling hills or waves on a piece of paper placed directly behind your loom warps.
- Weave section by section using eccentric weaving (weaving along curved lines rather than horizontal rows).
- Select an evocative color story: deep blues and foams for waves, or terracotta, ochre, and warm blush for desert dunes.
- Use dense soumak stitches to define the ridgelines of the landforms.
- Hang the piece on an organic wooden branch that complements the natural landscape theme.
Tips & Variations
- Tips: Pack your weave down firmly along curved edges to prevent gaps from opening between color blocks.
- Variations: Add needle-felted clouds or sun discs directly onto the background fabric of the sky section.




16. Oversized Moody Dark Academia Tapestry
What This Idea Means
Moving away from classic light bohemian styles, dark academia tapestries embrace deep, moody color palettes like forest green, midnight navy, deep plum, and antique bronze. They add rich warmth to libraries, studies, or dark accent walls.
How to Make It
- Select a dark warp thread (black, deep brown, or charcoal) to prevent bright core threads from showing through.
- Gather rich, tactile yarns like alpaca wool, velvet ribbon, dark metallic threads, and hand-dyed wools in jewel tones.
- Weave complex, dense patterns featuring tight plain weaves balanced with heavy velvet accents.
- Attach the completed artwork to an antique dark walnut rod or vintage brass curtain pole.
- Add extra-long, flowing fringe at the bottom that gently brushes against furniture surfaces below.
Tips & Variations
- Tips: Match the hardware to the theme—antique brass, vintage iron, or dark stained woods fit the aesthetic well.
- Variations: Weave small brass rings or antique-style keys directly into the lower fringe sections for visual storytelling.
17. Woven Fiber Floor Mat / Wall Runner
What This Idea Means
Versatile fiber art pieces can function as dynamic wall runners or durable accent rugs. Made with sturdy materials, these long, narrow textiles add texture to narrow hallways, gallery walls, or floor spaces.
How to Make It
- Warp a long floor loom or large frame loom with extra-durable carpet warp thread.
- Weave using thick cotton rug yarn, jute, or recycled fabric strips for structure and durability.
- Work in dense plain weave rows, pressing each row down tightly with a weaving comb.
- Incorporate subtle flat-woven geometric blocks along both ends.
- Bind off both ends with flat hemstitches and short, tightly bound fringe loops.
Tips & Variations
- Tips: If displaying on the floor, apply a non-slip rubber backing or spray latex on the underside to prevent sliding.
- Variations: Hang vertically as an elongated wall runner using two horizontal support rods at both top and bottom to keep it flat.
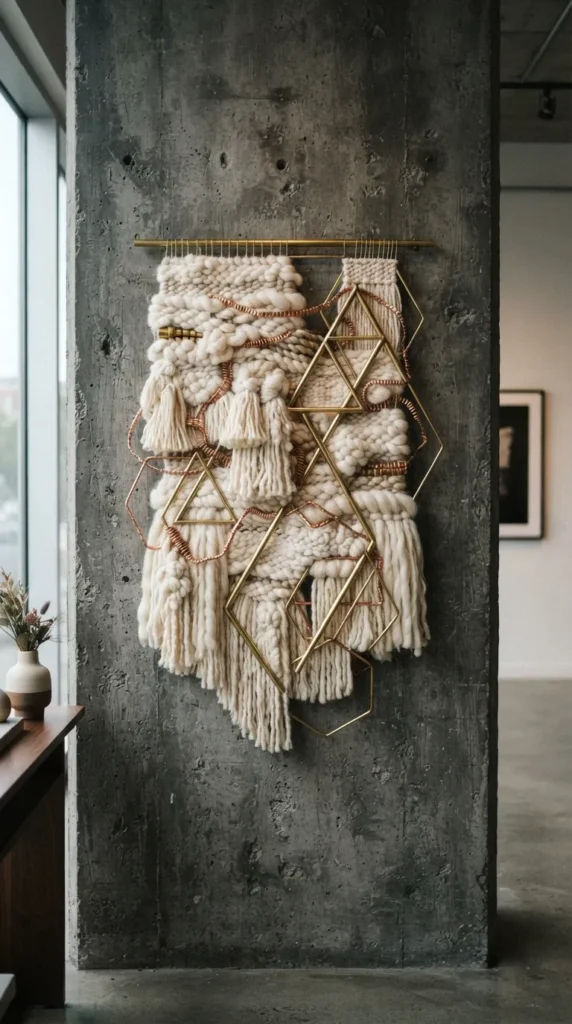
18. Mixed-Media Metallic & Fiber Wall Sculpture
What This Idea Means
Combining soft textiles with hard metallic elements (such as copper wire, brass tubing, or polished sheet metal) creates a modern, high-contrast sculptural art piece that fits contemporary and industrial interior styles.
How to Make It
- Construct a rigid frame using welded metal rings or pre-cut brass rods.
- String wire or strong linen thread across the frame as your warp foundation.
- Weave soft wools and cotton cords around and through the metal elements, leaving sections of bare metal exposed.
- Thread polished brass tubes directly onto specific warp lines to introduce reflective metallic accents.
- Let long, untamed strands of fine silk or wool cascade below the metallic base frame.
Tips & Variations
- Tips: Use a polishing cloth on the metal elements before hanging to keep the metal shiny and smudge-free.
- Variations: Experiment with oxidized copper rods to introduce striking turquoise and green patinas against neutral wools.
19. Textured Fiber Lamp Shade Cover
What This Idea Means
Transforming a plain lamp shade with a custom-woven fiber cover diffuses light into soft, ambient glows while adding rich texture to bedside tables or floor lamps when the light is switched off.
How to Make It
- Take a wire lamp shade frame (remove any existing fabric covering).
- Warp vertically around the upper and lower rings of the frame.
- Weave horizontally around the circumference using light-transmitting yarns like loose-spun cotton, linen, and openwork boucle.
- Keep the weave slightly loose so light can filter through the fiber openings.
- Secure all loose ends neatly on the interior frame with clear fabric glue.
Tips & Variations
- Tips: Always use cool-burning LED bulbs inside fiber lampshades to avoid heat buildup near the yarn.
- Variations: Add a subtle row of short fringe along the bottom rim of the shade for a vintage-inspired look.
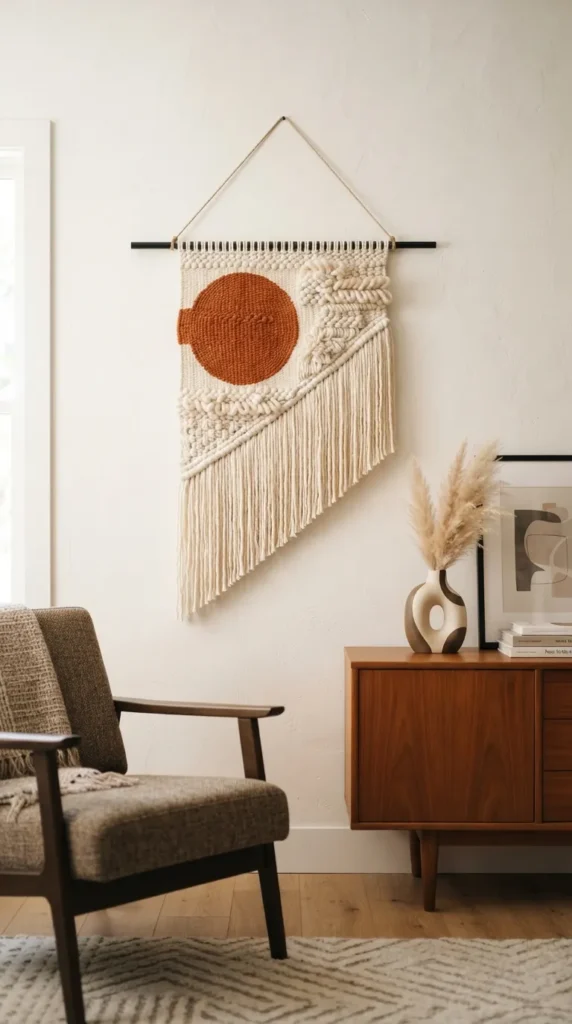
20. Mid-Century Modern Asymmetrical Fiber Wall Hanging
What This Idea Means
Embracing asymmetry introduces modern movement and visual energy to wall art. This design features uneven fringe lengths, off-center focal points, and diagonal weave lines characteristic of Mid-Century Modern graphic design.
How to Make It
- Warp a standard frame loom, dividing the warp layout into asymmetrical sections in your planning sketch.
- Weave the background using a clean off-white base color.
- Build an off-center geometric focal shape (such as a circle or half-moon) off to one side using vibrant rust or mustard wool.
- Cut the lower fringe at a steep diagonal angle, tapering from extra long on one side to short on the other.
- Hang on a sleek black metal dowel offset slightly to one side for balanced asymmetry.
Tips & Variations
- Tips: Balance an asymmetrical design by keeping one element (like color weight or visual density) grounded on the opposite side.
- Variations: Combine asymmetrical shapes with varying loop heights to introduce both spatial and tactile dimensions.