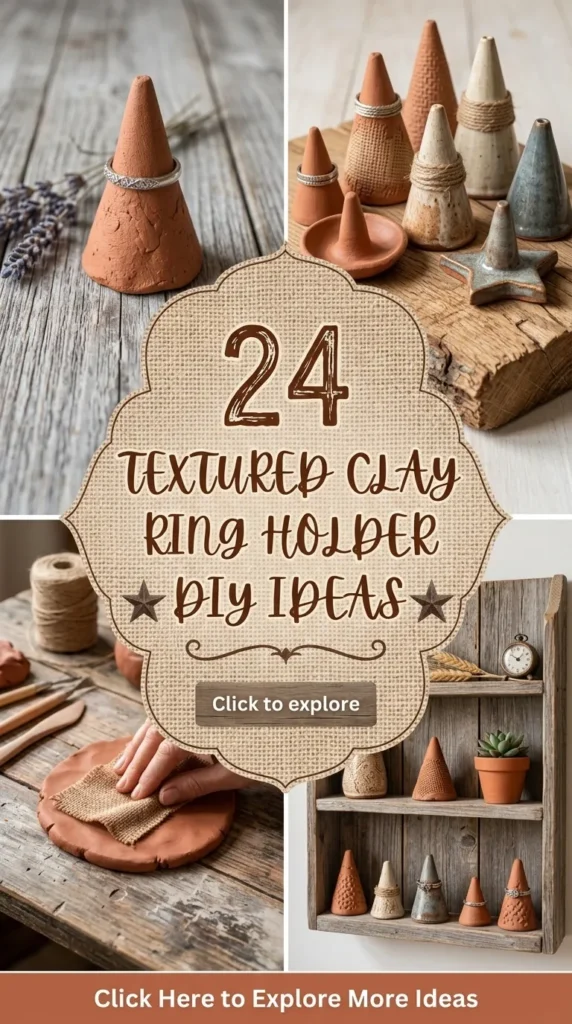
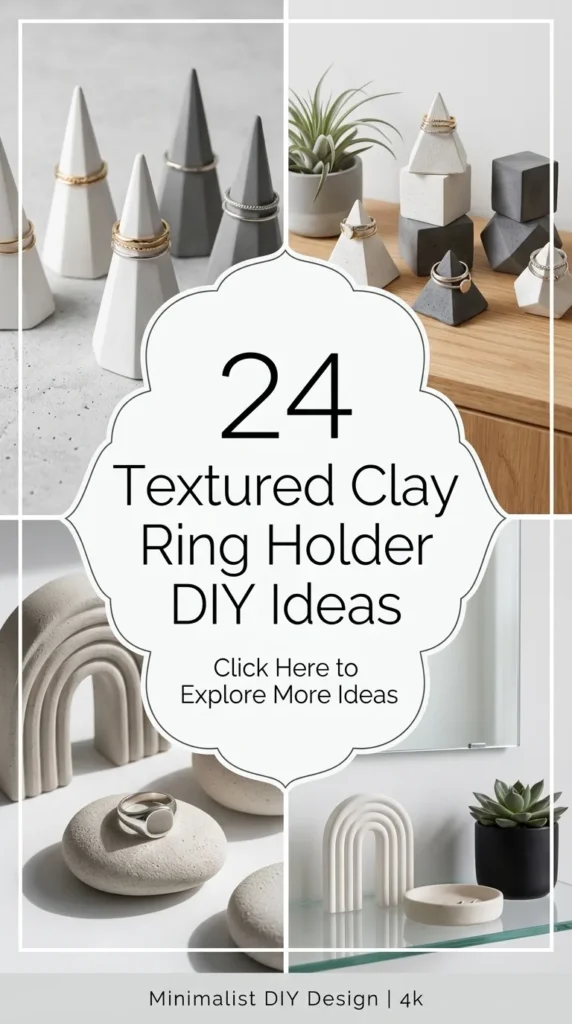
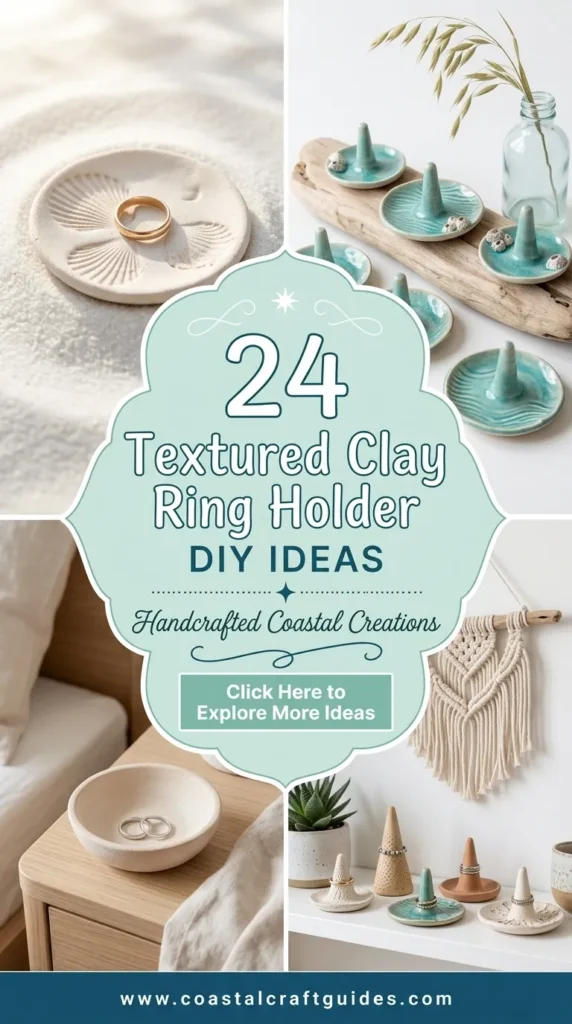
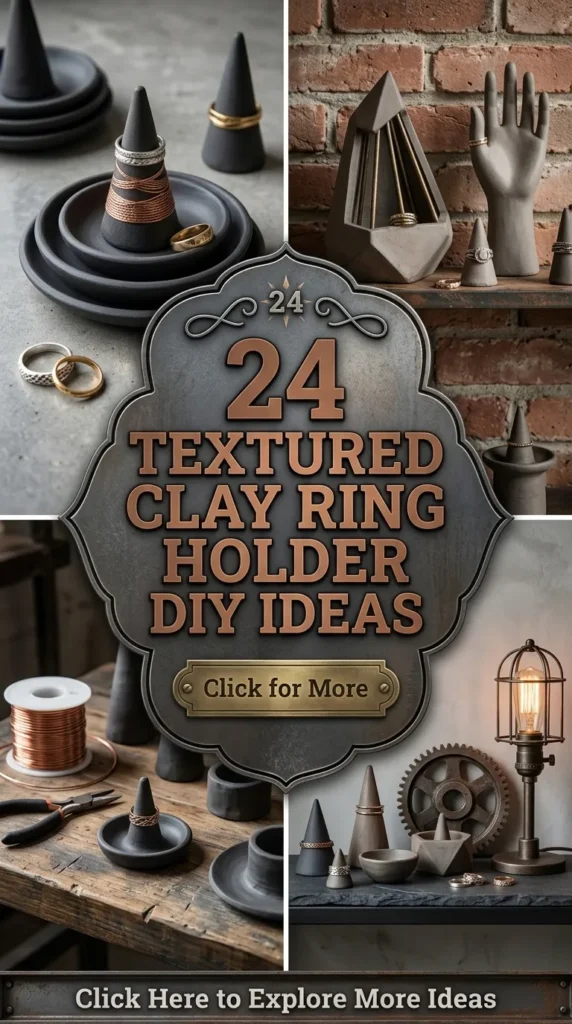
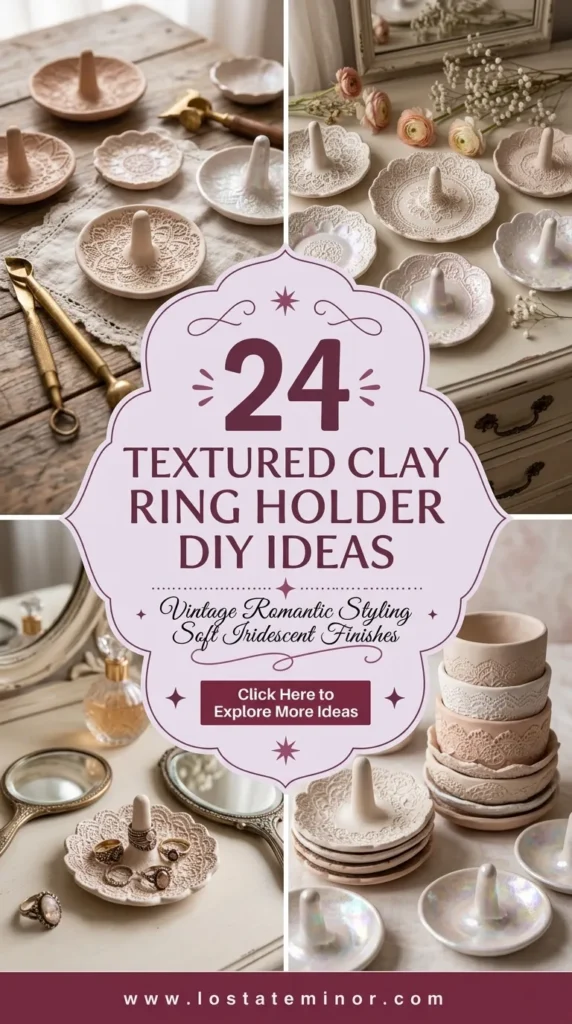
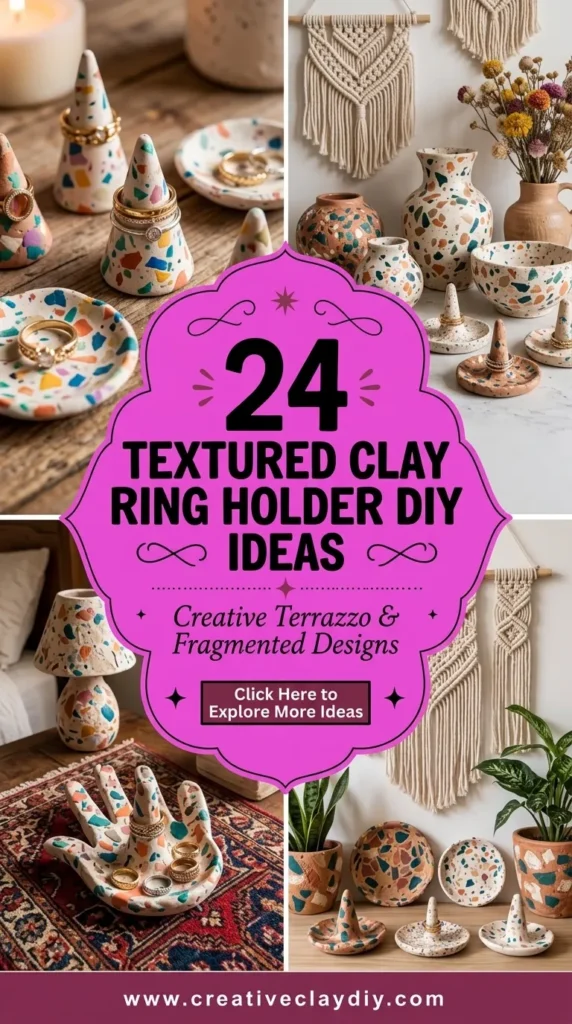
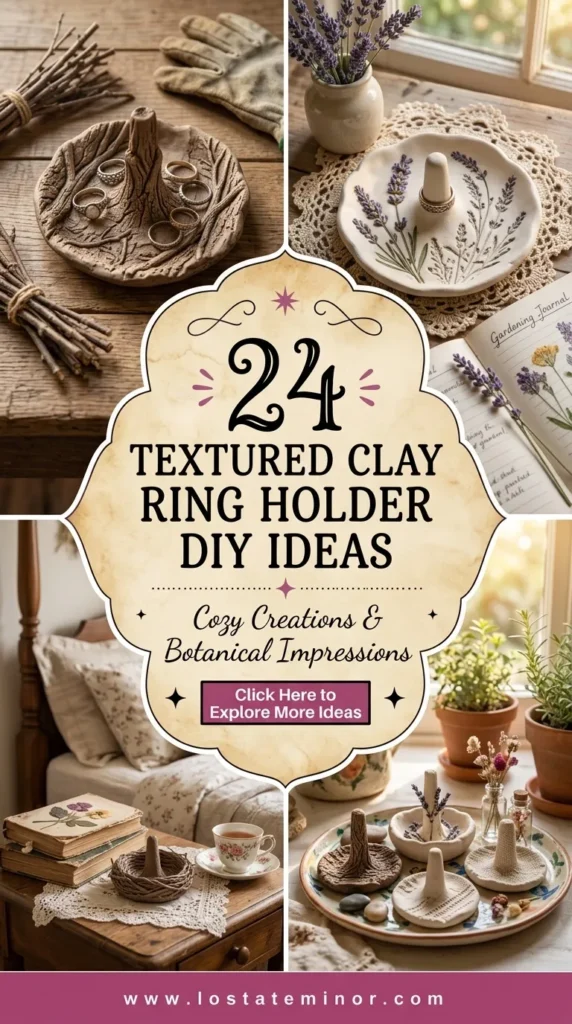
There is a quiet, poetic charm in handcrafted items, especially those designed to hold our most cherished jewelry. Clay ring holders are not merely functional organizers; they are small sculptures that bring warmth, texture, and personal artistry to nightstands, vanity tables, and dressers. Working with textured clay elevates simple trinket dishes into sophisticated decor pieces. By introducing tactile elements—such as stamped botanical patterns, rustic hand-built ridges, geometric facets, or marble-like swirls—you turn an everyday craft into a luxurious accent piece.
Whether you are using air-dry clay for an accessible, low-fuss project or oven-bake polymer clay for maximum durability, crafting textured clay ring holders offers endless creative possibilities. In this guide, you will explore 20 unique, realistic, and Pinterest-worthy textured clay ring holder DIY ideas. Each concept includes a full breakdown of what makes it special, a clear step-by-step creation guide, pro tips, creative variations, and a list of required materials.
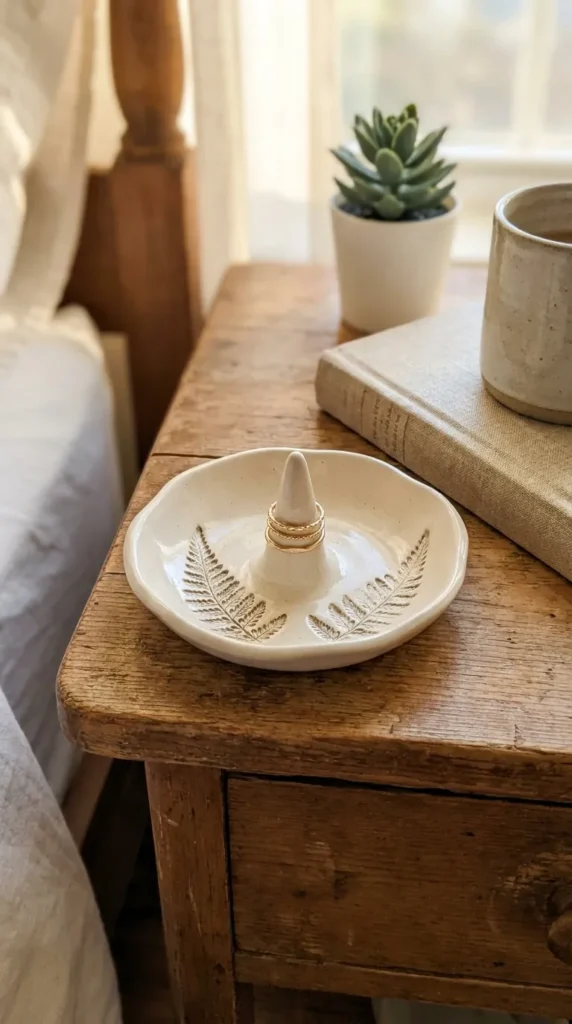
1. Botanical Impression Trinket Dish & Cone
Idea Overview
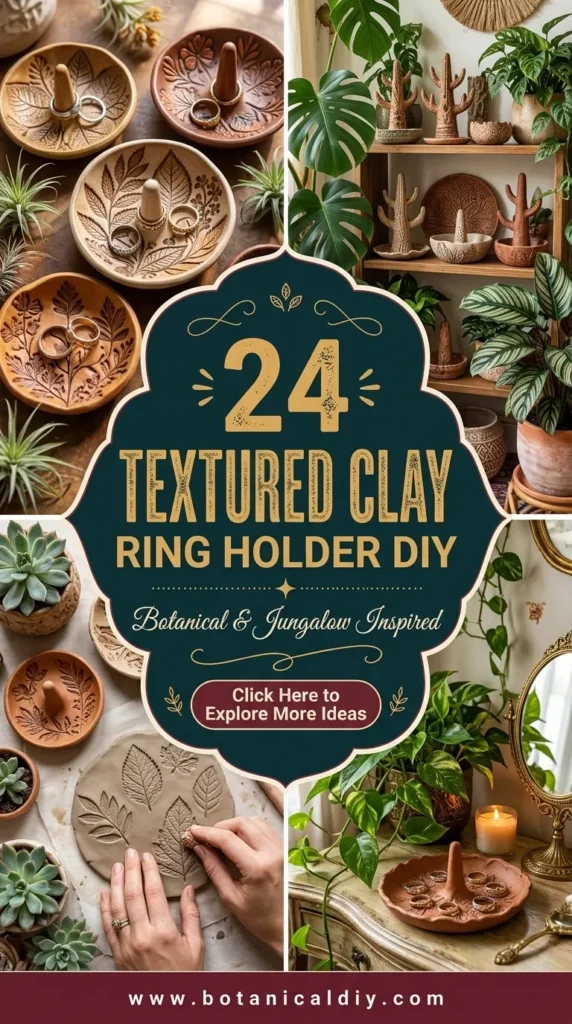
This design pairs a delicate, shallow dish with a tapered central cone, featuring real leaf or flower impressions stamped directly into the clay surface. The result is an elegant, organic piece that captures the fine vein structures of nature with a subtle tactile feel.
How to Make It
- Prepare the Clay: Roll out a piece of air-dry or polymer clay to a uniform thickness of approximately 1/4 inch using a acrylic rolling pin.
- Press the Botanicals: Place fresh, sturdy leaves or small flowers face down onto the clay. Gently pass the rolling pin over them to press the details into the surface.
- Shape the Dish: Carefully peel away the plants. Use a circular cookie cutter or craft knife to cut out a 4-inch circle. Gently lift the edges of the circle and drape it into a small bowl lined with plastic wrap to form a curved dish shape.
- Build the Cone: Roll a separate piece of clay into a smooth cone shape about 2 to 3 inches tall. Texture the outer surface of the cone by rolling it over smaller leaf veins.
- Assemble & Dry: Moisten the bottom of the cone and the center of the dish with a tiny bit of water (or clay slip). Score both surfaces and press them firmly together. Allow the piece to dry or bake according to package instructions.
- Finish: Once fully hardened, lightly brush a watered-down acrylic paint or dark wash into the botanical grooves, wiping away excess from the high points to highlight the leaf veins. Finish with a matte acrylic sealer.
Tips & Variations
- Tip: Harder leaves like sage, rosemary, or small ferns yield the crispest impressions.
- Variation: Apply metallic gold leaf strictly to the rim of the dish to add a touch of modern glam against the earthy botanical texture.
Materials Needed
- Air-dry or polymer clay
- Acrylic rolling pin
- Fresh leaves or flowers
- Circular cutter
- Craft knife or needle tool
- Acrylic paint and brushes
- Matte sealant
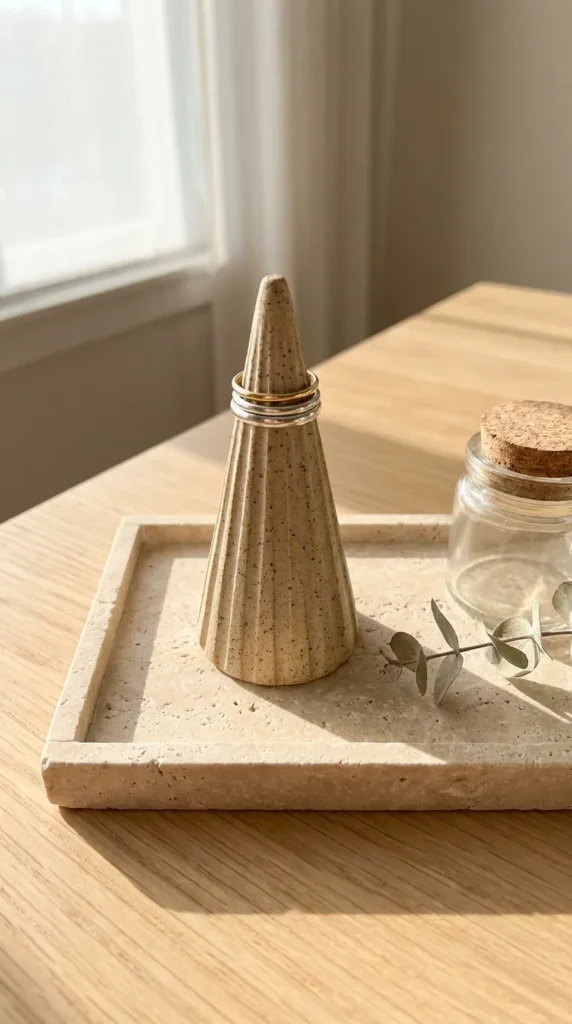
2. Fluted Minimalist Ceramic-Style Cone
Idea Overview
Inspired by modern Scandinavian architectural lines, this design features vertical, evenly spaced ridges (fluting) around a simple geometric ring cone. It offers a chic, sculptural aesthetic that looks like high-end designer stoneware.
How to Make It
- Form the Base Cone: Roll a solid block of clay into a smooth cone shape, roughly 3 inches high and 1.5 inches wide at the base.
- Carve the Flutes: Use a small loop tool, wood carving tool, or the back of a rounded craft knife to carve clean, vertical grooves from the tip down to the base all the way around the cone.
- Refine the Texture: Dip a soft detail sponge in a tiny amount of water to smooth out any rough edges inside the carved grooves, keeping the lines sharp yet soft.
- Cure & Paint: Cure or dry the clay completely. Paint the entire cone with a speckled, matte-finish paint to emulate real stoneware pottery.
Tips & Variations
- Tip: Keep the grooves spaced as evenly as possible by marking faint guidelines at the base before carving.
- Variation: Try horizontal ribbing instead of vertical fluting for a relaxed, wheel-thrown ceramic look.
Materials Needed
- Air-dry clay or beige polymer clay
- Clay loop tool or carving tool
- Craft sponge
- Speckled stone-effect acrylic paint
- Clear matte coat
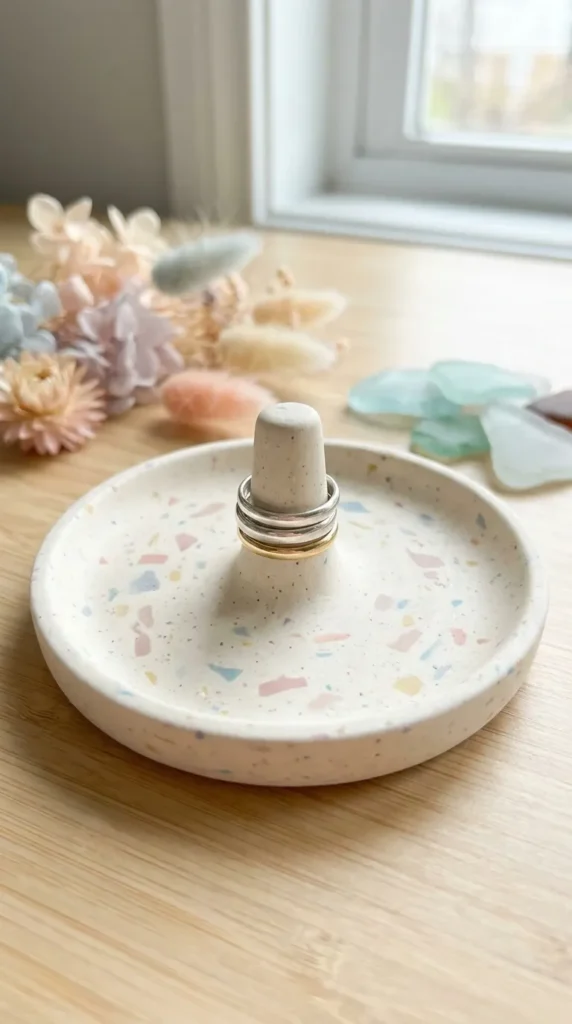
3. Sand-Infested Terrazzo Tray & Pillar
Idea Overview
Combining gritty sand texture with multicolored clay chips produces an eye-catching terrazzo finish. This ring holder features a broad, flat-bottomed tray with a short, sturdy ring pillar in the center.
How to Make It
- Create Clay Chips: Chop up pre-baked bits of colorful polymer clay into tiny, flat, irregular shapes.
- Mix into Base Clay: Knead the tiny colored chips along with a pinch of fine beach sand into a white or cream-colored base clay.
- Roll & Shape: Roll the mixed clay flat. Cut a large oval or rounded rectangle for the tray floor and attach a thin clay snake around the perimeter to form a low wall.
- Shape the Pillar: Roll a thick cylinder or pillar from the same terrazzo mix and attach it securely to the middle of the tray.
- Sand & Polish: Bake or dry the piece. Once hard, use fine-grit wet sandpaper (400 to 800 grit) to smooth the surface, revealing the sharp, colorful speckles beneath.
Tips & Variations
- Tip: Sanding under running water prevents dust and creates a silky, stone-like texture.
- Variation: Stick to a monochrome palette (black, gray, and white chips) for an industrial concrete look.
Materials Needed
- Polymer clay (white plus contrasting accent colors)
- Fine sand
- Clay knife and rolling pin
- Wet/dry sandpaper (various grits)
- Satin sealer
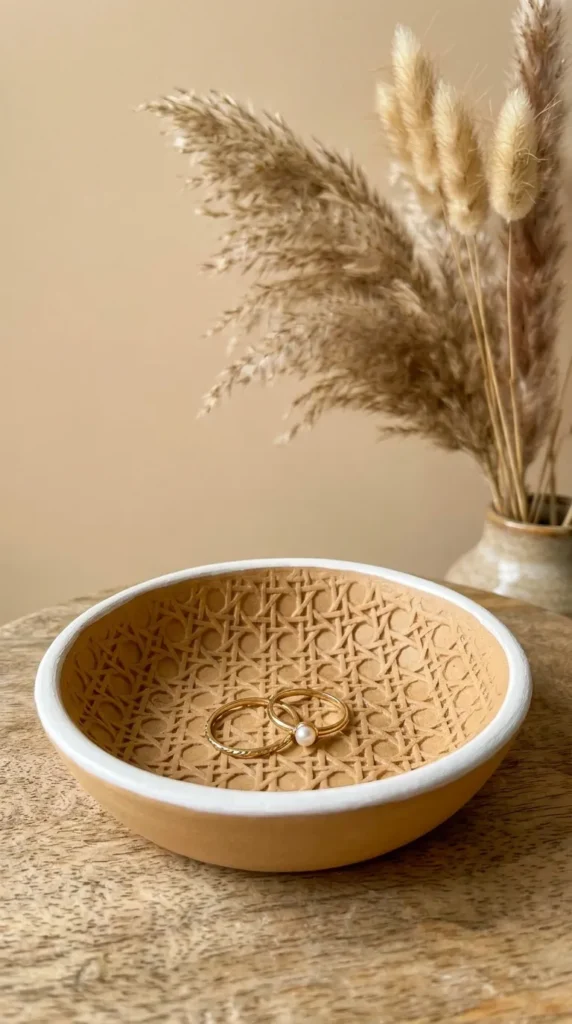
4. Woven Rattan Pattern Ring Dish
Idea Overview
This design uses textured mats or real woven material pressed into clay to replicate the warm, boho look of woven basketry or cane webbing inside a small trinket dish.
How to Make It
- Roll the Clay: Flatten light brown or tan clay into a 1/4-inch sheet.
- Imprint the Weave: Lay a piece of rattan webbing or a heavy-textured weave mat over the clay. Firmly press down with a rolling pin to stamp the crisscross pattern evenly into the surface.
- Form the Dish: Cut out a circle or soft hexagon shape. Lift the outer edges upward slightly to form a dish shape.
- Add Center Post: Create a small, simple ring post, texture its lower half with the same woven pattern, and join it to the center.
- Cure and Stain: Cure the clay. Brush a light brown wash into the woven texture, then immediately wipe the surface with a paper towel so the paint remains only in the recessed lines.
Tips & Variations
- Tip: If the clay sticks to the texture mat, dust the mat lightly with cornstarch before pressing.
- Variation: Paint the rim in a soft white or cream coat to give it a relaxed, coastal-chic vibe.
Materials Needed
- Tan or beige clay
- Woven mat or rattan scrap
- Cornstarch (optional)
- Rolling pin and circular cutter
- Brown acrylic paint and glaze
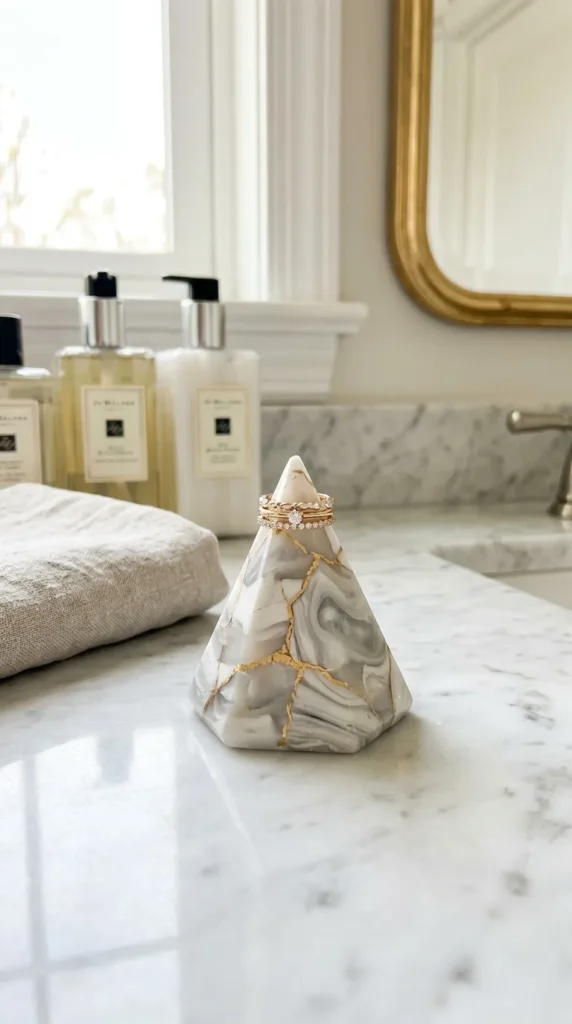
5. Raw Marble Swirl with Gold Crackle Texture
Idea Overview
Blending white, gray, and semi-translucent clay creates a luxurious faux-marble look, elevated by deliberate surface cracks filled with metallic gold highlight.
How to Make It
- Marble the Clay: Roll white, soft gray, and translucent clay into long ropes. Twist them together, fold them, and roll them out flat. Repeat until a natural marble grain forms.
- Create Crackle Texture: Gently stretch the clay sheet over a slightly curved surface or pull the edges apart to create micro-fissures across the top surface.
- Shape the Dish & Dish Post: Form a shallow dish and a smooth, slightly twisted central pyramid post. Attach the post securely to the base.
- Bake/Dry: Cure the piece fully according to your clay’s guidelines.
- Highlight Cracks: Brush liquid gold leaf or metallic gold paint directly into the textured surface cracks, allowing the metallic lines to contrast against the marble background.
Tips & Variations
- Tip: Do not over-mix the clay colors, or you will end up with a solid gray tone rather than clear marble veining.
- Variation: Use deep emerald green and black clay mixed with gold for an opulent dark marble aesthetic.
Materials Needed
- Polymer clay (white, gray, translucent)
- Liquid gold leaf or gold paint
- Detail paint brush
- Clay tools and rolling pin
- Gloss varnish
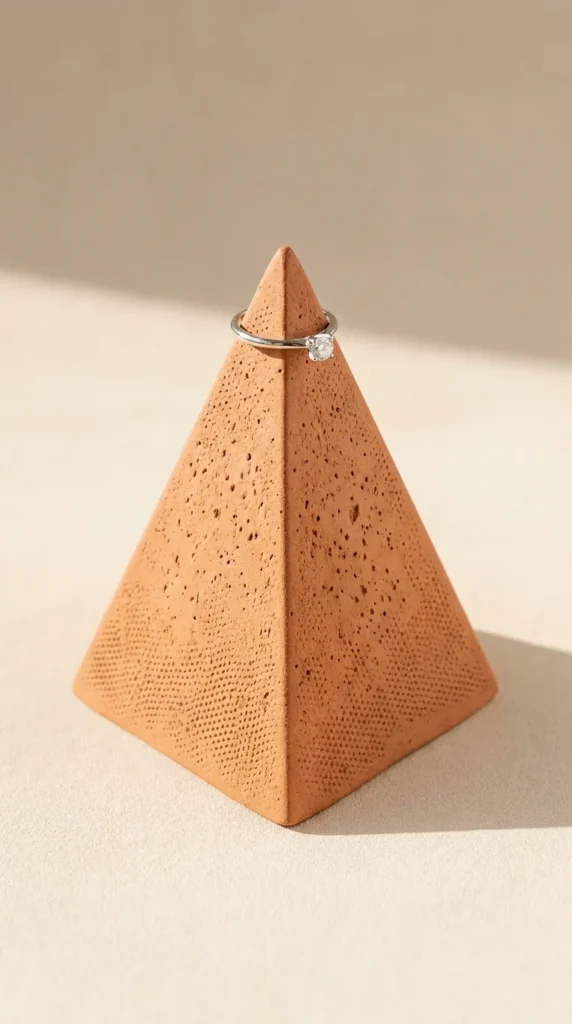
6. Stippled Geo Pyramid Ring Stand
Idea Overview
A modern, geometric pyramid design covered entirely in a fine, pitted stipple texture. This piece combines sharp architectural angles with a soft, tactile surface.
How to Make It
- Construct the Pyramid: Form a solid four-sided pyramid out of firm clay, keeping the base flat and the top point clean.
- Apply Stipple Texture: Using a stiff-bristled stippling brush, a textured ball tool, or a coarse sponge, press firmly all over the sides of the pyramid to create a dense, uniform pitted surface.
- Define Edges: Take a straight edge or ruler and gently smooth the sharp vertical corners so the geometric silhouette remains crisp despite the surface texture.
- Cure & Finish: Cure the piece and apply a chalky, matte finish paint in a neutral shade like stone gray, terracotta, or off-white.
Tips & Variations
- Tip: Work on a cool surface so the clay stays firm while you apply pressure with the stippling tools.
- Variation: Leave one side of the pyramid smooth while stippling the other three for a dynamic, half-and-half contrast.
Materials Needed
- Firm polymer or air-dry clay
- Stippling brush or textured tool
- Ruler or flat smoothing tool
- Chalk paint
- Flat sealer
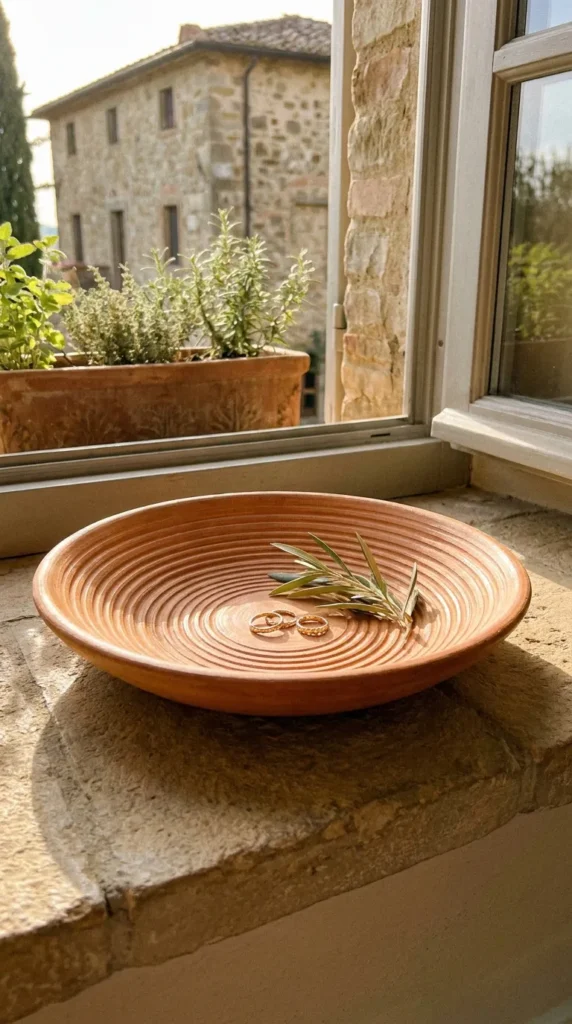
7. Rustic Terracotta Ribbed Bowl
Idea Overview
Embracing the rich, warm tones of Mediterranean pottery, this ring holder features a shallow bowl shape lined with horizontal hand-carved ribs and an earthy, unglazed texture.
How to Make It
- Form the Base Dish: Roll out terracotta-colored clay and press it into a small rounded bowl mold.
- Add Ribbed Detail: Using a rounded wooden modeling tool or your fingertips, gently press horizontal concentric rings around the inner and outer walls of the bowl.
- Craft the Ring Stems: Make two small, off-center vertical stems inside the bowl to hold multiple rings at once. Add subtle ribbing to the stems as well.
- Dry & Burnish: Once slightly firm (leather-hard if using air-dry), rub the surface gently with a smooth stone or spoon to burnish the high points, giving it a soft sheen while keeping the texture intact.
- Bake & Protect: Cure the piece and apply a breathable, matte water-resistant sealer.
Tips & Variations
- Tip: Burnishing before full drying compresses the clay surface, making it feel remarkably smooth and stone-like.
- Variation: Add a single band of white ceramic paint around the outer rim for a modern desert-style look.
Materials Needed
- Terracotta clay (air-dry or polymer)
- Wooden modeling tools
- Smooth burnishing stone or metal spoon
- Matte sealer
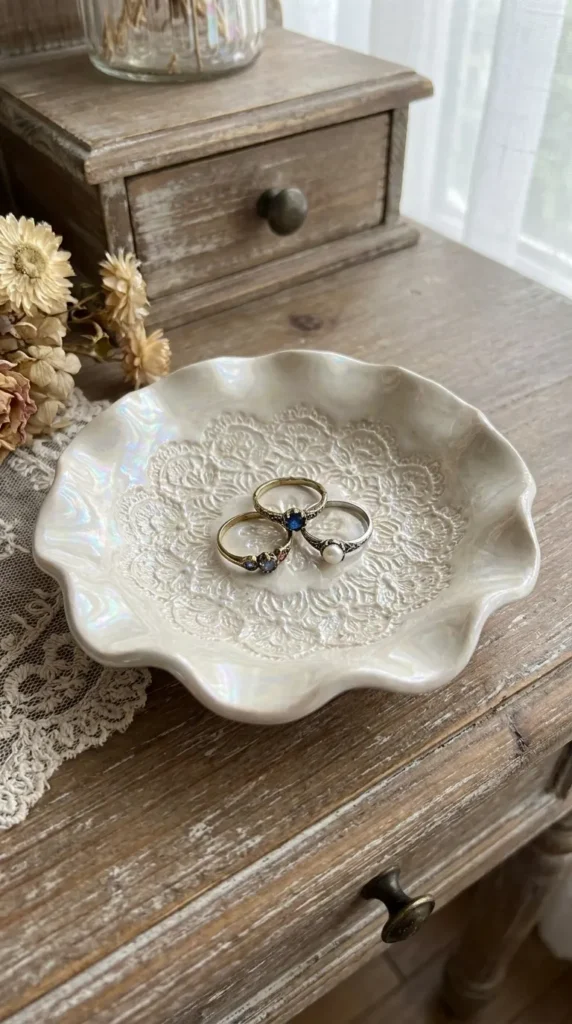
8. Lace Embossed Delicate Dish
Idea Overview
A romantic and timeless concept that uses vintage lace fabric to imprint intricate, delicate patterns onto a shallow clay ring dish with scalloped edges.
How to Make It
- Roll Out Clay: Roll white air-dry or polymer clay down to about 1/8 inch thickness.
- Press the Lace: Lay a strip of heavy vintage lace fabric over the clay sheet. Roll over it firmly with a rolling pin to transfer the detailed lace embroidery into the clay.
- Cut Scalloped Rim: Carefully remove the lace. Use a scalloped round cutter to stamp out the dish shape.
- Form the Curve: Place the cut clay circle into a shallow bowl or muffin tin so the edges curl upward naturally.
- Dry & Accent: Dry or bake the piece. Lightly pat a metallic pearl or pastel powder over the raised lace details to make the pattern pop softly.
Tips & Variations
- Tip: Antique crochet doilies work exceptionally well because of their deep, thick thread patterns.
- Variation: Wash the lace imprint with soft blush pink or sage green watercolor paint for a vintage cottagecore vibe.
Materials Needed
- White clay
- Vintage lace or crochet doily
- Scalloped cutter
- Pearl powder or pastel chalks
- Protective clear coat
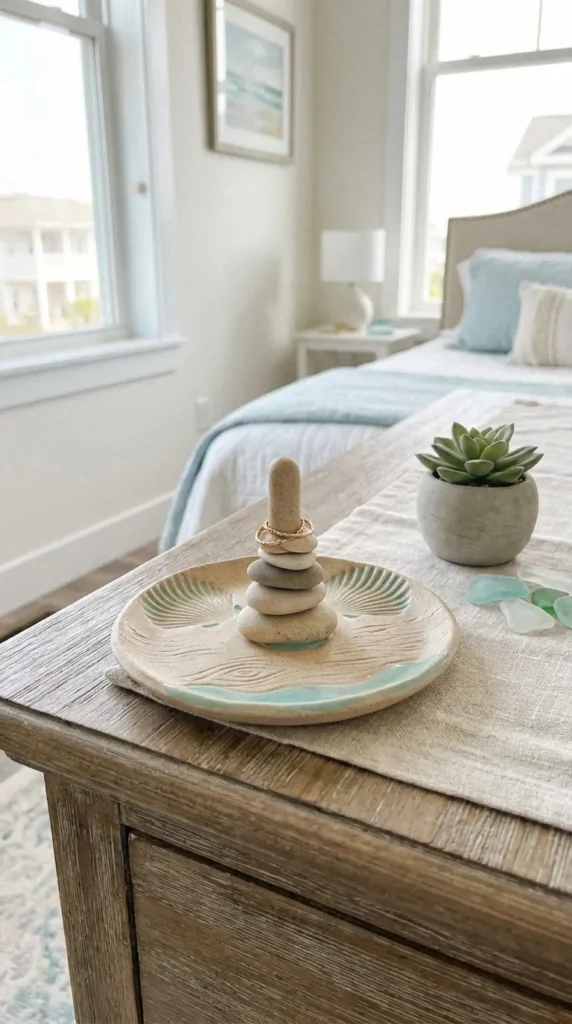
9. Driftwood & Shell Impression Coastal Dish
Idea Overview
Perfect for beach lovers, this dish incorporates the rough texture of washed-up sea shells and weathered driftwood directly into the surface of the clay.
How to Make It
- Prepare Clay Base: Flatten soft sand-colored clay into an organic, slightly asymmetrical oval shape.
- Stamp Shell Textures: Take small seashells and press their textured outer ridges firmly into various areas of the dish surface.
- Add Driftwood Lines: Use a piece of rough wood or a coarse wire brush to drag subtle, linear wood-grain lines across the rest of the dish.
- Build Ring Post: Create a central ring post shaped like a smooth sea stack or small pebble tower, attaching it securely with slip.
- Cure & Detail: Cure the piece. Paint inside the shell imprints with a faint turquoise or iridescent shimmer, keeping the rest of the dish matte and sandy.
Tips & Variations
- Tip: Lightly dusting the shells with water ensures they pull away cleanly without ripping the wet clay.
- Variation: Press tiny real sea glass fragments into the bottom of the dish before baking for a pop of ocean color.
Materials Needed
- Sand or beige colored clay
- Real seashells
- Wire brush or wood scrap
- Aqua or iridescent paint
- Matte glaze
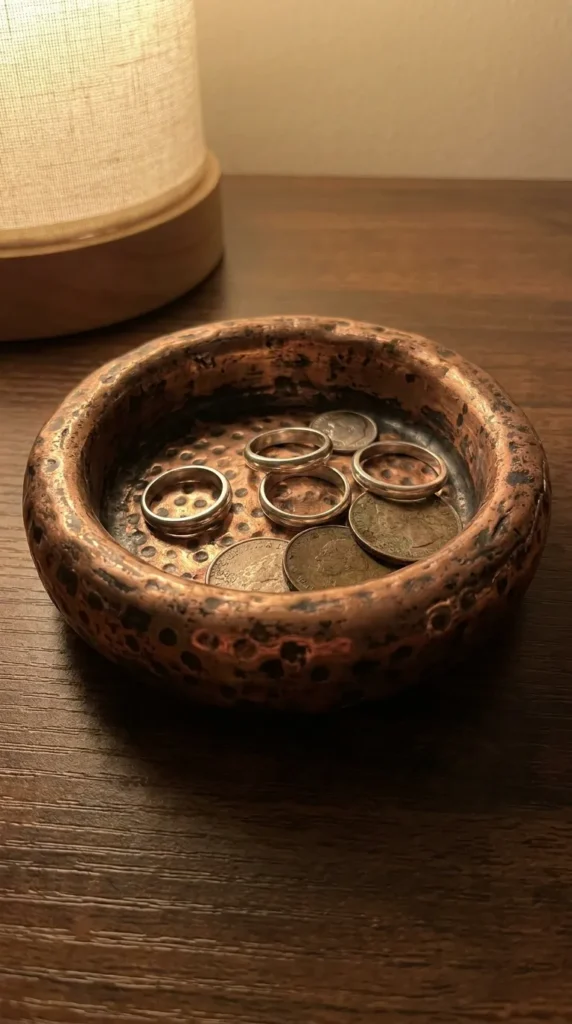
10. Hammered Metal Style Dish with Cone
Idea Overview
Replicating the rustic, dimpled look of hand-hammered copper or brass, this clay ring holder brings a warm, artisanal metallic texture to your nightstand.
How to Make It
- Shape the Base & Cone: Model a flat-bottomed round dish and a smooth central cone from polymer clay. Attach them firmly together.
- Create Hammered Texture: Use a small ball-end stylus tool to press small, shallow, overlapping dimples across the entire surface of the dish and cone.
- Bake: Bake the piece according to polymer clay instructions until fully hardened.
- Apply Metallic Finish: Paint the entire piece with metallic copper, bronze, or antique gold acrylic paint.
- Add Antiquing Wash: Once the base coat is dry, wash over it with black acrylic paint and quickly wipe off the surface, leaving dark paint in the dimples to emphasize depth.
Tips & Variations
- Tip: Keep dimple sizes inconsistent for a more authentic hand-crafted hammered effect.
- Variation: Use metallic silver paint mixed with a touch of blue-gray wash for a hammered pewter aesthetic.
Materials Needed
- Polymer clay
- Ball-end stylus tools
- Metallic acrylic paints (copper/gold/silver)
- Black acrylic paint
- Satin topcoat
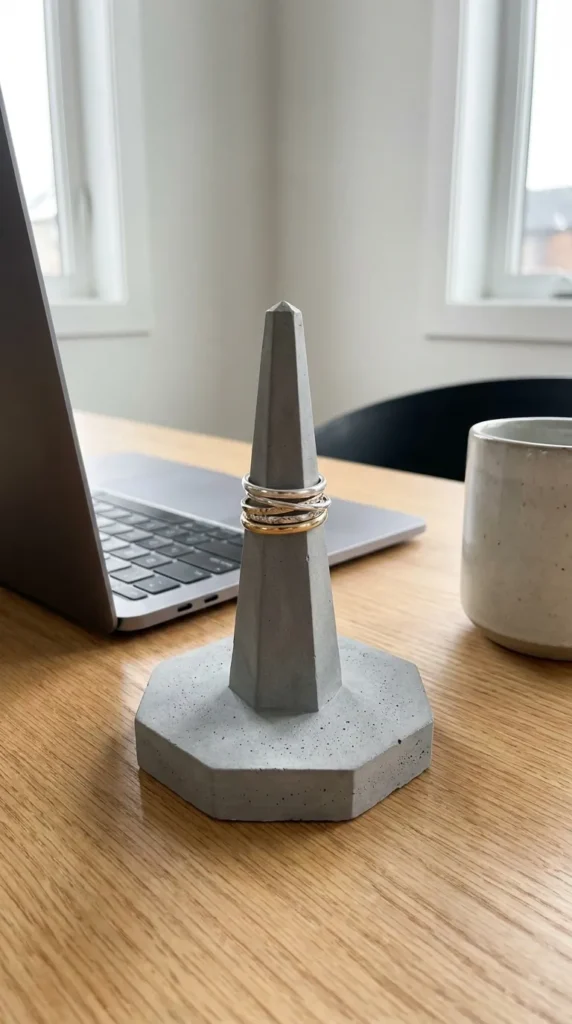
11. Concrete Look Geometric Prism Holder
Idea Overview
A sleek, industrial design that mimics raw cast concrete. Features a multi-faceted geometric base dish with a matching sharp prism post.
How to Make It
- Mix Concrete Color: Blend gray, white, and a speck of black clay together until an uneven light gray concrete shade is achieved.
- Form Facets: Sculpt a thick octagonal dish base and a tall six-sided prism for the center using a sharp blade to slice away flat facets.
- Add Pores: Gently press coarse sea salt or a rough sponge onto the flat facets to create tiny surface pockmarks that mimic real concrete air bubbles.
- Cure and Wash: Cure the clay. Dissolve away any surface salt with warm water if used.
- Dark Wash finish: Brush a thin dark gray wash over the facets to enhance the raw industrial texture.
Tips & Variations
- Tip: A sharp, tissue blade is essential for getting crisp, razor-sharp edges on geometric clay facets.
- Variation: Dip the top half of the prism in matte white paint for a trendy color-blocked concrete look.
Materials Needed
- Gray polymer or air-dry clay
- Flexible tissue blade or craft knife
- Coarse sea salt or coarse sponge
- Dark acrylic wash
- Ultra-matte sealer
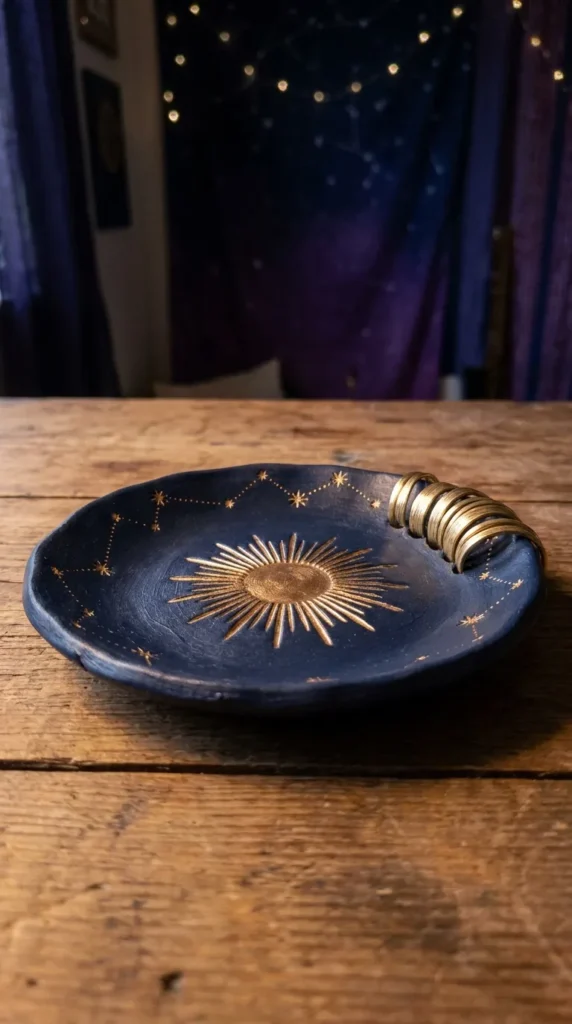
12. Celestial Sunburst Stamped Ring Plate
Idea Overview
An enchanting design featuring an embossed central sunburst pattern with delicate ray ridges fanning outward across a wide, flat ring plate.
How to Make It
- Prepare Clay Circle: Roll out dark navy or black clay to 1/4-inch thickness and cut a 5-inch circle.
- Carve or Stamp Sunburst: Use a sunburst stamp in the center, or hand-carve fine lines radiating out from the middle toward the edges using a needle tool.
- Form Low Rim: Curve the outer edge slightly upward to keep rings from sliding off.
- Cure & Highlight: Cure the clay completely. Rub gold metallic wax paste (Rub ‘n Buff) over the raised sun lines to make them shine brilliantly against the dark base.
Tips & Variations
- Tip: Work from the center outward when hand-carving rays to maintain balanced spacing.
- Variation: Stamp tiny star clusters and moon crescents along the outer rim for a complete cosmic theme.
Materials Needed
- Deep navy or black clay
- Sunburst stamp or needle tool
- Metallic gold wax paste or paint
- Clear protective coat
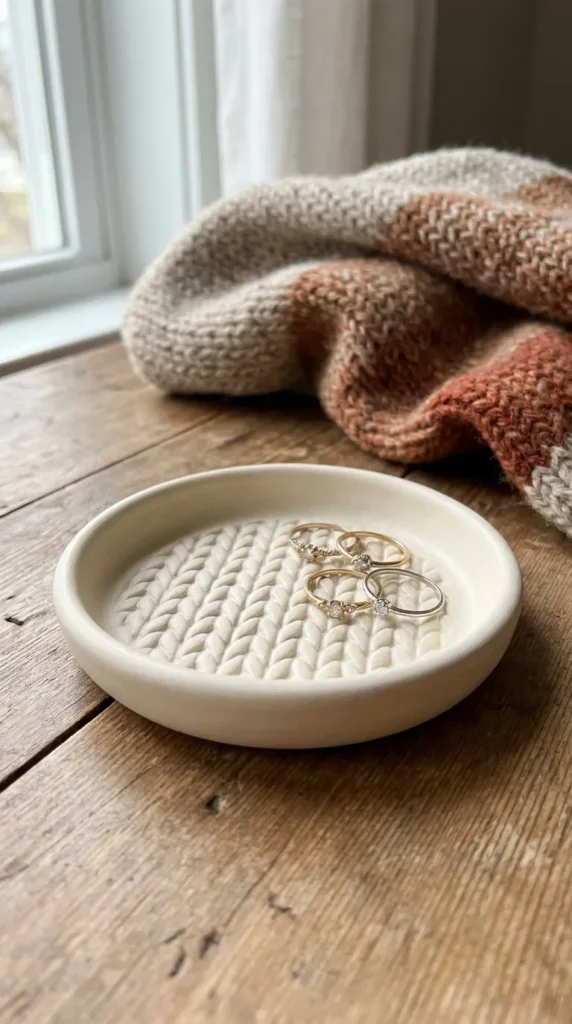
13. Chunky Knit Wool Texture Tray
Idea Overview
Emulating the cozy warmth of a chunky cable-knit sweater, this unique ring tray features deep, interlaced yarn-like textures pressed into clay.
How to Make It
- Create Clay Ropes: Twist thin ropes of clay together in opposite directions to form braided or knitted cords.
- Lay the Knit Pattern: Align several braided ropes side by side on a flat clay base sheet to create a full knitted fabric texture.
- Cut Dish Shape: Trim the textured slab into a neat square or oval tray.
- Add Side Walls: Attach smooth, thin clay rims around the knitted tray to frame the cozy pattern.
- Cure & Soften: Cure the piece and apply a soft chalky pastel paint in cream, soft grey, or blush pink.
Tips & Variations
- Tip: Dust clay ropes with a tiny bit of talcum powder to prevent them from sticking to your fingers while braiding.
- Variation: Use a real piece of coarse knit fabric pressed into a solid clay sheet for a quicker, uniform texture.
Materials Needed
- Light-colored clay
- Clay extruder or manual rolling technique
- Craft knife
- Chalky finish paint
- Matte varnish
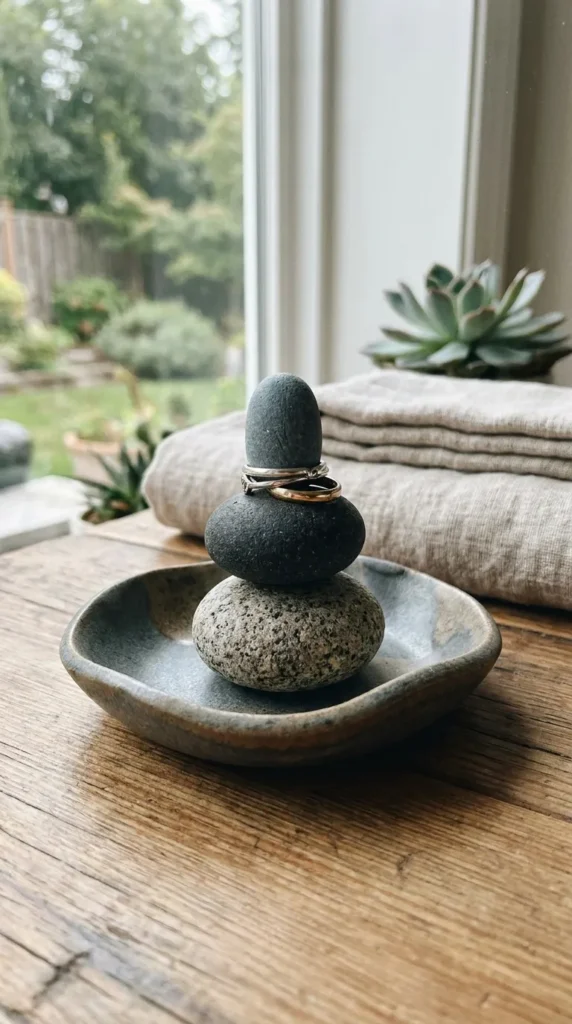
14. Organic Pebble & River Stone Stack
Idea Overview
Inspired by natural cairns (stacked river stones), this ring holder features smooth and textured clay stones stacked vertically as the central ring stem inside a low-profile dish.
How to Make It
- Sculpt Clay Pebbles: Roll 3 to 4 clay stones of decreasing sizes. Texture one with a fine sandpaper, another with stippling, and leave one completely smooth.
- Create Dish: Form a broad, shallow dish with an undulating, organic edge.
- Stack the Stones: Pass a thin metal wire or wooden toothpick through the center of the stacked pebbles to anchor them securely to each other and to the center of the dish.
- Cure: Bake or dry the entire assembly intact with the inner support wire.
- Paint in Earth Tones: Paint each stone in varying earthy tones (slate gray, granite beige, basalt charcoal) to highlight their contrasting textures.
Tips & Variations
- Tip: Make sure the top stone is narrow enough for your smallest ring size to slide over easily.
- Variation: Add small patches of green moss texture using faux craft moss glued near the base of the stones after curing.
Materials Needed
- Neutral tone clay
- Metal wire or wooden skewer
- Texturing tools / sandpaper
- Earth-tone acrylic paints
- Matte finish
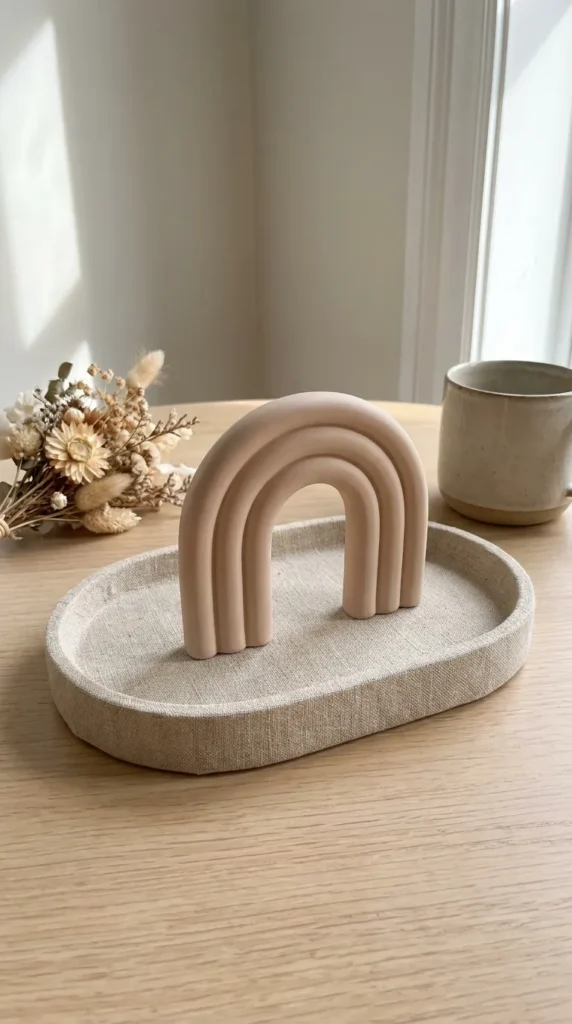
15. Minimalist Arch & Catch-All Dish
Idea Overview
A modern architectural concept featuring a smooth, raised clay rainbow arch mounted over a textured, oval catch-all dish base. Rings slip easily over the arch legs.
How to Make It
- Roll Base Tray: Roll a slab of clay into an oval and build a low rim around it. Texture the floor of the tray using a coarse cloth or linen sheet.
- Form the Arch: Roll a thick snake of smooth clay and bend it into a clean “U” shape (rainbow arch).
- Attach Arch: Stand the arch upright in the center of the oval tray. Secure the two base ends to the dish floor using scoring and clay slip.
- Cure & Paint: Cure the piece completely. Paint the base tray in a warm nude tone and the arch in a crisp off-white for a beautiful two-tone finish.
Tips & Variations
- Tip: Place a small piece of cardboard inside the arch curve while curing to prevent it from sagging.
- Variation: Create a double or triple nested arch for extra ring storage capacity.
Materials Needed
- Polymer or air-dry clay
- Textured linen fabric
- Scoring tool and clay slip
- Neutral shade acrylic paints
- Matte coat sealer
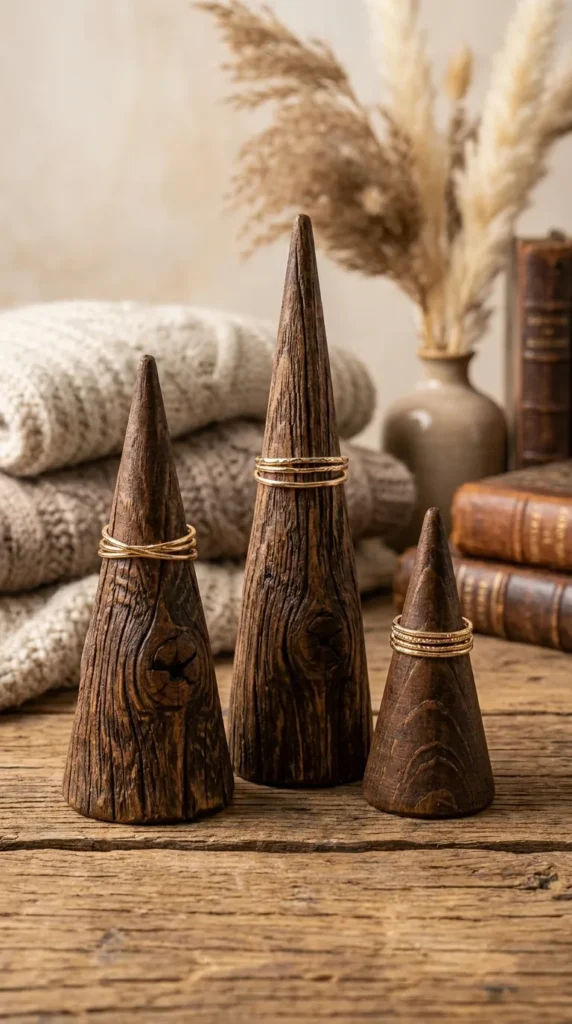
16. Distressed Wood Grain Ring Cone Set
Idea Overview
A trio of varying-height ring cones featuring deep, natural distressed wood grain lines and knot textures carved directly into the clay.
How to Make It
- Roll Cones: Model three separate ring cones in tall, medium, and short proportions.
- Carve Wood Texture: Drag a coarse wire tool or needle tool vertically down the length of each cone. Add small concentric circles at various points to represent wood knots.
- Flatten Bases: Press the base of each cone firmly on a flat surface so they stand perfectly upright.
- Cure & Stain: Cure the cones. Apply a dark brown paint wash over the piece, rubbing it off quickly so the pigment settles into the carved grain lines.
Tips & Variations
- Tip: Grouping cones in odd numbers (like 3 or 5) creates a more visually pleasing Pinterest-style arrangement.
- Variation: Dip the top tips of the wood-grain cones in glossy white paint for a snowy, rustic pine look.
Materials Needed
- Brown or beige clay
- Wire texture tool or needle tool
- Dark brown/black acrylic paint
- Soft rag for wiping paint
- Satin sealer
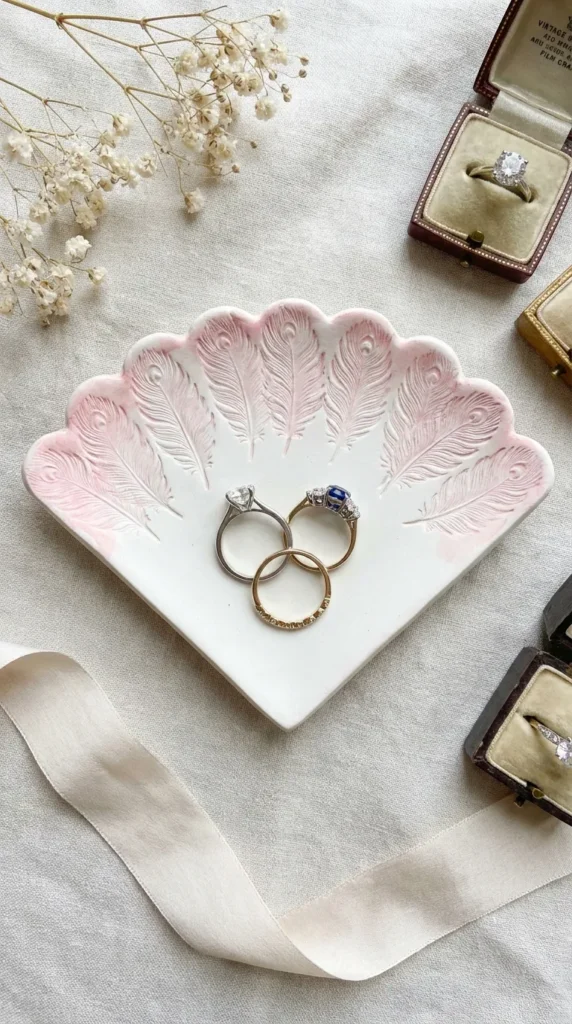
17. Feather Relief Shell-Rim Holder
Idea Overview
A delicate, fan-shaped dish featuring soft feather reliefs impressed around the curved edges, radiating outward like a scalloped sea shell.
How to Make It
- Prepare Clay: Flatten white clay into a soft triangular/fan shape with rounded corners.
- Stamp Feather Lines: Use a feather stamp or press the side of a feather tool repeatedly along the outer border to create soft, overlapping plume textures.
- Form Ring Bowl: Gently cup the piece into a curve so the feather-detailed edges slope upward.
- Add Center Post: Attach a small, smooth ring stem in the center.
- Cure & Detail: Cure the piece. Highlight the feather edges with iridescent white or soft lavender mica powder for a subtle shimmer.
Tips & Variations
- Tip: Use real craft feathers pressed firmly into the clay for hyper-realistic feather barb textures.
- Variation: Paint the feather details in soft ombre watercolor shades (blushing pink to lilac).
Materials Needed
- White clay
- Craft feathers or feather stamps
- Mica powder (iridescent)
- Detail brushes
- Glossy or satin sealant
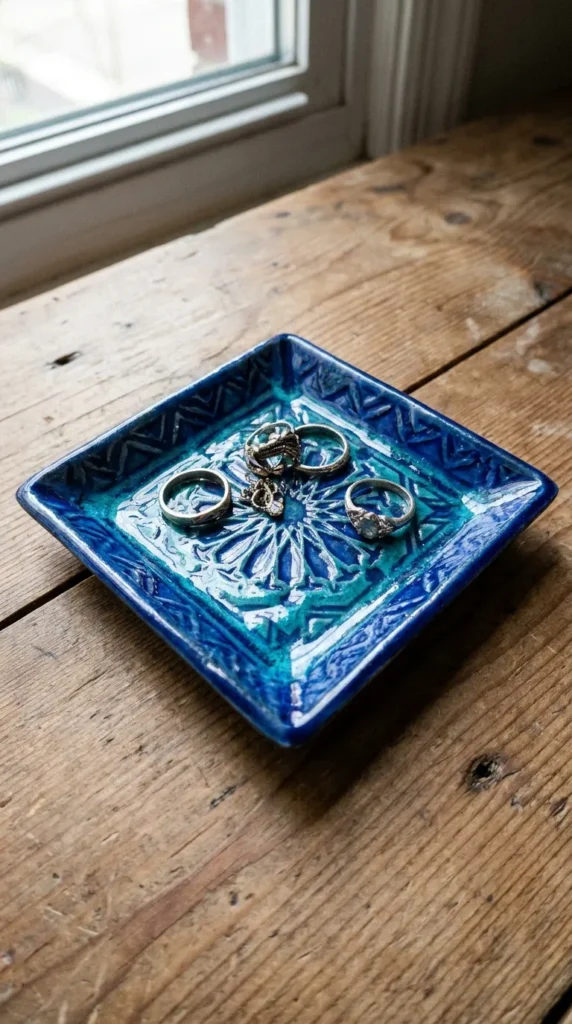
18. Moroccan Zellige Tile Stamped Tray
Idea Overview
Inspired by classic North African mosaic tilework, this square ring tray features intricate geometric star and diamond impressions filled with rich glossy glazes.
How to Make It
- Roll Square Slab: Cut a neat 4×4 inch square from a flat sheet of clay.
- Stamp Tile Patterns: Press Moroccan or geometric pattern stamps deeply into the top surface of the square slab.
- Add Small Walls: Attach thin square borders along the perimeter to form a shallow dish.
- Cure & Paint: Cure the piece fully. Paint inside the indented geometric lines with vivid acrylic paints (cobalt blue, turquoise, terracotta).
- High-Gloss Finish: Apply a thick coat of crystal-clear epoxy resin or heavy gloss glaze over the tile surface to replicate real glazed ceramic tiles.
Tips & Variations
- Tip: Use a toothpick to guide paint into tight geometric grooves without smudging the top borders.
- Variation: Keep the paint monochrome (black stamping on white clay) for a modern, minimalist tile vibe.
Materials Needed
- White polymer clay
- Geometric or Zellige pattern stamps
- Colorful acrylic paints
- Clear epoxy resin or dimensional glaze
- Square cutter
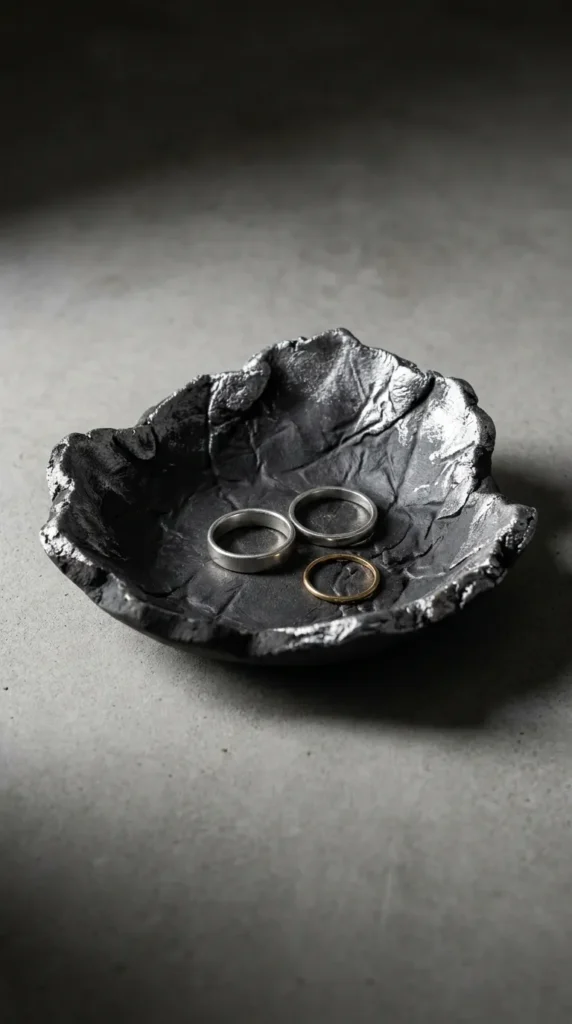
19. Crumpled Foil Metallic Impression Bowl
Idea Overview
A strikingly modern, abstract ring holder created by pressing tightly crumpled aluminum foil onto clay, creating an organic, crinkled rock or metal texture.
How to Make It
- Prepare Foil Ball: Ball up a piece of aluminum foil, then unroll it slightly so it stays densely crumpled.
- Press Texture: Press the crumpled foil firmly over a flattened sheet of gray or black clay, transferring the random crinkle texture.
- Drape into Shape: Cut out a circle or organic shape and drape it over a small rounded object to form a freeform bowl.
- Add Ring Cone: Texture a small ring cone using the same foil technique and attach it securely inside the bowl.
- Cure & Highlight: Cure the piece. Lightly dry-brush metallic silver or pewter paint over the high ridges of the crinkled texture.
Tips & Variations
- Tip: Dry-brushing requires almost no paint on your brush—just skim the surface to catch only the highest points.
- Variation: Use dark bronze paint over black clay for an antique forged metal appearance.
Materials Needed
- Black or gray clay
- Aluminum foil
- Metallic silver/pewter paint
- Flat dry-brush
- Clear satin sealer
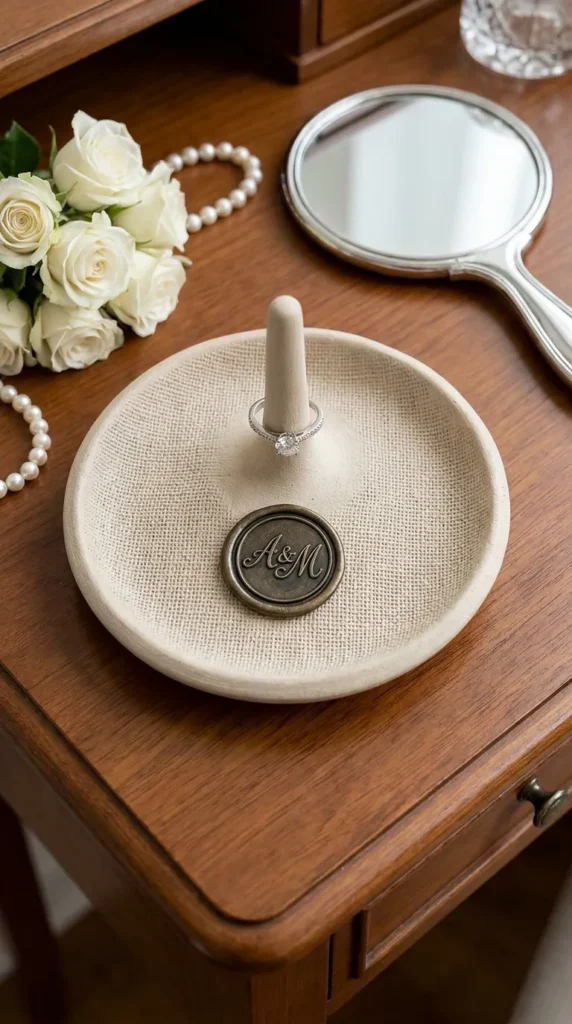
20. Monogrammed Wax Seal Medallion Stand
Idea Overview
A personalized, elegant design featuring a central wax-seal style medallion stamped with a monogram initial, surrounded by a rustic textured rim.
How to Make It
- Build Base Dish: Form a small, 3.5-inch round clay dish with a hand-pinched, rustic rim texture.
- Create Monogram Seal: Roll a small ball of clay, flatten it slightly in the center of the dish, and press a personalized wax seal stamp or initial stamp directly into it.
- Form Ring Post: Add a slender ring post right behind or beside the medallion stamp.
- Cure & Highlight: Cure the piece. Paint the monogram seal with classic brass or wax-red paint, while keeping the surrounding dish in a neutral, matte linen texture.
Tips & Variations
- Tip: Dust the wax seal stamp with a little mica powder before pressing to coat the monogram in instant metallic shine.
- Variation: Make these as personalized bridesmaid gifts by customizing each initial and color theme.
Materials Needed
- Neutral polymer clay
- Wax seal stamp with initial
- Metallic mica powder or acrylic paint
- Pinch bowl tools
- Matte & gloss varnish combo
Material Comparison Matrix
| Project Style | Recommended Clay Type | Primary Texturing Tool | Finish Style | Skill Level |
| Botanical Impression | Air-Dry Clay | Fresh Leaves / Plants | Matte Wash | Beginner |
| Fluted Minimalist | Polymer Clay | Carving Loop Tool | Stone Effect | Intermediate |
| Sand Terrazzo | Polymer Clay | Sand & Clay Chips | Wet Sanded Smooth | Intermediate |
| Woven Rattan | Polymer Clay | Rattan Webbing / Mat | Stain Wash | Beginner |
| Raw Marble | Polymer Clay | Mixed Colors / Stretching | Gold Crackle | Intermediate |
| Stippled Geo | Polymer / Air-Dry | Stippling Brush | Chalk Matte | Beginner |
| Terracotta Ribbed | Terracotta Air-Dry | Modeling Tool / Stone | Burnished | Intermediate |
| Lace Embossed | Air-Dry Clay | Vintage Lace Fabric | Pearl Highlight | Beginner |
| Coastal Shell | Air-Dry Clay | Real Shells & Driftwood | Ocean Glaze | Beginner |
| Hammered Metal | Polymer Clay | Ball Stylus | Metallic Antiqued | Beginner |
| Concrete Prism | Polymer Clay | Tissue Blade & Salt | Industrial Matte | Advanced |
| Celestial Sunburst | Polymer Clay | Needle Tool / Stamps | Gold Wax Accent | Intermediate |
| Chunky Knit | Polymer Clay | Extruded Ropes | Soft Chalky | Advanced |
| River Stone Stack | Air-Dry Clay | Sandpaper / Wire | Earth Tone Matte | Intermediate |
| Minimalist Arch | Polymer Clay | Linen / Fabric | Neutral Two-Tone | Intermediate |
| Wood Grain Set | Air-Dry Clay | Wire Texture Tool | Dark Stain Wash | Beginner |
| Feather Relief | Polymer Clay | Craft Feathers | Iridescent Shimmer | Beginner |
| Moroccan Tile | Polymer Clay | Geometric Stamps | High-Gloss Resin | Advanced |
| Crumpled Foil | Polymer Clay | Aluminum Foil | Metallic Dry-Brush | Beginner |
| Monogram Seal | Polymer Clay | Initial Wax Seal Stamp | Metallic Accent | Beginner |
Master Tips for DIY Clay Ring Holders
- Conditioning is Key: Knead your clay thoroughly before starting. Proper conditioning prevents cracks from forming while drying or baking, ensuring your textures stay sharp.
- Prevent Sticking: When using intricate texture mats, stamps, or natural elements like leaves, dust the surface lightly with cornstarch or water to ensure a clean release without distortion.
- Strong Attachments: When attaching ring cones or pillars to a dish base, always score both surfaces (cross-hatch with a needle tool) and use liquid clay or slip as adhesive.
- Consistent Baking: Follow temperature guidelines strictly when using polymer clay. An inexpensive oven thermometer ensures your clay cures properly without burning or yellowing.
- Sealing for Durability: Since ring holders endure frequent friction from metal jewelry, apply at least two thin coats of high-quality acrylic sealer or UV resin to protect your painted textures.