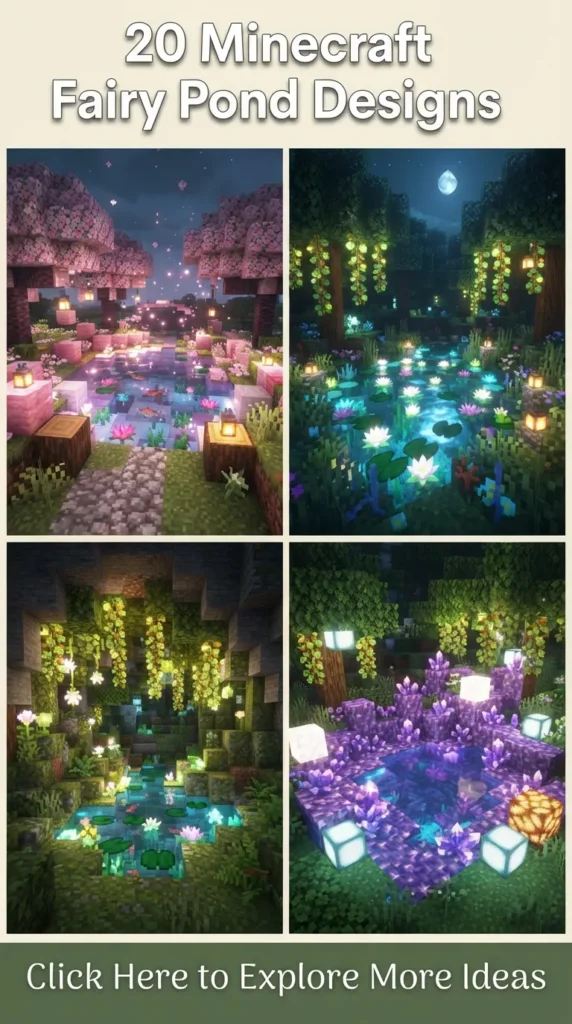
Transforming a standard Minecraft landscape into a mystical, fairy-tailored sanctuary requires more than just dumping a few buckets of water next to grass blocks. Fairy ponds bring organic warmth, soft illumination, and storytelling into your world. Whether you are building a cozy cottagecore village, an intricate fantasy forest, or an enchanted garden path, these 20 unique fairy pond designs will elevate your build aesthetic.


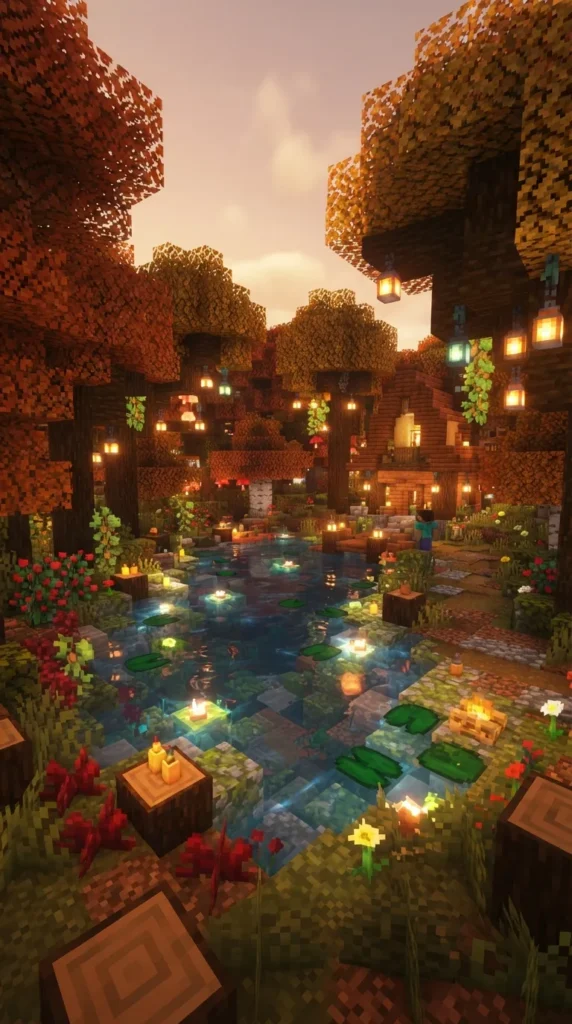

1. Glowing Mushroom Haven Pond
Concept & Inspiration
The Glowing Mushroom Haven is centered around vibrant, oversized fungi that cast a dreamy luminescence onto clear, calm waters. This design creates a cozy, bioluminescent pocket within dense dark oak or spruce biomes, making your pond look like a secret gathering spot for mythical forest spirits.
Step-by-Step Build Guide
- Sculpt the Basin: Dig an asymmetrical 8×6 hole varying between 1 to 3 blocks deep. Smooth the edges using standard Dirt, Mud, and Coarse Dirt.
- Build the Custom Fungi: Construct two or three custom giant mushrooms using Red Mushroom blocks, Brown Mushroom blocks, and Shroomlights embedded underneath the caps for hidden lighting.
- Set the Base: Line the underwater floor with Moss Blocks, Sea Pickles (placed in groups of 3–4 for gentle underwater glow), and Cyan Clay or Prismarine for depth contrast.
- Water Placement: Fill the basin with still water sources. Place Lily Pads and spore blossoms above hanging leaves nearby for falling particles.
- Surrounding Details: Scatter red and brown small mushrooms, Ferns, and Podzol along the banks.
Required Materials
- Red & Brown Mushroom Blocks
- Shroomlights / Glowstone
- Moss Blocks & Moss Carpet
- Coarse Dirt, Mud & Podzol
- Sea Pickles & Lily Pads
- Spore Blossoms & Ferns
Tips & Creative Variations
- Tip: Hide Light Blocks or Froglights under Moss Carpets around the shoreline to avoid visible torches while keeping spawnable areas lit.
- Variation: Swap red mushroom caps for Warped Hyphae and Nether Wart blocks for an ethereal blue-and-teal fairy pond.
What to Avoid
Avoid making the pond perfectly circular or square. Geometric shapes ruin the organic fairy-core aesthetic. Also, refrain from using standard lit Torches on the ground, as harsh flame sources break the natural, soft glow of the mushroom theme.
2. Mystical Cherry Blossom Sanctuary Pond
Concept & Inspiration
Inspired by serene Japanese gardens and fairy folklore, this design utilizes the delicate pink hues of Cherry Blossom trees, soft petals, and subtle stone lanterns. The water reflects drifting petals, creating a peaceful, dreamlike ambiance.
Step-by-Step Build Guide
- Outline the Shoreline: Carve out a curved, natural shape using Smooth Basalt, Andesite, and Moss Blocks.
- Plant the Canopy: Grow or hand-build a weeping Cherry Blossom tree extending over the center of the water.
- Layer the Water Surface: Place Waterlogged Pink Petals along the shore and drop Pink Petals on top of surrounding Grass Blocks.
- Add Stone Lanterns: Stack Andesite Walls, a Redstone Lamp or Froglight, and a Trapdoor top to create small lanterns along the bank.
- Populate the Pond: Add Axolotls (preferably pink or white) and Tropical Fish to give the pond vibrant life.
Required Materials
- Cherry Log, Leaves & Stripped Wood
- Pink Petals & Moss Carpet
- Andesite Walls, Slabs & Smooth Basalt
- Ochre Froglights or Sea Lanterns
- Axolotl Buckets & Water Lilies
Tips & Creative Variations
- Tip: Mix Mangrove Leaves into the Cherry Blossom leaves to add depth and varied color tones to the tree canopy.
- Variation: Add a small wooden arched bridge using Dark Oak Slabs crossing the narrowest point of the pond.
What to Avoid
Do not over-clutter the surface of the water with too many lily pads or petals; leave at least half of the water clear to mirror the bright cherry leaves above. Avoid harsh block contrast like bright yellow birch planks right next to the pale pink wood.
3. Ancient Mossy Ruins Fairy Pond
Concept & Inspiration
This design blends history with magic. Ancient stone pillars, weathered brick arches, and overgrown vines suggest that a forgotten temple once stood here, now reclaimed by nature and enchanted by woodland fairies.
Step-by-Step Build Guide
- Construct Fallen Pillars: Lay down Mossy Stone Bricks, Cracked Stone Bricks, and Chiseled Stone Bricks into broken pillar shapes.
- Excavate the Center: Dig out a deep pond directly in the middle of the collapsed ruin structure.
- Age the Stonework: Intermix Moss Blocks, Vines, and Glow Lichen over the stone structures.
- Deepen the Water Bed: Use Deepslate and Gravel on the bottom of the pond to convey age and erosion.
- Add Magical Accents: Place Candle Clusters on flat stone surfaces underwater and along the shore, keeping them lit.
Required Materials
- Mossy Stone Bricks & Cracked Stone Bricks
- Chiseled Stone Bricks & Andesite
- Vines & Glow Lichen
- Deepslate Tile Slabs & Gravel
- Candles & Flint and Steel
Tips & Creative Variations
- Tip: Place Light Blocks or Glowstone underneath Mossy Stone Slabs at the water’s edge to make the ruins look like they emit ancient ambient energy.
- Variation: Incorporate a small ruined Nether Portal frame covered in leaves and moss at one side of the pond.
What to Avoid
Do not construct symmetrical or perfectly pristine stone structures. The beauty of this design lies in decay—avoid clean, non-mossy stone blocks dominating the build.
4. Crystal Cave & Geode Reflection Pond
Concept & Inspiration
Combining subterranean subterranean magic with surface waters, this design incorporates Amethyst geodes and glowing crystals. The pond sits inside a hollowed-out alcove or cliffside, reflecting purple and blue hues off the water.
Step-by-Step Build Guide
- Carve a Cliffside Grotto: Hollow out a semi-enclosed cave entrance near the base of a mountain or hill.
- Line with Amethyst: Replace standard Stone with Amethyst Blocks, Budding Amethyst, and Amethyst Clusters along the ceiling and underwater floor.
- Build Crystal Formations: Mix Tinted Glass and Calcite into the cave walls to create natural mineral veins.
- Fill the Pool: Fill the grotto floor with crystal-clear water, using Sea Lanterns hidden under Amethyst Clusters for light.
- Add Water Drops: Place Pointed Dripstone on the ceiling to create subtle, calming dripping water sounds.
Required Materials
- Amethyst Blocks & Amethyst Clusters
- Calcite & Smooth Basalt
- Tinted Glass & Sea Lanterns
- Pointed Dripstone
- Water Buckets
Tips & Creative Variations
- Tip: Use Sculk Sensors or Sculk Catalyst blocks deeply buried nearby for ambient, eerie particle effects and blue coloration.
- Variation: Incorporate Prismarine Crystals and Sea Pickles for a cyan-and-purple dual-tone crystal cave.
What to Avoid
Avoid over-illuminating the cave with bright orange light like Torches or Lanterns, as this ruins the cold, magical purple reflection produced by the crystals.
5. Overgrown Willow Tree Canopy Pond
Concept & Inspiration
A solitary, majestic willow tree draped in drooping vines casts long shadows over a quiet forest pool. The drooping canopy creates a secluded, curtained room over the water, offering complete privacy for magical creatures.
Step-by-Step Build Guide
- Build the Willow Trunk: Use Oak or Dark Oak Logs, spiraling upwards and splitting into wide, low branches.
- Drape the Foliage: Attach Oak Leaves and Vines, letting foliage hang all the way down to hover just one block above the water level.
- Carve the Basin: Shape a large pond beneath the full radius of the branches.
- Floor Detailing: Use Clay, Sand, and Gravel on the bottom, with Sea Grass swaying in the currents.
- Lighting: Place Shroomlights or Pearlescent Froglights high inside the leaf canopy so light filters down through the vines.
Required Materials
- Oak Logs & Stripped Oak Logs
- Oak Leaves & Vines
- Shroomlights / Pearlescent Froglights
- Clay, Sand & Gravel
- Seagrass & Lilies
Tips & Creative Variations
- Tip: Intermingle Weeping Vines or Twisting Vines into the leaves to create varied textures hanging down over the pond.
- Variation: Place a tiny wooden rowboat or wooden raft made of Birch Slabs in the middle of the water.
What to Avoid
Avoid making the willow tree trunk too straight or boxy. Tree trunks should flare out at the base with exposed root structures creeping into the water.


6. Enchanted Floating Island Pond
Concept & Inspiration
Defying gravity, this fairy pond sits atop a miniature floating landmass high in the sky or hovering right above a main base. Small waterfalls cascade off the edges, spilling into the world below.
Step-by-Step Build Guide
- Build the Bottom Spike: Construct an inverted cone using Stone, Tuff, Dirt, and Deepslate suspended in mid-air.
- Flatten and Green the Top: Cover the top surface in Grass Blocks, Moss, and Azalea bushes.
- Carve the Pond: Hollow out a small pool in the middle of the island.
- Create Waterfalls: Allow water to overflow from one or two edges, creating long, flowing streams down to a lower basin.
- Decorate the Underside: Hang Glow Berries, Vines, and Pointed Dripstone from the bottom of the floating island.
Required Materials
- Stone, Tuff & Deepslate
- Grass Blocks & Moss Blocks
- Cave Vines with Glow Berries
- Flowering Azalea Leaves
- Water Buckets
Tips & Creative Variations
- Tip: Build smaller, tiny floating rocks around the main island connected by chains or glowing end rod beams.
- Variation: Use Nether roots and Warp wood to create an ethereal, floating void-fairy island.
What to Avoid
Avoid flat, unnatural bottoms on floating islands. The undercarriage must taper off into realistic, jagged rock spikes to look naturally torn from the earth.
7. Sunken Lotus & Water Lily Oasis
Concept & Inspiration
Focused on botanical beauty, this pond design features massive, hand-built custom water lilies and lotus blooms floating across a crystal-clear, sunlit oasis.
Step-by-Step Build Guide
- Dig a Shallow Basin: Create a wide, shallow pond (1-2 blocks deep) lined with bright Yellow Terracotta, Sand, and Light Blue Concrete Powder.
- Craft Custom Lilies: Use Green Wool or Lime Terracotta Slabs to craft large lotus pads (3×3 or 5×5 wide shapes).
- Build Lotus Blossoms: Place Pink Wool, Coral Fans, or Magenta Concrete in the center of the giant pads to form open flowers.
- Add Surface Detail: Scatter vanilla Lily Pads around the larger custom pads.
- Shoreline Greenery: Surround the banks with Flowering Azalea, Sugar Cane, and Bamboo.
Required Materials
- Lime Wool / Lime Terracotta
- Pink, Red & Magenta Wool
- Sea Pickles & Coral Fans
- Sand, Clay & Yellow Terracotta
- Flowering Azalea & Sugar Cane
Tips & Creative Variations
- Tip: Hide Sea Lanterns directly beneath the custom wool flowers so they appear to glow softly from within at night.
- Variation: Change the flower color palette to white and yellow using Quartz Slabs and Gold Blocks for a classic royal lotus look.
What to Avoid
Avoid using materials that burn easily near open flame sources. Stick to safe surrounding lighting like Sea Pickles or hidden underwater lanterns.
8. Deep Forest Bioluminescent Lagoon
Concept & Inspiration
Designed for night-time enchantment, this build relies on extreme contrast between dark, moody blocks and bright, neon bioluminescent underwater foliage.
Step-by-Step Build Guide
- Darken the Environment: Dig a pond in a dense Dark Oak or Old Growth Taiga forest. Line the basin floor with Obsidian, Dark Prismarine, and Blackstone.
- Plant Bioluminescence: Submerge Verdant Froglights, Sculk Catalysts, and glowing Sea Pickles throughout the deep basin.
- Use Coral Shades: Place tube corals and magenta sea fans that stay alive underwater, creating colorful neon coral beds.
- Edge with Spore Blossoms: Place Dark Oak trees overhanging the water and mount Spore Blossoms underneath their leaves for falling green particles.
- Add Floating Lights: Drop glowing Candle clusters onto floating carpet pads or lily pads.
Required Materials
- Dark Prismarine & Blackstone
- Froglights (Verdant/Pearlescent)
- Sea Pickles & Live Corals
- Spore Blossoms
- Dark Oak Leaves & Wood
Tips & Creative Variations
- Tip: Mix Sculk Veins along the edges of the pool; their subtle pulsing blue texture accentuates the magical, bioluminescent vibe.
- Variation: Turn this into an alien-themed pond by substituting Nether Warped Nylium for grass edges.
What to Avoid
Avoid using bright surface lights such as glowstone posts or torches along the shore. The light must originate from within the water to maintain the true bioluminescent feel.
9. Cottagecore Flower Meadow Pond
Concept & Inspiration
A sweet, nostalgic fairy pond tucked into a sprawling wildflower field. This design relies on pastel colors, farmland accents, small fences, and dense floral surrounds.
Step-by-Step Build Guide
- Shape a Curved Bank: Dig a natural, meandering river path or round pond in a Plains biome.
- Mix Shore Line Textures: Blend Dirt Paths, Coarse Dirt, Grass Blocks, and Patchy Moss along the water edge.
- Plant Dense Flowers: Cluster Alliums, Cornflowers, Tulips, Oxeye Daisies, and Sunflowers around the perimeter in natural, gradient patches.
- Fairy Details: Add small custom bee beehives, wooden benches made of Spruce Stairs, and Oak Fences with hanging lanterns.
- Pond Life: Fill the shallow water with Lilies, Seagrass, and yellow/orange Tropical Fish.
Required Materials
- Alliums, Cornflowers & Tulips
- Spruce Stairs, Slabs & Fences
- Dirt Path & Coarse Dirt
- Beehives / Bee Nests
- Water Lilies & Tropical Fish
Tips & Creative Variations
- Tip: Use Hay Bales and Wheelbarrows (Composters with Dark Oak Wheels/Trapdoors) nearby to enhance the rustic farm-fairy mood.
- Variation: Add a small, functioning decorative waterwheel on the edge of the pond.
What to Avoid
Avoid planting flowers in neat rows or alternating single-block patterns. Cluster single flower species together in groups of 3 to 5 for a natural wildflower look.
10. Twilight Firefly Grotto Pond
Concept & Inspiration
Capturing the nostalgic magic of warm summer nights, this grotto relies on subtle light sources and floating particles to simulate hundreds of flickering fireflies dance over calm waters.
Step-by-Step Build Guide
- Enclose the Space: Build steep dirt and stone cliff walls around three sides of a deep pool.
- Plant Hanging Canopy: Cover the top opening with dense Oak Leaves and hanging Cave Vines with Glow Berries.
- Simulate Fireflies: Use End Rods, Candle clusters placed on invisible/glass blocks, and Shroomlights hidden in leaves to create tiny glowing specks.
- Water Surface Setup: Keep the water calm, using dark floor blocks like Deepslate Tiles to maximize sky and light reflections.
- Grotto Floor: Add Moss Carpets, Small Dripleafs, and Big Dripleafs along the damp grotto floor.
Required Materials
- Cave Vines & Glow Berries
- End Rods & Yellow Candles
- Oak Leaves & Deepslate Tiles
- Moss Carpet & Dripleaf
- Light Blocks / Hidden Glowstone
Tips & Creative Variations
- Tip: If playing in creative mode or using commands, spawn Yellow Spores or use low-intensity Light Blocks (level 4-7) for ultra-realistic soft glows.
- Variation: Add a tiny stone stepping-stone path cutting right through the middle of the grotto pool.
What to Avoid
Avoid placing full-brightness block lights out in the open. Fireflies are subtle; bright open lanterns will wash out the illusion of tiny glowing insects.

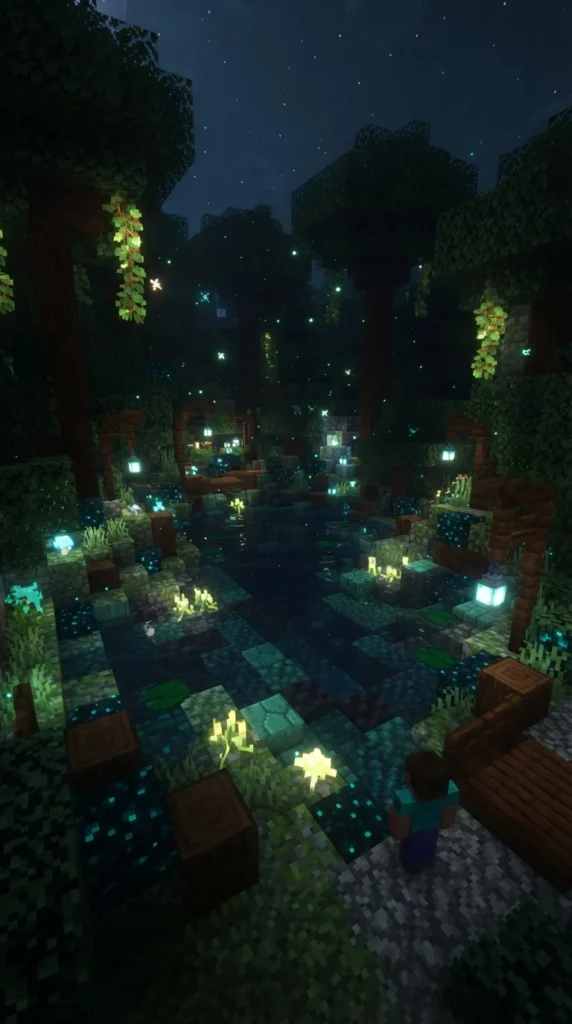


11. Rustic Stone Archway Waterfall Pond
Concept & Inspiration
Featuring a towering, natural stone archway through which a gentle waterfall plunges into a pristine fairy basin below, this design combines majesty with serene natural beauty.
Step-by-Step Build Guide
- Construct the Arch: Use Cobblestone, Mossy Cobblestone, Andesite, and Tuff to build a tall, sweeping natural arch over your planned pond site.
- Set the Water Source: Place water source blocks high up inside the archway apex, allowing it to spill smoothly into the center of the floor.
- Sculpt the Plunge Pool: Dig the splash area deeper than the rest of the pond (3-4 blocks deep) to reflect natural erosion.
- Add Splash Effects: Place White Stained Glass Panes or Sea Foam accents around the base where the waterfall meets the pool.
- Vegetation Overlay: Cover the archway in Vines, Glow Lichen, and Hanging Roots.
Required Materials
- Cobblestone & Mossy Cobblestone
- Andesite, Tuff & Gravel
- Vines & Hanging Roots
- White Stained Glass Panes
- Water Buckets
Tips & Creative Variations
- Tip: Place a hidden cave passage behind the waterfall curtain containing a secret enchantment room or chest!
- Variation: Turn the stone arch into a petrified, ancient tree root archway using Stripped Spruce wood.
What to Avoid
Avoid making the stone arch symmetrical. Real rock formations formed by water erosion are irregular, rough, and asymmetrical.
12. Starry Night Celestial Reflection Pond
Concept & Inspiration
A cosmic-themed fairy pond designed to mirror the vastness of the night sky. Deep dark hues, shimmering glass, and starry elements make this pool feel directly connected to the cosmos.
Step-by-Step Build Guide
- Construct a Void Basin: Dig out a 3-block deep pool. Line the bottom layer entirely with Black Concrete.
- Create the Reflection Layer: Cover the Black Concrete with End Rods, Sea Lanterns, and Amethyst Clusters scattered sparingly.
- Add Glass Layers: Place a layer of Black Stained Glass, then Blue Stained Glass, and fill the top layer with Water.
- Decorate the Perimeter: Use Polished Basalt, End Stone Bricks, and Blue Orchids around the border.
- Celestial Pillars: Build tiny quartz or purple glass obelisks around the pool edges.
Required Materials
- Black Concrete & Black Stained Glass
- Blue Stained Glass & End Rods
- Amethyst Clusters & Sea Lanterns
- Polished Basalt & Blue Orchids
- Smooth Quartz Slabs
Tips & Creative Variations
- Tip: Stacking colored glass with air gaps creates a stunning depth-parallax effect that makes the pond look infinitely deep!
- Variation: Place a floating crescent moon sculpture made of Smooth Quartz Slabs right over the center of the water.
What to Avoid
Do not use warm-toned blocks like Oak Wood, Sand, or Granite near this pool, as they disrupt the deep space, cool-toned celestial aesthetic.
13. Fairy Ring & Toadstool Spring
Concept & Inspiration
Rooted in classic European folklore, this design surrounds a bubbling freshwater spring with a sacred “fairy ring” of wild red toadstools and delicate forest flowers.
Step-by-Step Build Guide
- Dig a Small Circular Spring: Keep this pond intimate—around 4×4 or 5×5 blocks across.
- Center Feature: Place a bubbling water source in the center using Soul Sand underneath to create floating bubbles.
- Build the Toadstool Ring: Construct a circular ring of small custom mushrooms using Red Concrete, White Wool, and Red Mushroom Blocks surrounding the spring.
- Soft Border Details: Surround the ring with Moss Blocks, Ferns, and Lily of the Valley.
- Add Particle Effects: Hide a Spore Blossom high up above the spring to drop magical dust continuously over the fairy ring.
Required Materials
- Soul Sand (for bubble column)
- Red Mushroom Blocks & Red Concrete
- White Wool & Quartz Slabs
- Moss Blocks & Lily of the Valley
- Spore Blossom
Tips & Creative Variations
- Tip: Mix Brown Mushrooms and Red Mushrooms in alternating patterns for a wilder, less uniform fairy circle.
- Variation: Replace red toadstools with Warped Fungus and Nether Sprouts for an otherworldly cyan fairy ring.
What to Avoid
Do not break the circular form of the mushroom ring completely, but avoid making it a harsh pixel square. Soften the diagonal corners using slabs and carpets.
14. Hidden Woodland Grotto Pond
Concept & Inspiration
Tucked deep inside a hillside or beneath the roots of a massive forest canopy, this hidden grotto offers a secluded, tranquil fairy sanctuary protected from the elements.
Step-by-Step Build Guide
- Carve an Earthy Alcove: Hollow out a hillside using Mud, Rooted Dirt, and Coarse Dirt for realistic, damp soil walls.
- Expose Root Systems: Use Mangrove Roots and Hanging Roots along the ceiling, letting them reach down into the water.
- Fill the Floor: Fill the floor with a shallow water pool, using Clay and Gravel for the bed.
- Lighting: Illuminate using Glow Berries hanging from ceiling roots and Sea Pickles placed on submerged clay blocks.
- Furnish the Grotto: Place a small Moss Carpet seating spot with books and candles along the edge of the water.
Required Materials
- Rooted Dirt, Mud & Coarse Dirt
- Mangrove Roots & Hanging Roots
- Clay & Gravel
- Glow Berries & Sea Pickles
- Bookshelf, Candles & Moss Carpet
Tips & Creative Variations
- Tip: Add a small trickle of water coming directly out of the dirt ceiling wall using a single water source block behind a stair block.
- Variation: Turn the grotto into a fairy enchanting area by placing an Enchanting Table on a stone slab in the center of the pool.
What to Avoid
Avoid using overly refined building materials like polished stone bricks or smooth quartz. Keep the materials raw, organic, and muddy.
15. Bamboo & Azalea Zen Fairy Pond
Concept & Inspiration
A harmonious fusion of peaceful Asian garden design and soft fairy aesthetics. Fresh green bamboo shoots, blooming pink azaleas, and smooth river rocks border a tranquil reflecting pond.
Step-by-Step Build Guide
- Create Organic Shorelines: Use Smooth Basalt, Andesite, and Gravel to build a smooth, rocky edge.
- Plant Bamboo Groves: Plant Bamboo in dense clusters at varying heights along one side of the pond (use String on top to stop growth).
- Incorporate Flowering Azaleas: Surround the remaining edges with Flowering Azalea bushes and Moss Blocks.
- Step-Stone Paths: Place Flat Andesite Slabs stepping through the shallow parts of the water.
- Add Water Features: Build a tiny bamboo water fountain (Shishi-odoshi design) using Oak Fences and Waterlogged Traps.
Required Materials
- Bamboo & String (to cap height)
- Flowering Azalea & Azalea Leaves
- Smooth Basalt, Andesite & Gravel
- Moss Blocks & Moss Carpet
- Oak Fences & Trapdoors
Tips & Creative Variations
- Tip: Populate the pond exclusively with orange and black Tropical Fish to mimic decorative Koi fish!
- Variation: Add small red stained-glass lanterns or candles on top of fence posts along the path.
What to Avoid
Do not allow the Bamboo to grow untamed to its maximum height; tall bamboo will block viewlines and overwhelm the delicate scale of the fairy pond.


16. Magical Prismarine Shimmer Pond
Concept & Inspiration
Infused with oceanic magic, this pond utilizes shimmering ocean monument materials to produce an iridescent, glowing pool that seems to pulsate with energy.
Step-by-Step Build Guide
- Excavate the Basin: Dig a 3-block deep basin in any magical forest setting.
- Line with Prismarine: Pattern the floor and walls using Prismarine, Prismarine Bricks, and Dark Prismarine.
- Add Light Pulse Core: Embed Sea Lanterns into the floor, covering them with Cyan and Light Blue Stained Glass.
- Bordering Accents: Use Weathered Cut Copper Slabs and Prismarine Stairs to frame the water’s edge.
- Add Water Effects: Place Conduit in the center of the deep pool for ambient oceanic sound effects and light particles.
Required Materials
- Prismarine, Prismarine Bricks & Dark Prismarine
- Sea Lanterns & Conduit
- Cyan & Light Blue Stained Glass
- Weathered Cut Copper Slabs
- Water Buckets
Tips & Creative Variations
- Tip: Activating the underwater Conduit will grant permanent Night Vision underwater while giving off magical particle swirls!
- Variation: Blend Prismarine with Oxidized Copper blocks for a rustic, ancient sea-magic look.
What to Avoid
Avoid pairing Prismarine with warm red or yellow blocks (like Acacia wood or Gold), as this ruins the cool, mysterious sea-green aesthetic.
17. Whispering Reed & Marsh Fairy Pond
Concept & Inspiration
Reminiscent of cozy fantasy wetlands, this marshy fairy pond is filled with tall grasses, whispering cattails, and murky, mysterious shallow waters ideal for amphibious magical life.
Step-by-Step Build Guide
- Design a Shallow Marsh: Excavate a sprawling, shallow water bed (mostly 1 block deep).
- Mud & Clay Floor: Line the floor with Mud Blocks, Muddy Mangrove Roots, and Clay.
- Build Cattails & Reeds: Use Brown Candles on top of Sugar Cane or Dried Kelp blocks to craft realistic marsh cattails.
- Plant Wetland Grass: Scatter Sea Pickles, Tall Grass, Ferns, and Big Dripleaf plants densely throughout the water and shoreline.
- Wildlife & Atmosphere: Add Frogs (green, brown, or white) and place Slime Blocks hidden nearby for organic wetland sounds.
Required Materials
- Mud & Muddy Mangrove Roots
- Clay & Moss Blocks
- Sugar Cane & Brown Candles
- Big Dripleaf & Ferns
- Frog Spawn / Frog Buckets
Tips & Creative Variations
- Tip: Place Light Gray Stained Glass or Cobwebs low over the water to mimic early morning marsh mist!
- Variation: Build a raised wooden plank boardwalk (using Mangrove or Spruce Slabs) winding over the marsh.
What to Avoid
Do not make the water deep or crystal clear. Marsh ponds should feel shallow, dense with plants, and slightly overgrown.
18. Emerald Forest Waterfall Grotto
Concept & Inspiration
A luxurious, lush green haven dominated by vibrant emerald tones, rich moss layers, cascading waterfalls, and glowing green flora that make the entire area look enchanted.
Step-by-Step Build Guide
- Build a Terraced Cliff: Construct a multi-tiered rock face using Tuff, Mossy Stone Bricks, and Moss Blocks.
- Cascading Waterfalls: Place water sources on different tiers so water cascades down multiple levels into a main lower pool.
- Incorporate Emerald Block Highlights: Embed Emerald Ore or Deepslate Emerald Ore into the cliff face as natural glowing magic veins.
- Verdant Vegetation: Drapes Vines, Cave Vines, Azalea Leaves, and Moss Carpets across every rock surface.
- Glinting Lights: Hide Ochre and Verdant Froglights behind leafy curtains to bathe the waterfall in a soft green glow.
Required Materials
- Moss Blocks & Mossy Stone Bricks
- Emerald Ore / Deepslate Emerald Ore
- Verdant Froglights & Glow Lichen
- Tuff & Andesite
- Vines & Cave Vines
Tips & Creative Variations
- Tip: Use Bone Meal on submerged Moss Blocks to instantly grow lush sea vegetation and short grass along the aquatic steps.
- Variation: Add small emerald crystal spikes using Lime Stained Glass Panes emerging from the water.
What to Avoid
Avoid leaving bare, dry stone blocks exposed. Every surface in an Emerald Grotto should be covered in moss, lichen, or water spray.
19. Fantasy Sunken Shrine Pond
Concept & Inspiration
Centered around a mysterious ancient altar or small shrine submerged in a quiet pool, this build feels loaded with ancient lore and sacred fairy magic.
Step-by-Step Build Guide
- Build the Center Shrine: In the middle of your site, construct a small 3×3 altar using Quartz, Sea Lanterns, and Chiseled Stone Bricks.
- Add Sacred Artifacts: Place a Dragon Egg, Conduit, or Light Block on top of the altar pedestal.
- Fill with Deep Water: Dig the pond around the shrine 3 to 4 blocks deep so the shrine appears partially submerged.
- Add Submerged Stairs: Build stone stepping steps leading underwater down toward the central shrine entrance.
- Magical Surroundings: Place Glow Lichen, Sea Pickles, and Purple Candles on stone pillars guarding the water perimeter.
Required Materials
- Smooth Quartz & Chiseled Stone Bricks
- Sea Lanterns & Candles
- Deepslate & Cobblestone Slabs
- Glow Lichen & Sea Pickles
- Water Buckets
Tips & Creative Variations
- Tip: Place Soul Sand underneath surrounding water channels to create rising air bubbles that frame the central shrine!
- Variation: Use Dark Prismarine and Sculk to make a dark/corrupted fairy shrine pond instead of a sacred light shrine.
What to Avoid
Avoid placing messy, unstructured dirt or chaos right around the altar; the shrine itself should look deliberate, balanced, and revered.
20. Enchanted Autumnal Amber Pond
Concept & Inspiration
Capturing the warm, cozy magical energy of endless autumn, this design uses golden, amber, and orange hues reflected in warm, glowing forest waters.
Step-by-Step Build Guide
- Set the Warm Palette: Carve out a wide pond in a Dark Oak or Birch forest. Line edges with Coarse Dirt, Podzol, and Red Sand.
- Build Autumn Trees: Craft custom canopy trees using Acacia Leaves, Dark Oak Leaves, Orange Wool, and Red Mushroom Blocks.
- Warm Floor Lighting: Submerge Pearlescent/Ochre Froglights and Shroomlights under Red and Orange Stained Glass on the pond floor.
- Scatter Fallen Leaves: Place Red Petals, Orange Carpets, and Acacia Leaves along the shore and floating on top of water blocks.
- Warm Candles & Accents: Cluster Orange and Yellow Candles on Birch Slabs around the pond edge for cozy light flickering.
Required Materials
- Podzol, Coarse Dirt & Red Sand
- Acacia Leaves & Orange Wool
- Shroomlights & Ochre Froglights
- Orange & Red Stained Glass
- Yellow & Orange Candles
Tips & Creative Variations
- Tip: Hide Campfires underneath Hay Bales near the shore; smoke rising through leaves adds a cozy autumn bonfire ambiance!
- Variation: Mix in Nether Wart blocks into the leaves for deep crimson autumn colors.
What to Avoid
Avoid using cool blue, teal, or green lighting blocks (like Sea Lanterns or Cyan Froglights), as they contradict the cozy amber warmth of this theme.